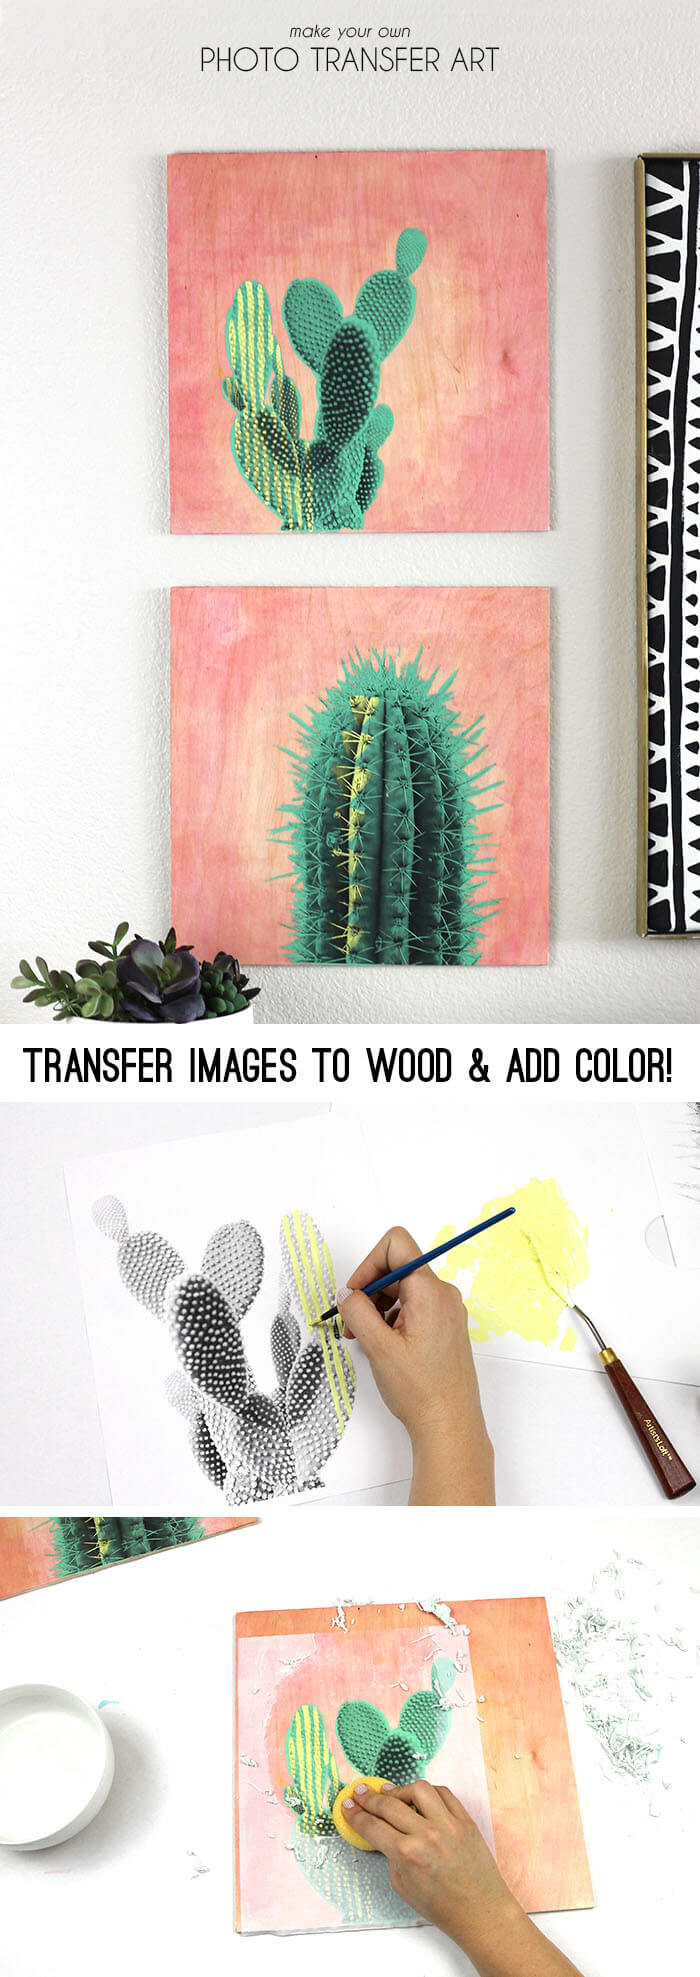
Transfer your favorite photos to wood and add fun color! These fun pieces of art are easy to make with just a few special product. A big thanks to DecoArt for sponsoring this post! This post includes affiliate links for your convenience. See my full disclosure policy here. 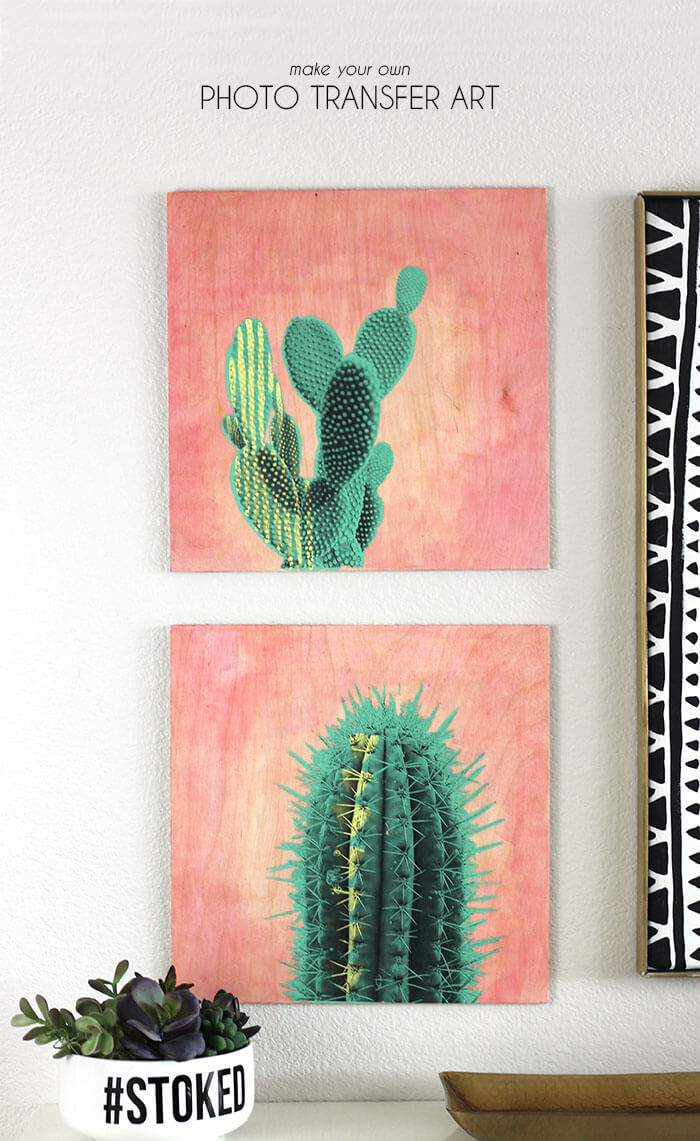
Have you seen #plantsonpink on instagram? Ah! I just love it. What is it about plants + pink backgrounds that is just so great? I wanted to try to recreate that look in this art project. Photo transfer is such a fun technique, and I added a little twist with some color and pattern.
This project may look complicated, but it’s really easy to make with just a few special products. DecoArt has a new mixed media line that includes everything you need to make super cool mixed media art pieces – fluid acrylics, misters, gessoes, mediums, varnishes, and more. Guys. This stuff is fun. You can find all these fun products at Joann, online or in stores.
Want to learn how to make your own #plantsonpink photo transfer piece? Let’s do this!
Supplies:
- 12″ x 12″ piece of plywood
- DecoArt Media Matte Medium
- DecoArt Media Tinting Base
- DecoArt Media Ultra Matte Varnish
- DecoArt Media Fluid Acrylics in Naphthol Red Light, Primary Magenta, Quinacridone Magenta, Hansa Yellow Light, and Cobalt Turquoise Hue
- Images printed on regular copy paper
- Brushes
- Brayer
- Sponge
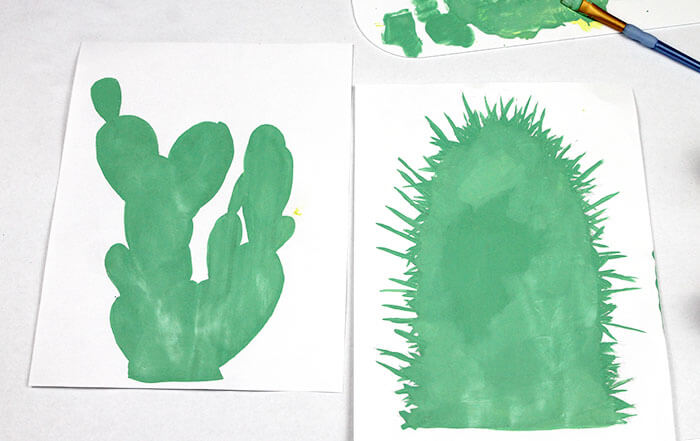
The very first thing you need to do is pick the image you want to transfer to your piece. I found some cacti images online, and then removed the backgrounds and made them black and white (using the maximum white setting) in photoshop. Finally, I printed them out as big as I could on regular copy paper.
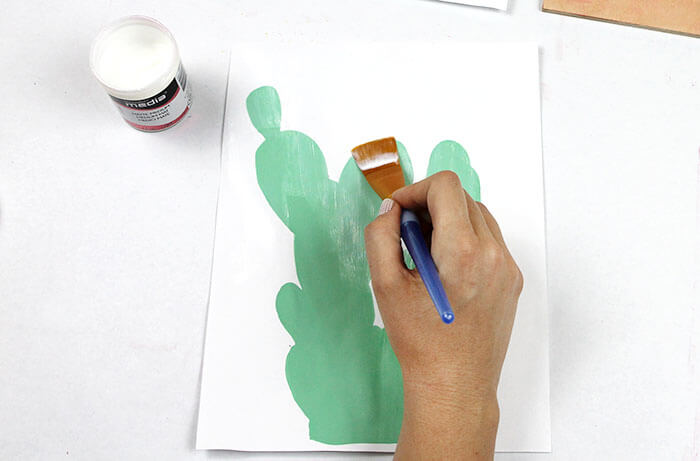
The next thing to do is paint cover the cactus image using opaque paint. If you look at the bottle of each of the fluid acrylics, you will see that they have different levels of opacity – transparent, semi-transparent, or opaque.
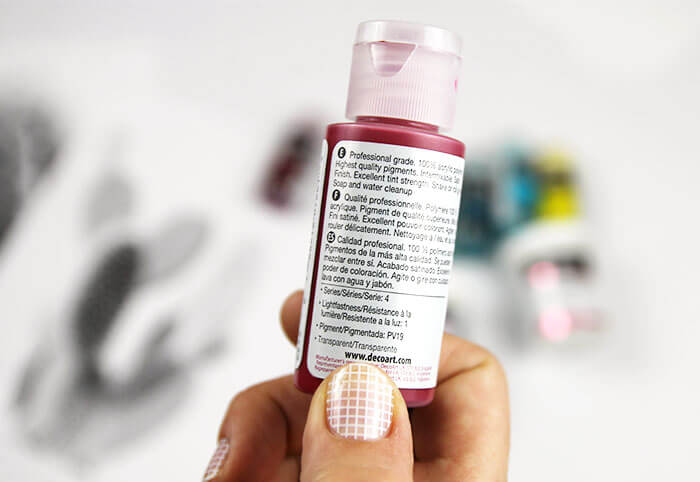
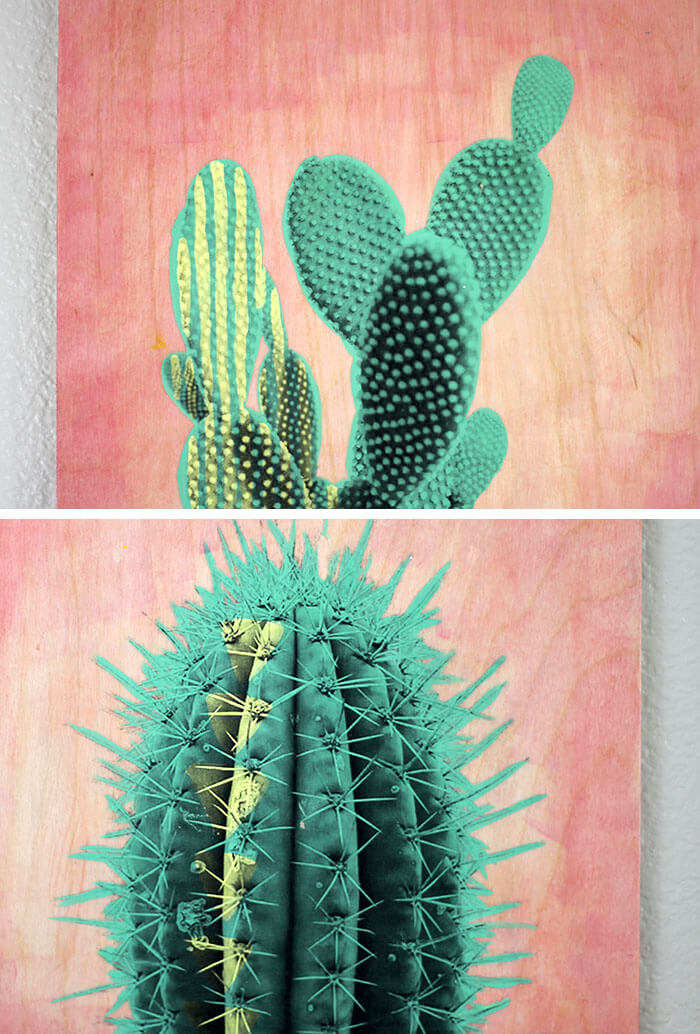
The good news is that even if you want an opaque look and you have a transparent color, these acrylics are highly pigmented, which means they mix well with the bases and mediums to give you whatever look you are going for without too much dilution. To get an opaque yellow color, I just mixed a bit of my Hansa Yellow Light fluid acrylic with the white tinting base, which is opaque. Easy Peasy. Then I painted some designs onto the cacti – stripes on one and a column of triangles on the other. When the image is transferred, these designs will show through the white and gray parts of the image. Fun, right?
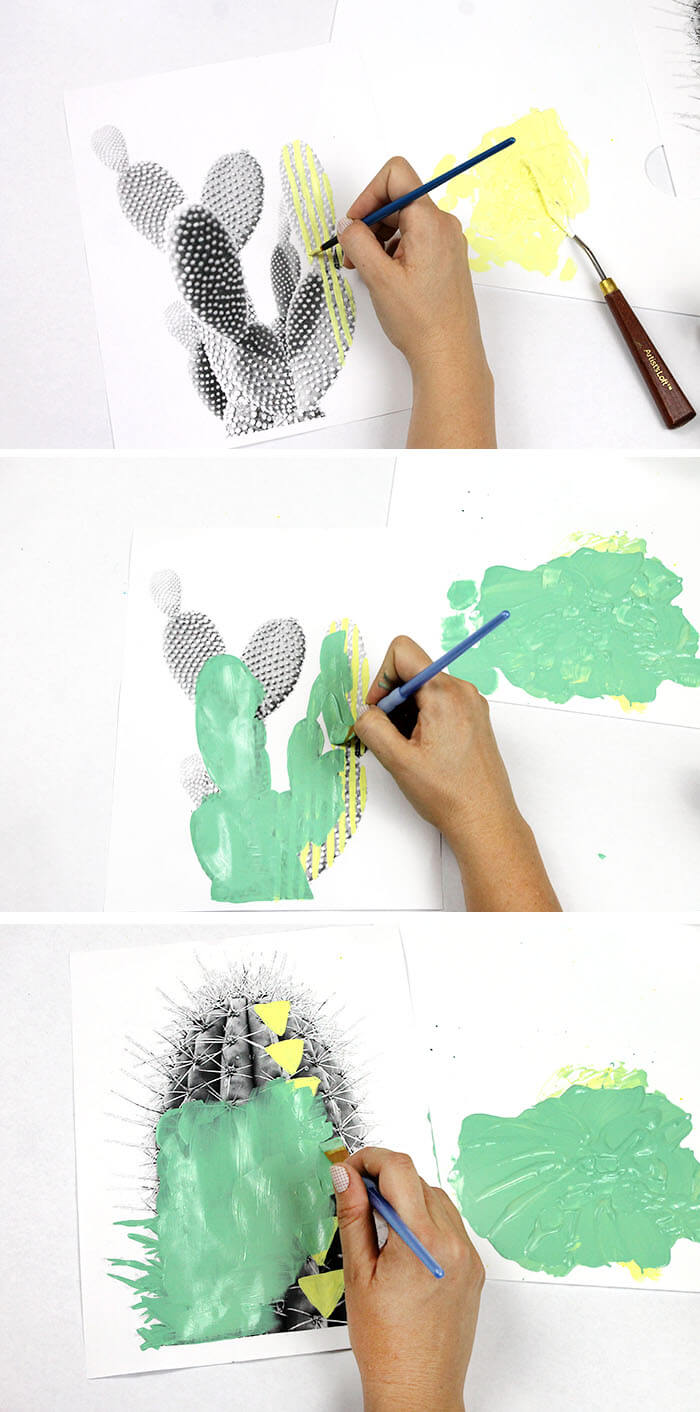
When the yellow designs had dried, I mixed some Cobalt Turquoise Hue into my yellow paint to create a pretty green and used that to paint over the rest of the cacti. Now I am wishing I had not painted over the spines of the barrel cactus, but oh well. Live and learn, right? You will need to do two or three coats to get full coverage.
Once that has completely dried, cover the paper with a thin layer of the matte medium. (Next time around I will trim the paper closer to the image. Do as I say, not as I do, okay?)
While that dries, it’s time to prep our wooden canvas. I wanted to apply a transparent wash of pink color to the wood so the wood grain would still shine through. The matte medium is perfect for mixing with the fluid acrylics to make them more transparent. Remember, the fluid acrylics are super pigmented, so just a drop goes a long way. I mixed just one drop of Naphthol Red Light into some matte medium and gave each board one coat.

Then I added a bit more color to the outsides of the board with a mix of matte medium and just a drop of Primary Magenta fluid acrylic.
When both the wooden canvases and printed images are dry, it’s time to do the photo transfer! Start by covering the board with another thin layer of matte medium. While it is still wet, apply the print face down onto the matte medium. Use your fingers to press the paper down, and then use a brayer to firmly lay it down and remove any bubbles.

Now your canvases need to sit overnight. The next morning, it’s magic time! Time to remove that paper and reveal your amazing photo transfer!
And how do we make this magic happen? All you need is a sponge and some water. Start by wetting the paper and allowing the water to soak into the paper for about 30 seconds. Then just use the sponge to gently rub the paper off.
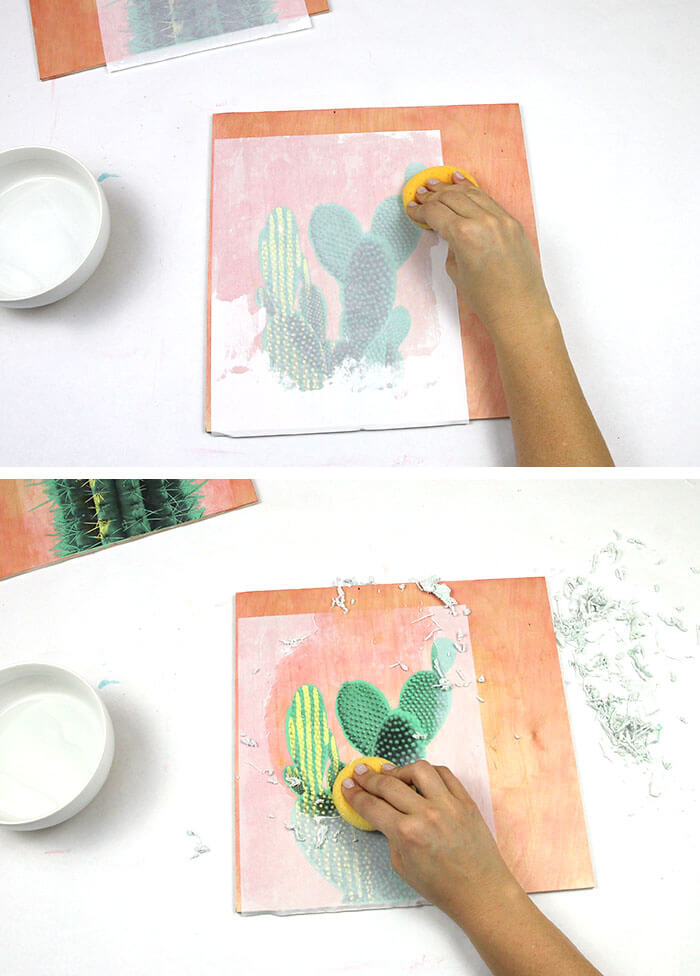
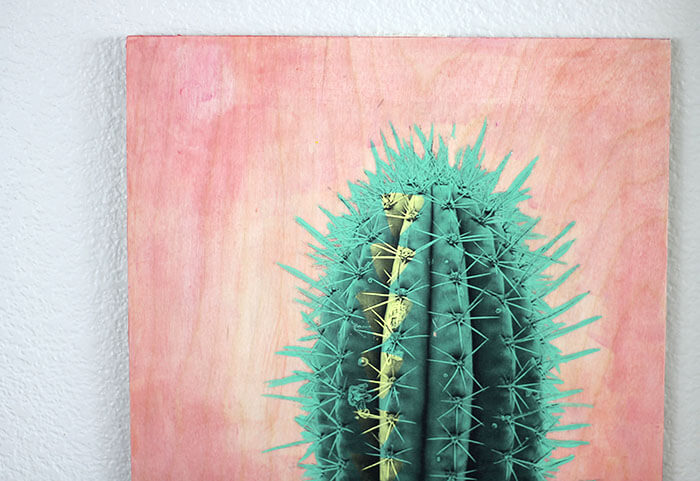
Ta-Daaaaaa! So cool, right? It will take a bit of time to remove all of the paper. When it dries you will be able to see better where any paper remains. Just go ahead and wet the paper and keep rubbing it off.
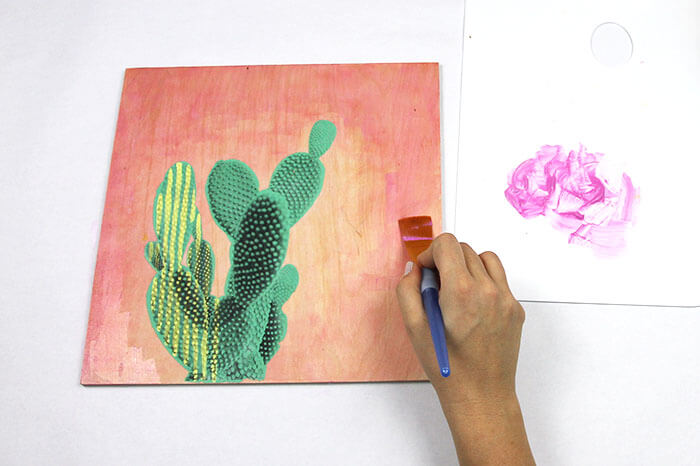
When I got all of the paper off, I decided to add a bit more color around the outside of my canvases. This time I used just a drop of the Quinacridone Magenta mixed with matte medium.
When that final coat has dried, it’s time to seal the whole thing with Ultra-Matte Varnish – this stuff is super awesome, guys. It has zero shine to it. None. Just give the entire canvas one thin layer and it will be all sealed and finished.

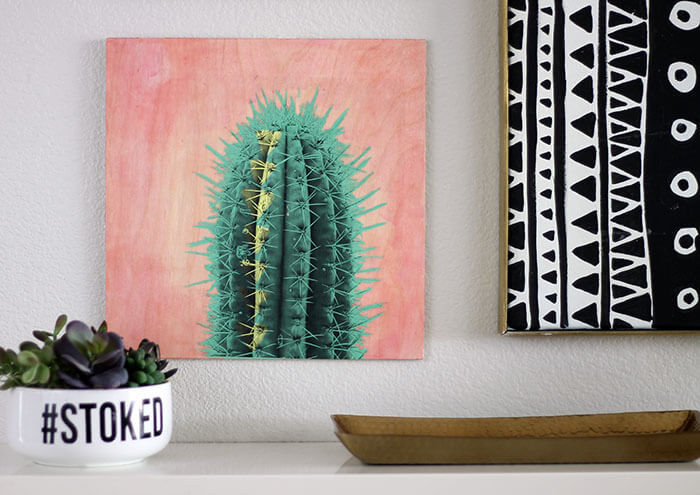
All done and ready to display!

You can use picture hanging strips to hang them on the wall or just prop them up on a picture ledge.
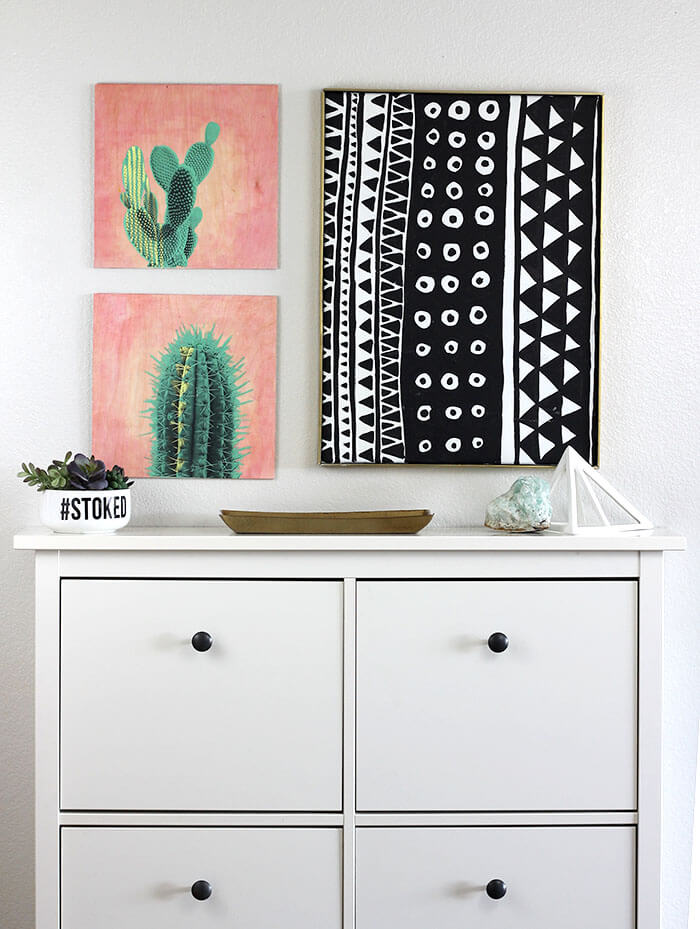 (Check out my Black and White Geometric Art and my #Stoked Succulent Planter too!)
This was such a fun art project! I really enjoyed working with these cool products – there are just SO many possibilities!
What do you think? Want to make your own photo transfer piece? What type of image would you use?
As always, if you make your own project, please share it with me! I just love seeing what you all come up with. You can share your projects to my facebook page or tag me on instagram.
Happy Making!

Looking for more creative inspiration? Check out these posts:
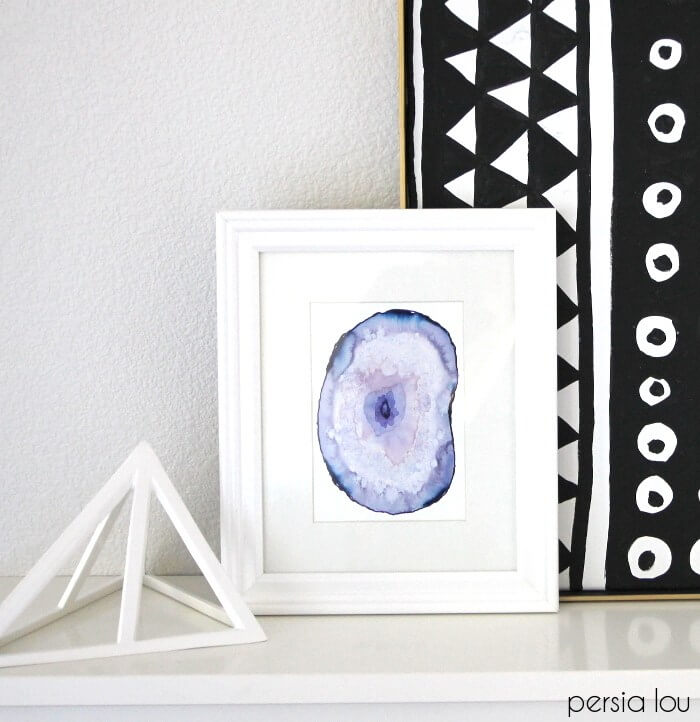
How to Paint Watercolor Agate Slices

Simple DIY Birch Tree Wall Art


Comments + Project Love
Claire says
Brilliant! Love the colours – looks sort of surreal. I did a DIY – Coffee Painting on plywood recently, but I didn’t seal it – Do you think the Matte Varnish you used would be suitable (or smudge it!)? (I’d maybe have to find a similar brand – I don’t know if we have the same one in Australia!) adorablest.com
persialou says
Hi Claire! I’m not sure if it would work on the Coffee Painting. I think it should work, but I would worry a bit about smearing. I would probably try it on a scrap piece of wood first before I applied it to the finished painting. I need to come by and check that out! Sounds awesome!
Megan says
Love this idea. What was the sizing of the printed image?? I want to make sure its pretty similarly proportionate to the one you did on the 12×12 plywood.
Megan says
Oh also, do the print outs need to be laser jet?
Alexis says
Laser or inkjet images will work, but you may get a crisper image with a laser printer.
Alexis says
Hi Megan! I printed the images on 8.5″ x 11″ paper, and as you can see in the images, I scaled them to fill most of the page. Good luck. 🙂
Amy says
ALEXIS! I think you are trying to honestly give me a heart attack. What the heck, girl…. first this DIY is blowing my mind. And then, the nails. It’s like a double whamey of amazing.
Brittany Bly says
I’ve been making gel / matte medium transfers for a decade. I had no idea that you could add pigment to the paper before you transfer! Very exciting – very cool diy.
Kelly says
These turned out awesome sauce! Love them, Alexis!! -xo
persialou says
Thanks so much, Kelly!
Christine says
Amazingly Fabulously cool!!!! WOW!
persialou says
Thanks, Christine!
Joi@RR says
Wonderful tutorial. Lovely pieces. Thanks bunches for sharing. j.
persialou says
Thank you!
Brynne@TheGatheredHome says
Alexis, these are AMAZING!!!! Jaw droppingly incredible!
persialou says
Thank you, Brynne! You are so sweet!
Rachel | The Crafted Life says
Ahhh-mazing! Pinned!
persialou says
Thank you SO much, Rachel!
Diana says
How does one think of such cool ideas?!! Love this so much!!! When I’m not so tired I will read through this again for the tutorial!! So neat!
Irene - One O says
This is AMAZING!!! Great great idea! Also love how they complement the tribal art
persialou says
Thank you!
Aniko says
I have to try this! Amazing work Alexis!!
persialou says
Thanks, Aniko!
Katie says
Love love love this! Thanks for sharing! Do you know if tbis would work on any other surfaces? Like canvas, mat board or thick paper?
persialou says
Hi Katie! Yes, it will work on other surfaces. I would say it would definitely work on canvas. I think it would probably work with mat board, but I’m leaning towards it not working great on thick paper. The reason I’m not sure about the mat board and paper is that since you use water to remove the paper that you printed your image on, I would worry about the paper warping or tearing. Good luck!
kim says
This is so awesome! I can’t wait to play and try it out. So many possibilities! Do you think it matters if it is an inkjet print or should I get a laser printed one?
Have a fabulous day!
~kiim
persialou says
Hi Kim! You can do it with either, but I think the quality of transfer might be better with the laser print. My images were printed on a laser printer, and I did not try it with an inkjet. Maybe try it with the inkjet and if you don’t like the way it turns out go and get a copy made. Good luck! If you try the inkjet, I’d love if you came back and let us know how it turns out!
Bec says
So excited to try this on my laser cut wood and acrylic. Thank-you for sharing 🙂
gaone says
Just came across your blog looking for DIY using modporge. Then i saw this tutorial and thought would be great to inspire my little people to create, rather than asking dad to print all the time. Great step by step tutorial and hopeful i will trigger creative juices flowing with them. Hard sometimes to get them of the couch. Lol
Sally says
I am inspired going to try with my after school kids
Loved it
abigail says
I love these! Just discovered your website:) Thank you for all the fun projects!
Alexis says
So glad you found me! Thanks so much for stopping by, Abigail!
Dyan says
Amazing! I LOVE cactus and as soon as I saw the picture, I had to visit your blog. First I thought that I would need too much artistic ability to create these images, but with your step-by-step tutorial, I think I could do this. Thanks so much.
Alexis says
You are so welcome! And, yes, you can totally do it! Thanks so much for stopping by.
Ninakolina says
Thank you so much for this tutorial. I made a portrait of my sister following your steps and it turned out great??
Alexis says
That sounds wonderful! Love that idea! Thanks so much for stopping by and leaving me a comment. Always makes my day. 🙂
Charlotte says
This looks amazing, can’t wait to try it with the ladies I look after. Can the same technique be applied to transfers onto fabric?
Ric says
Is it to late? Is there someone that can take 3 photographs and put them on wood like this?
Anab says
Can we use a canvas instead of plywood?
Anab says
Can we do this transfers technique on a canvas or on ceramic(coffee mug)?
Alexis says
Hmmm… This is a good question! I have not tried in on ceramics. I would worry about surfaces that need to be washed. But I would probably try finishing it with decoupage or some other varnish on a ceramic surface.