These DIY Leather Tassel Keychains have a unique waterfall or bell shape and are a lot of fun to make. They are also a great gift and a cute accent for your favorite bag or clutch. This post may contain affiliate links. See my full disclosure policy here.
Recently when I was browsing Target, as I am wont to do, I spotted an adorable clutch with a fun tassel attached to it. The tassel had a unique shape that I hadn’t seen before, so of course, I investigated and tried to figure out how to recreate it at home.

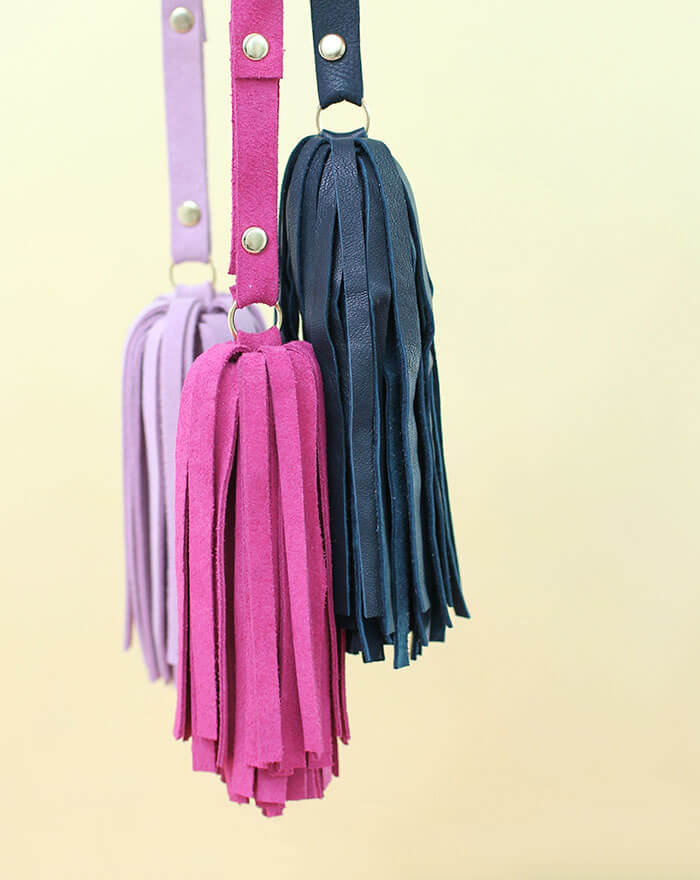
These tassels are a little more floppy and rounded than a regular tassel. When I was trying to come up with a name for them that described their shape, the best I could come up with was “Cousin It” Tassels. Ha! I wasn’t sure that was the best name for a tassel, so I asked for your input on my facebook page, and there were lots of good suggestions. Thank you! I decided to go with Waterfall Tassels, which is a slightly prettier name than Cousin It Tassels. (Although we can call them Cousin It Tassels too, if you prefer.)

I just super love them, and they are really easy to make. I’ve done a quick video to walk you through all of the steps. If you have been wanting to try out some leather crafting, this is a great little project to get you started.
DIY Leather Tassel Supplies:
- Leather or Suede
- Cutting Mat and Rotary Cutter
- Leather Punch
- Rivets and Rivet Setter
- Fabric Glue
- Large Gold Jump Rings
- Gold Keychains or Key Rings
- 1″ Masking Tape
Check out the video below to learn how to make your own DIY Leather Tassel. And don’t forget to subscribe to my Youtube Channel! More crafty videos are on their way.
To change up the size of your DIY Leather Tassel, you can adjust the size of the leather piece you start with. For a shorter tassel, you can make the width of your beginning rectangle smaller (the lavendar and green tassels pictured are shorter), you just have to make sure you keep the right side one inch (or the width of your tape) longer than the left side when cutting your fringe. For example, if your rectangle was 8 inches long, then you would place your tape over the fourth inch, leaving three inches on the left and four on the right. This ensures that your tassel ends all line up nicely.


And if you are wondering about that cute crocheted clutch that’s accompanying my pretty lavender tassel, Yes, I made it, and Yes, instructions are coming. 🙂


That’s it for now. Happy Making!


Comments + Project Love
Amy | Delineate Your Dwelling says
So so fun! I love the movement of these!
Nikolett says
Amazing! I love this light pink bag from the picture, do you have a tutorial for that too? x
Alexis says
Yes! You can check that out here: https://persialou.com/2016/05/chain-edge-raffia-crochet-clutch-pattern.html