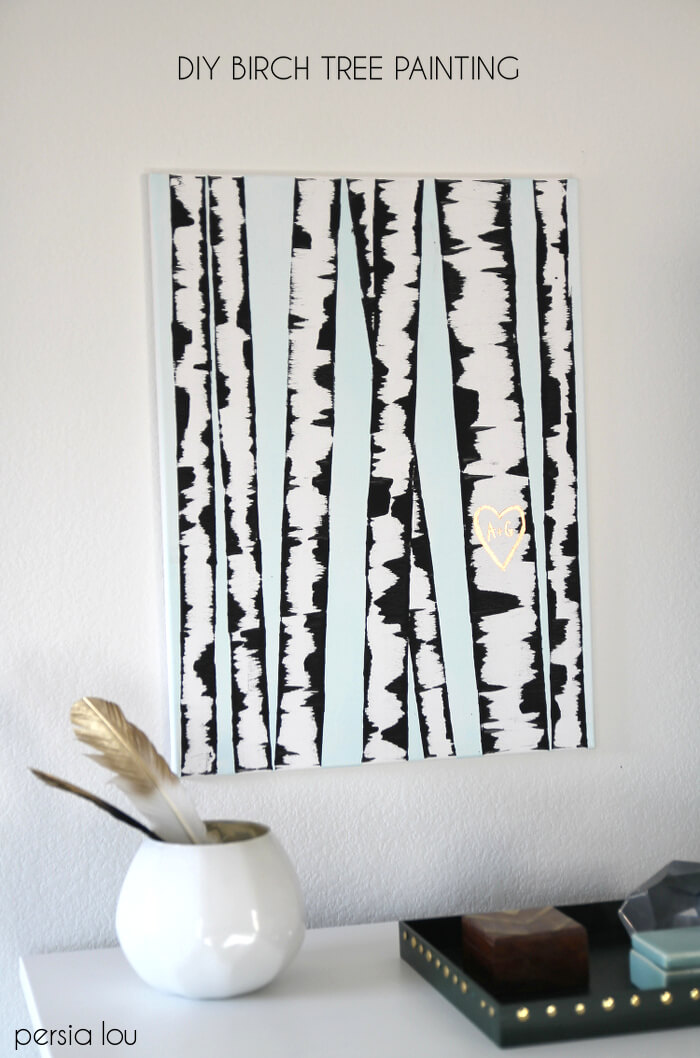
Making your own beautiful DIY Birch Tree Art is easy with this step by step tutorial. No special artistic skills or painting experience required! This post was originally created by me for Darice and contains affiliate links for your convenience. See my full disclosure policy here.
You know those grown up lady paint party places that are popping up all over the place lately? Like, come with your gal pals, get some appetizers and drinks, and make a painting? You know what I’m talking about, right?
Well, I’m thinking this little DIY wall art project would be absolutely perfect – I mean perfect! – for an at-home version of the girl’s night out painting party.
I mean, this painting looks pretty darn good (if I do say so myself), and the best part is that it is so, so easy to make! Honestly, this project is really just an Elementary School art class project given a grown-up makeover. And, guys, we all know that easy to make + looks great = the best.
Are you ready to make your own? Sweet! Let’s do this!
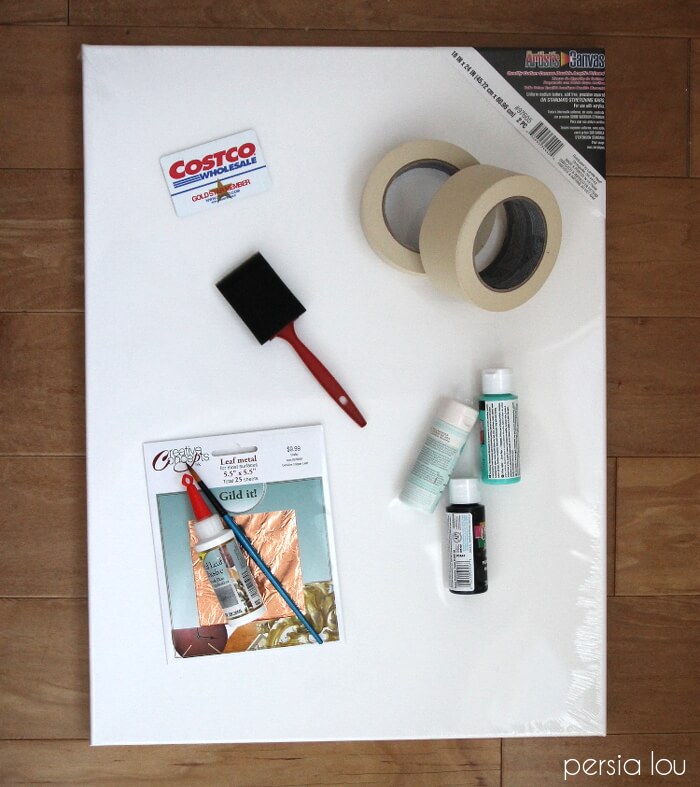
DIY Birch Tree Art Supplies:
- Canvas (I used an 18″ x 24″)
- Masking Tape of various widths
- Acrylic Craft Paint (I used a very light blue and black)
- Foam Brush
- Old Plastic Card (a credit card or store card works great)
- Copper Leaf
- Metal Leaf Adhesive (or you could use liquid leaf instead of the copper leaf and adhesive)
- Small Round Brush
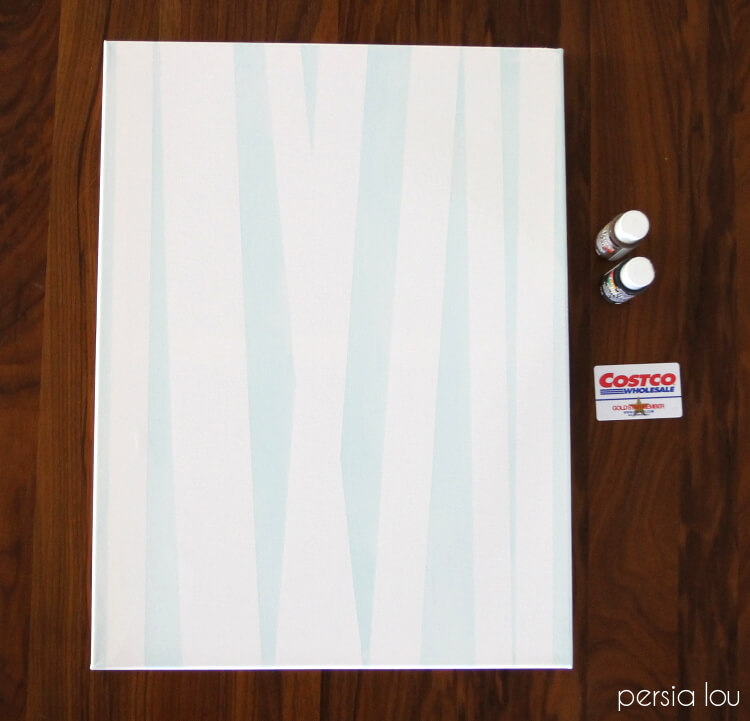
Step One: Tape off Canvas
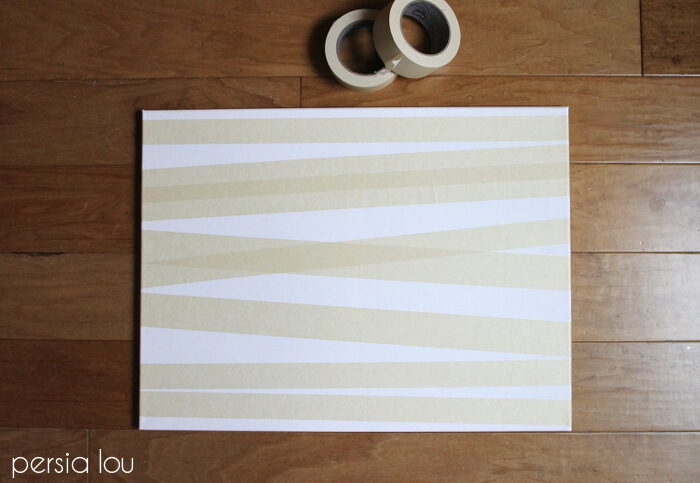
To make your own DIY Birch Tree Art, start by marking off the trees on your canvas using different widths of masking tape. I made my largest tree by overlapping pieces of 2″ tape. If two of your trees overlap, first tape down the tree you want to be in front. Be sure to press down on the edges of the tape to prevent any paint from leaking below.
Step Two: Paint Background

Paint the background using a sponge brush and acrylic paint. I just used a solid background, but I think it would be fun to try an ombre effect too.
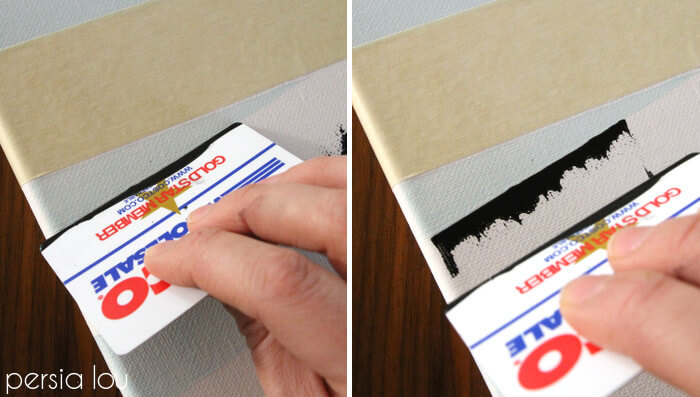
Step Three: Paint Birch Trees
Now to the fun part! The super, duper top secret key to easy, awesome-looking birch trees: an old credit card!

Start by practicing your technique on a scrap piece of paper before working directly on the canvas. Squirt out a bit of black paint on your palette (or paper plate). Dip the edge of your card into the paint. Place the edge of the card onto the paper perpendicular to your working surface, and then pushing down on the card, scrape it along the paper.
Practice a few times to figure out how much paint and pressure you need to get the look you want. When you feel ready, move over to your canvas. Use the same technique to paint along the edges of the white spaces we left for the trees.
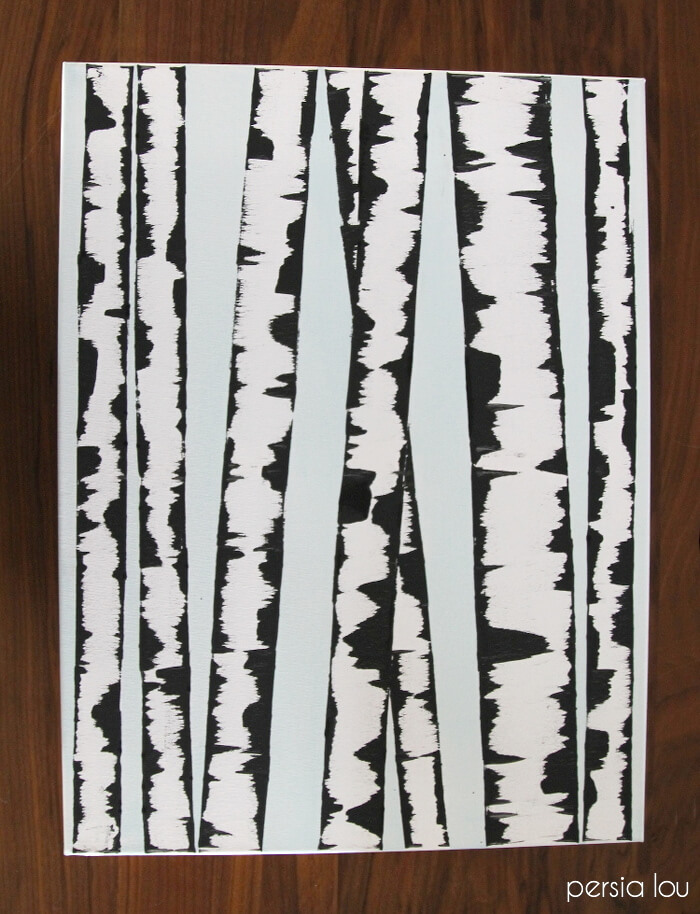
Where the two trees overlap, paint the back tree first, leaving the tape for the front tree in place. That’s why you see tape in the picture above. At this point you only need tape when two of your trees cross.

Pretty soon you will have a whole forest of birch trees.
You could call your DIY Birch Tree Art donezo now, BUT if you want to add a bit of metallic personalization, then I think we should probably be friends because that is just what I did.
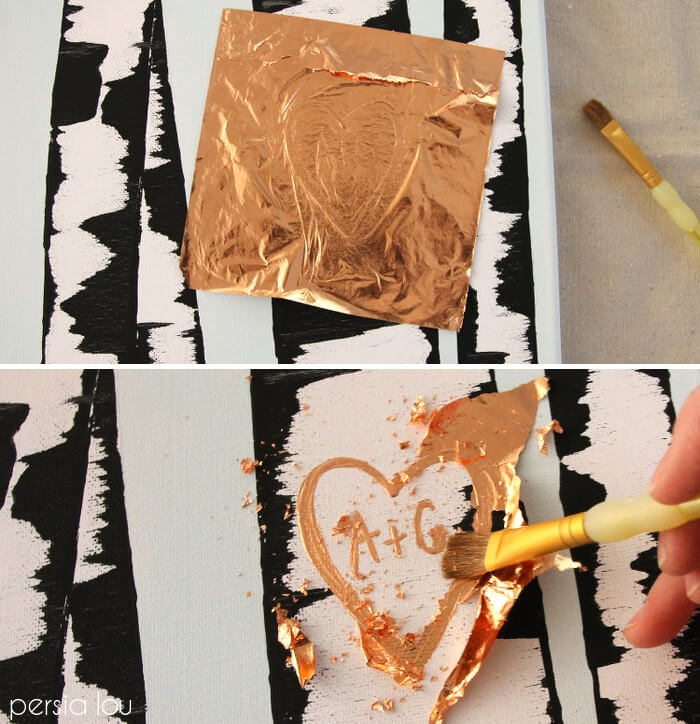
Step Four: Gilded Heart and Initials
Since I’m a romantic, I decided to add a heart with my hubby’s and my initials inscribed inside. I began by sketching out the design on the largest tree trunk in pencil.
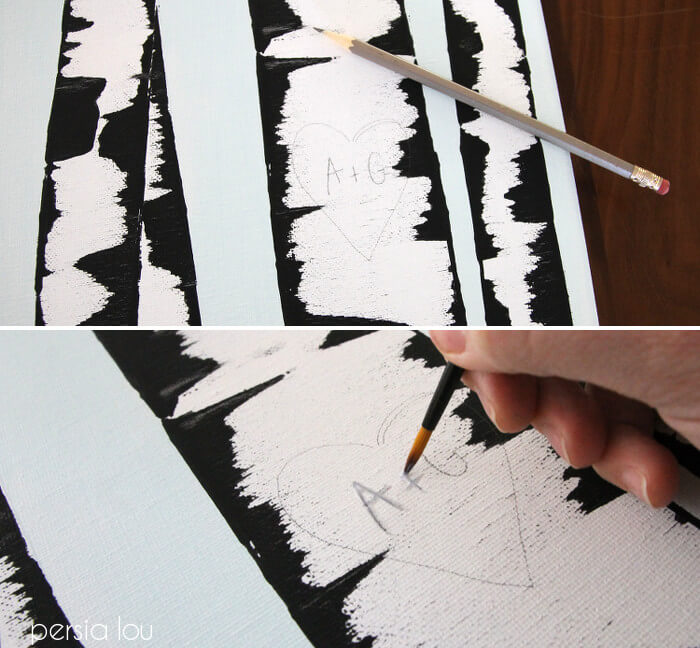
Then I painted over my sketch with my small round brush and the metal leaf adhesive. This stuff needs to sit for about 30 minutes to get nice and tacky. (Follow the instructions on your adhesive.)
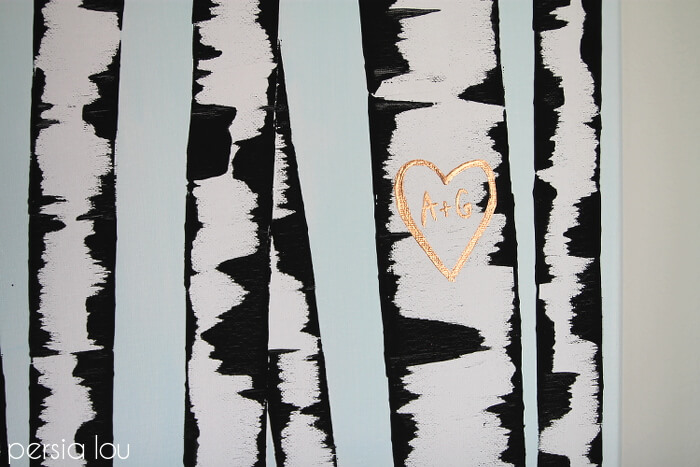
When the adhesive is all ready, gently press a piece of copper (or gold – I love gold too!) leaf onto the adhesive, and then brush off the excess with a soft bristle brush.
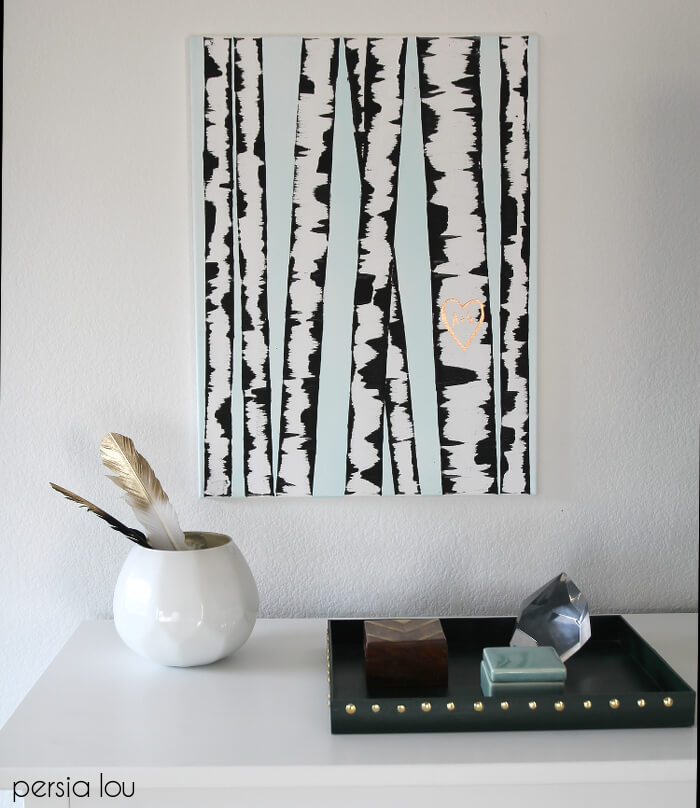
And that’s it! Your painting is all ready to be displayed/shown off. You are going to have so many people impressed with your mad painting skillz.
UPDATE: I recently did a little demonstration of this technique in my new weekly live Friday Craft Club over on my facebook page. You can watch the replay of it right here:

If you make your own DIY Birch Tree Art (and especially if you host a birch tree painting girls night), then please, please share it with me! Share your photos to my facebook page or tag me on instagram or twitter (@persialou).
Happy Painting!

If you like this post, check out these:
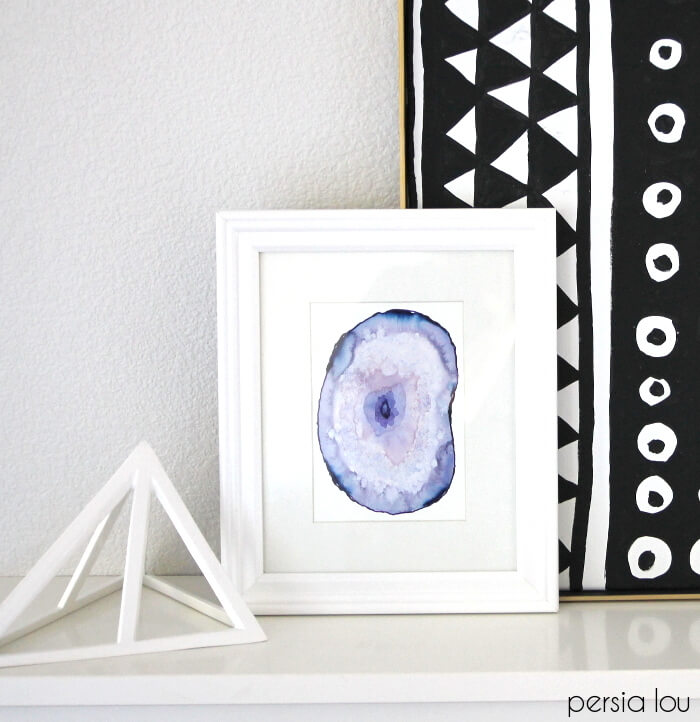
How to Paint Watercolor Agate Slices
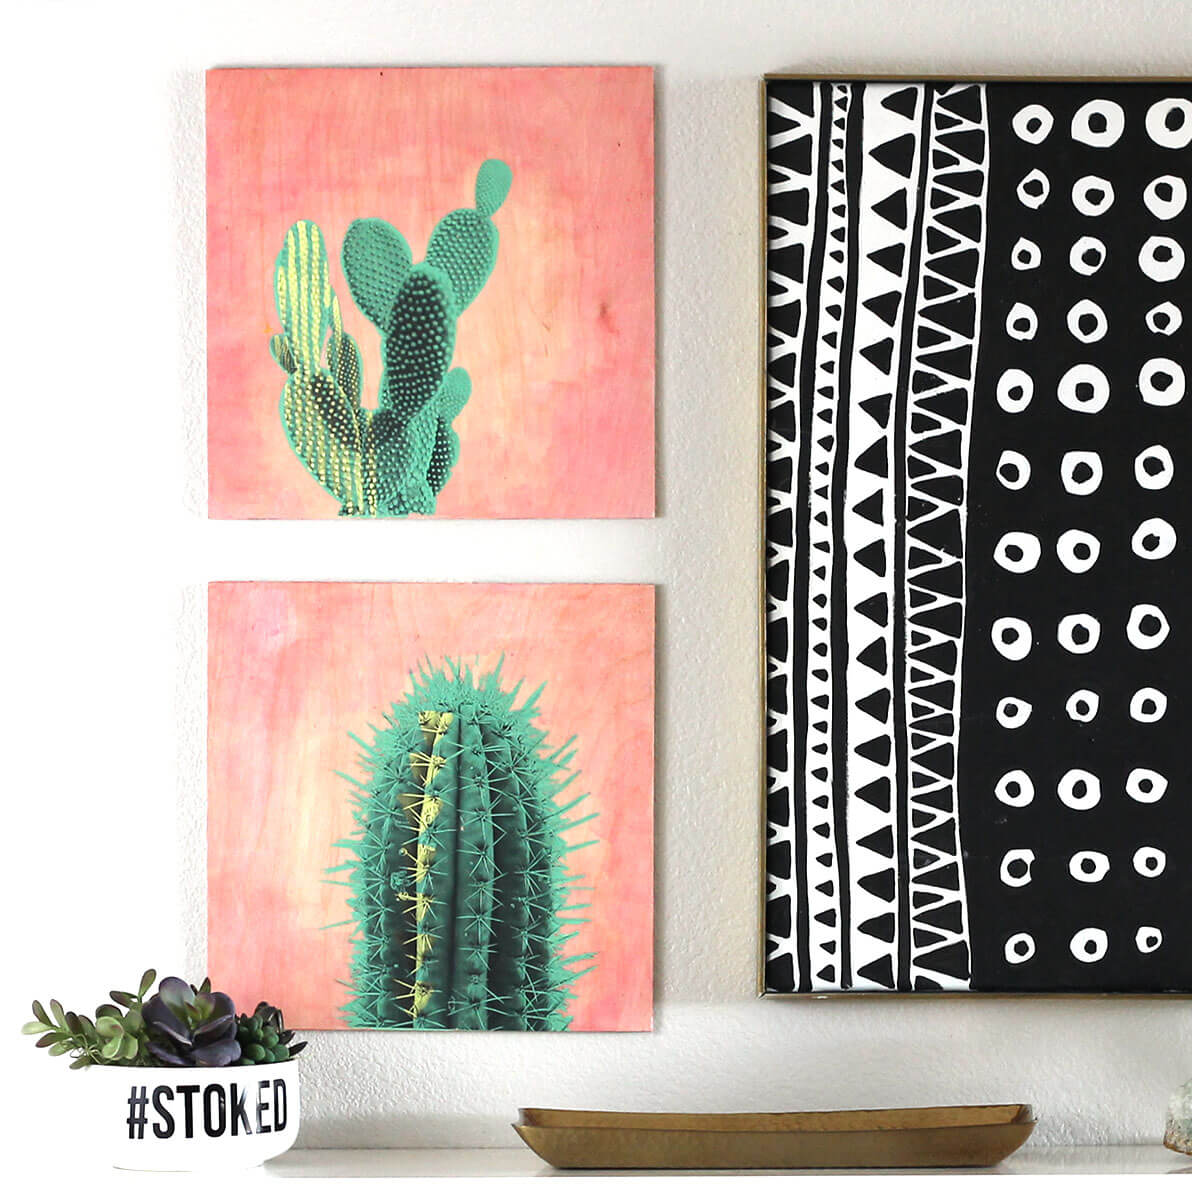
Make Your Own Photo Transfer Art
DIY Embroidered Canvas Wall Art


Comments + Project Love
chelsea jacobs says
I can’t believe how good it turned out! That’s amazing!
Sonya~At Home with The Barkers says
I love this SO much!! Surely would make a fun “grown up” ladies event. Pinning! ~Sonya
Melissa @ A Prudent Life says
Holy cow, this is my favorite DIY art project ever. Seriously.
elaine says
Have always loved this picture & definitely want to try this . I t’s gorgeous.
Deonna Wade says
I’ve been looking for some DIY art for my room at my parent’s cabin and this is going to be it! I’ll have to share pics when I actually do it…they are going to LOVE it.
persialou says
Yay! And yes, please share! I would love to see it!
Gina says
I love this! But am a little confused, did you ever take off the masking tape or just paint over it as an outline? I’m dying to make a set of 3 of these for above the couch art 🙂 thank you!
persialou says
Hi Gina! Yes, take off the masking tape after you have painted the background color. Good luck!
MaJay says
Have alwqys wanted to do a birch…think they are so pretty. You really gave a great tutorial for us to follor
Chris says
Thanks so much for this lovely project! Though we didnt have the gold leaf, my daughter made a beautiful forest of birches! Great project for a rainy day!
persialou says
Oh yay! I’m so glad you enjoyed the project!
persialou says
Thank you! I’m so glad you enjoyed the project! 🙂
Maureen says
I made this tonight! I don’t know how to attach a pic thanks!!!!!!!
persialou says
Yay! I would love to see it! You can post to my facebook page here: https://www.facebook.com/persialou or tag me on instagram or twitter (@persialou)
Adorablest says
I found this on Curbly! This is brilliant – I kept a (spent) plastic gift card recently – the sales assistant said she just throws them away – just look at what you can make! Thank You x
Julie Sills says
I am not a painter but I am definitely going to try this!
persialou says
Yay! I think you will like it. 🙂 Have fun!
Renee says
Hi! I really love this project and completed one myself recently 🙂 I kinda messed up on the gold leaf application and I’d like to try reapplying it, any idea on how I can take it off? Thanks!
persialou says
Hmm… I’m not sure. You could try gently scraping it off, but you would want to be careful not to damage the canvas. Maybe paint over it and try again?
Sophie says
How do I make this with liquid leaf? I really want to make it but I bought liquid leaf.
persialou says
Hi Sophie! Instead of painting on the heart with the adhesive, just paint it on with the liquid leaf. When it is dry, you are done!
emily says
fantastic project! Love this idea…I think my 9 year old would love to try this too. Also, love the strong contrast of the colors you used…would be so fun to try with other colors for fall!
Sue says
This is beaytiful and I am going to try it. On the birch trees, was the white painted or is that just the bare canvas?
persialou says
It’s just the bare canvas. If you want to paint that part, you will need to do paint the canvas before taping it off. Good luck! 🙂
sharon says
I love this idea!!! I went out and got a few canvases and made 2 for my long hallway and put one at the start and one at the end. I have had so many compliments about then and people asking me to make some for them that it is insane but I do give you credit for the inspiration for this beautiful birch painting. Thank you so much for sharing this with us!!
persialou says
Oh, I love to hear that! Thank you so much for the sweet comment, Sharon. It totally made my night. 🙂
Earl's says
Thanks much, it’s really helped. I’m pleased.
Centos VPS says
I love how you made these! When looking for inspiration I saw the same post about making the birch trees! I love how bold and huge yours are! What a great tutorial!
Carrie says
Oh Mylanta!! I can’t believe I just made this! Thank you for the clear and concise steps! I’m so excited to hang this up. I picked a dark aubergine purple for the background to go with my dining room. I’m so happy with how it turned out. Thank you!
Alexis says
Oh yay! I love to hear that! So glad you like it. 🙂
Lana says
Love your birch trees. So you left the tape on canvas or no. Sorry maybe a stupid question.
Alexis says
Hi Lana! Thanks so much! No, I pulled the tape off before doing the credit card / birch tree painting technique. I only left on one piece of tape where two trees crossed over each other. I hope that makes sense. 🙂 Good luck!
Jennifer Jensen says
Oh my gosh! It worked! It’s going to be such a nice housewarming gift! Thanks for such a simple-to-succeed project!
Alexis says
Yay! I love to hear that! So glad you liked it. 🙂
NaomiDorinthe says
Such a fun and beaituful project! Props! Will try out sooooon ! ??
Susan says
Well I didn’t take the tape off and used the black with the tape on. Guess I missed the part to remove the tape and scrape the black onto the white. So basically it’s backwards! Sigh! Guess I’ll start over. It is a cute painting just not mine.
Ines Powell says
I’m delighted with these ideas!!.. I really want to repeat it all means 🙂
Souri says
I love this birch tree, you did an awesome job, thank you for sharing with us.
Linzi says
I made this, it worked out just like yours, so easy, thanks so much.
Annette says
I love it!!!!! I just made this and it was my first ever painting and i just am so happy thank you for showing this techniqe. Any more great ideas? I would love to see them.
Alexis says
Hi! I’m so glad you liked it! Makes me so happy to hear that. 🙂 I have a couple other watercolor tutorials you can check out – http://persialou.com/2015/03/how-to-paint-watercolor-agate-slices.html and http://persialou.com/2014/03/gilded-watercolor-artwork-tutorial.html