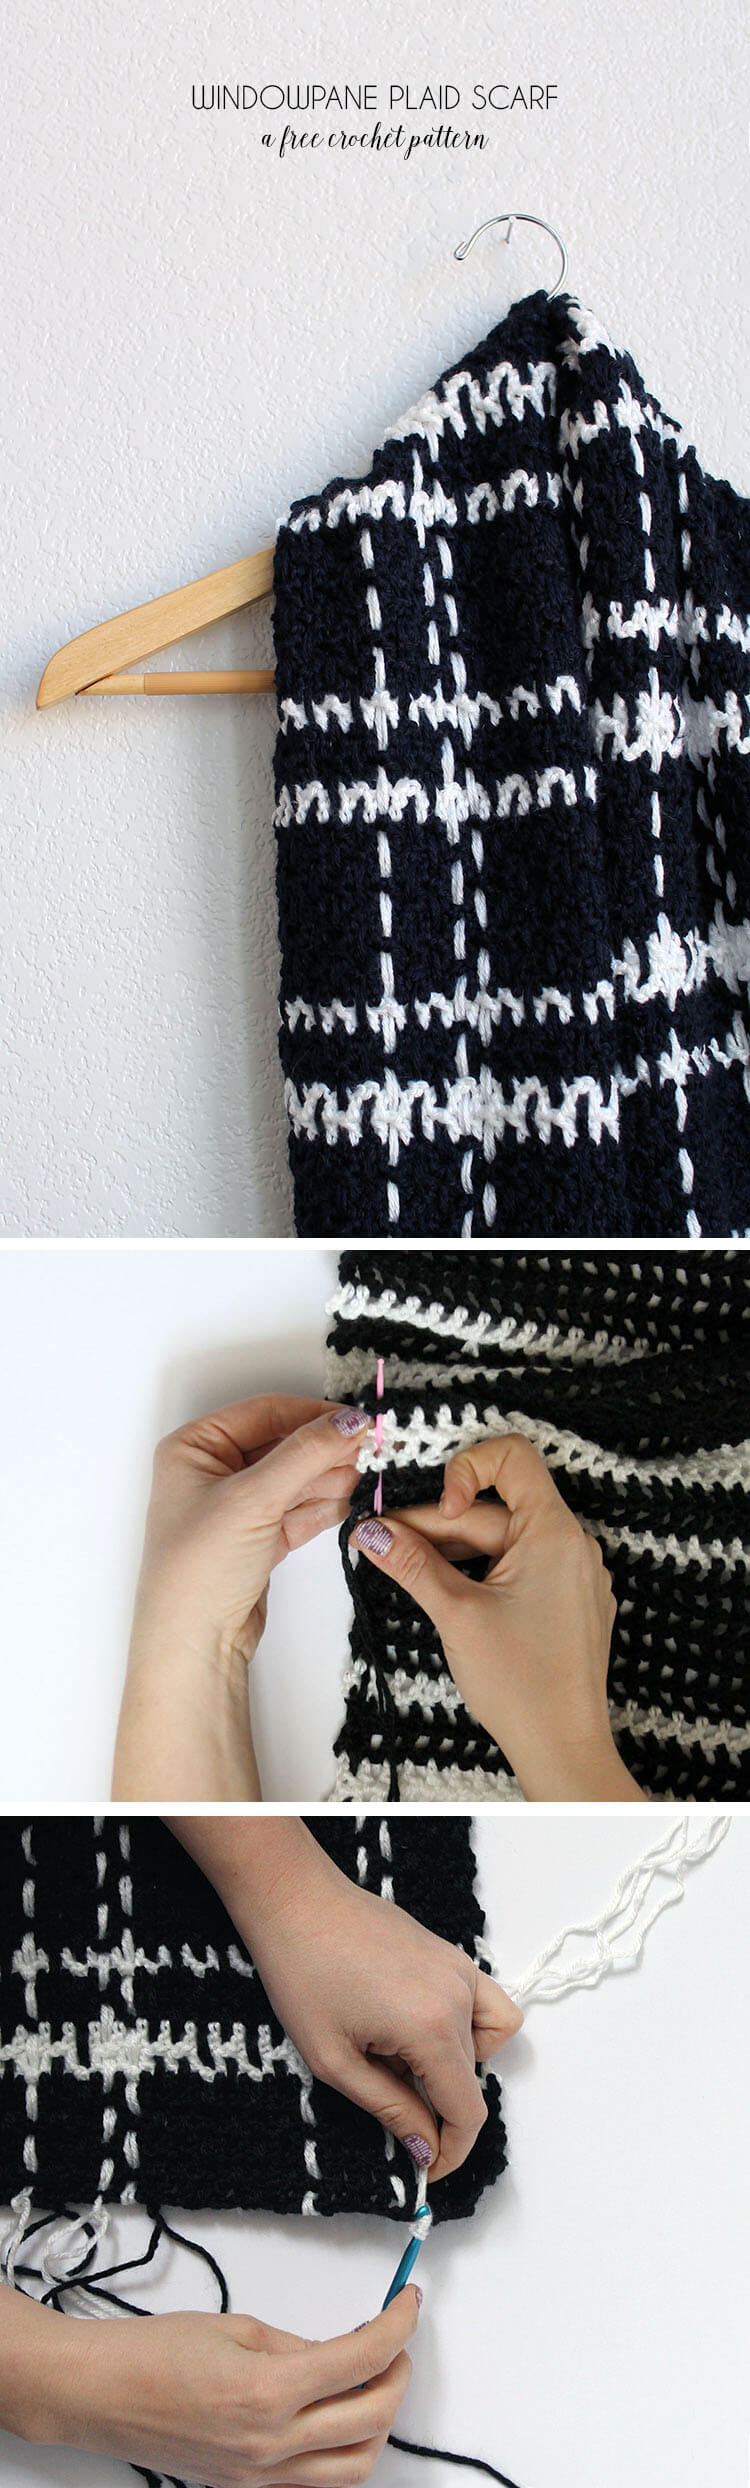
This stylish plaid scarf is much easier to crochet than it looks! Free pattern and photo tutorial. This post contains affiliate links when possible and was first shared at Darice.
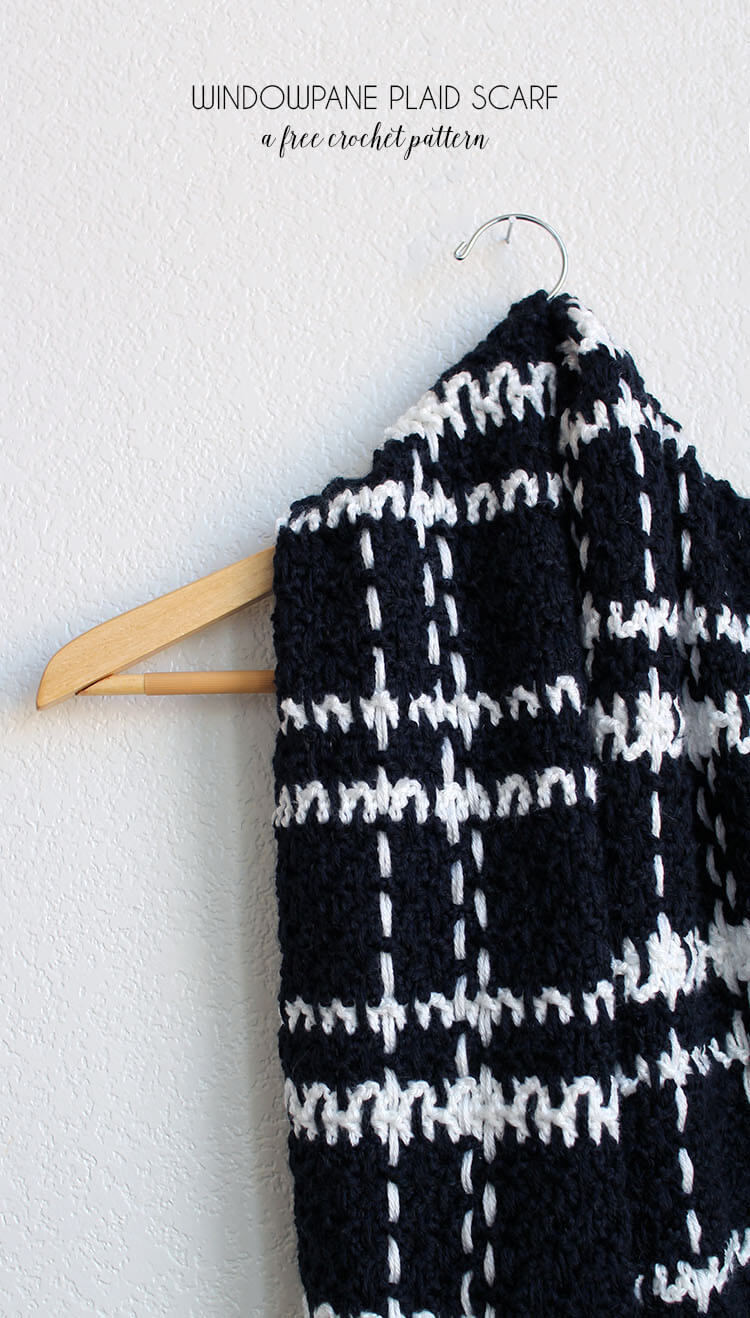
Plaid is back in a big way right now, and I’m getting in on the trend with a new crochet pattern for you all today. I’m not always a big fan of plaid. I don’t like small or busy plaid prints, but there is something about a large scale, graphic plaid that has always appealed to me.
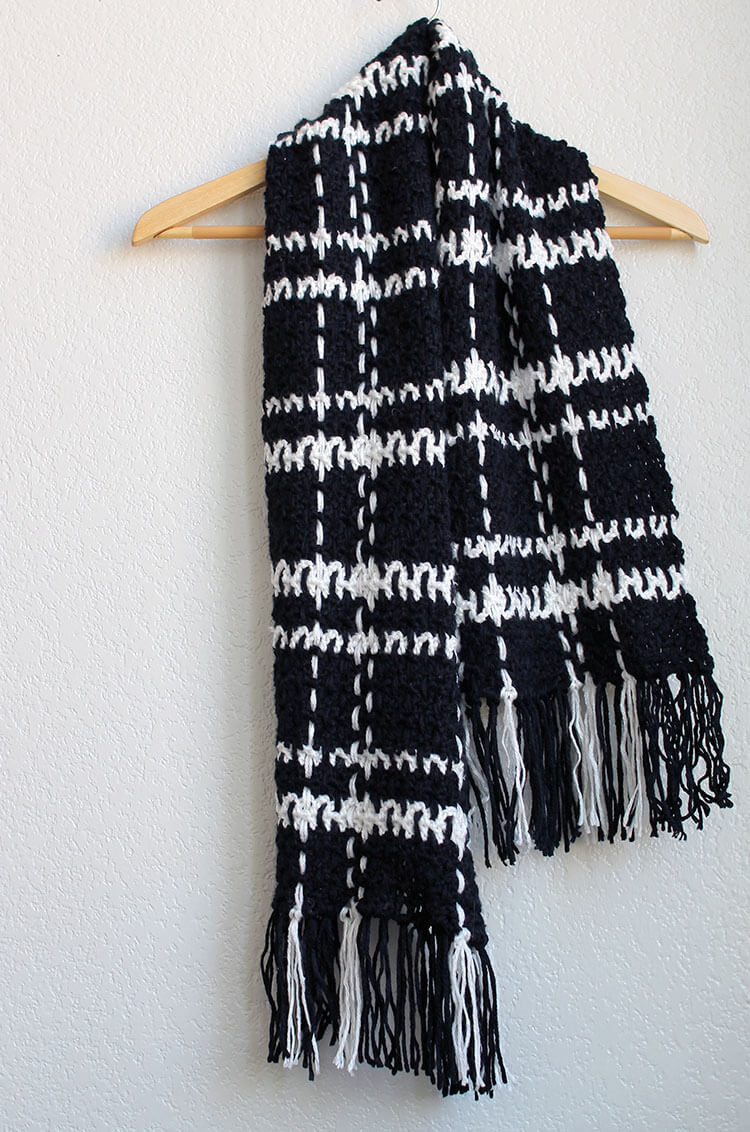
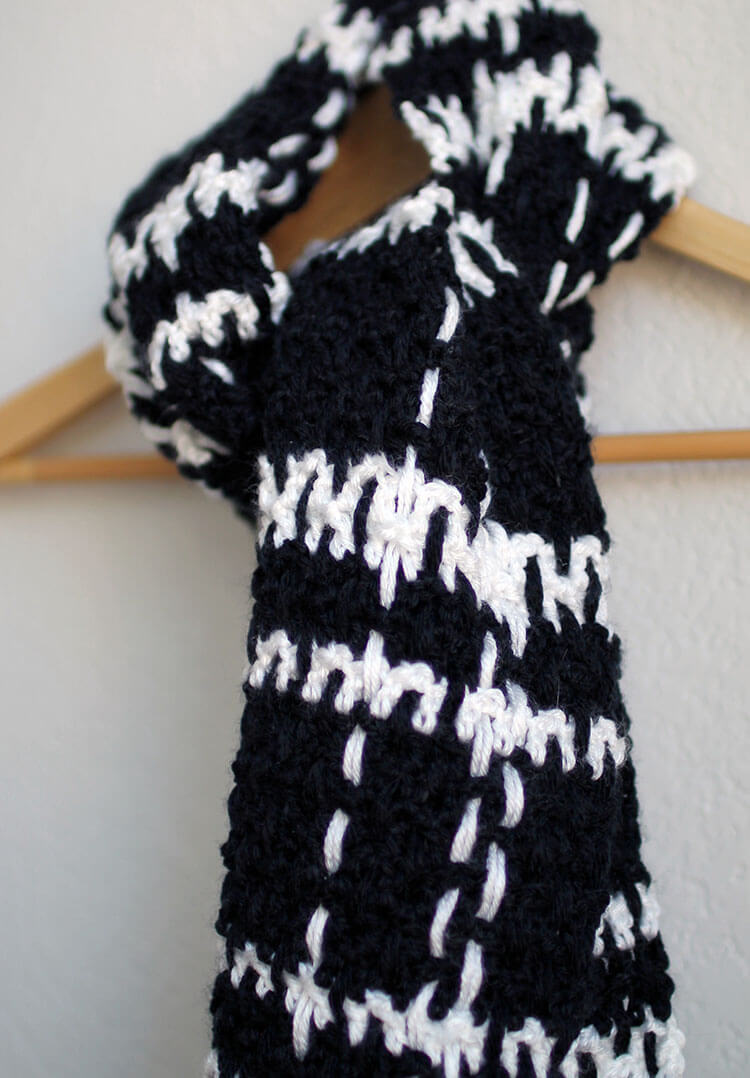
My windowpane plaid crochet scarf has high contrast (hello, black and white, my faves!) and a nice open design, soooo I pretty much love it.
If you are worried that you are going to have to learn some crazy new stitches to pull off this intricate plaid design, you are worrying in vain because this, my friends, is one of the easiest scarfs ever. Seriously. If you can make a chain, a double crochet, and work a yarn needle, then you have this one in the bag.
Ready to give it a go? Let’s do this!
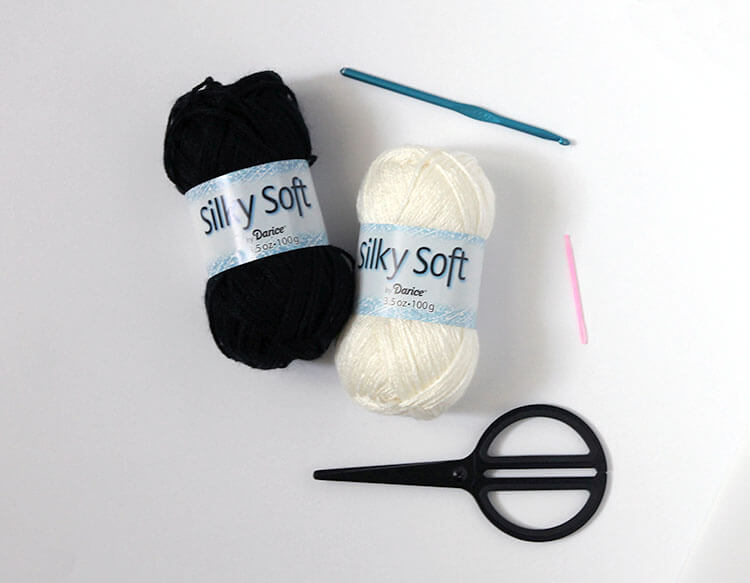
Supplies:
- Worsted weight yarn in two colors. I used Darice Silky Soft Yarn in Black (3 balls) and White (2 balls).
- Size I (5.50 mm) crochet hook
- Yarn Needle
- Scissors
This scarf is created using the same woven crochet technique I used in the Woven Tassel Pillow. It is a really simple technique that has a lot of potential for unique designs.
For this plaid design you begin by crocheting crochet a mesh base for your scarf, then you go back and weave in the spaces to create the plaid design.
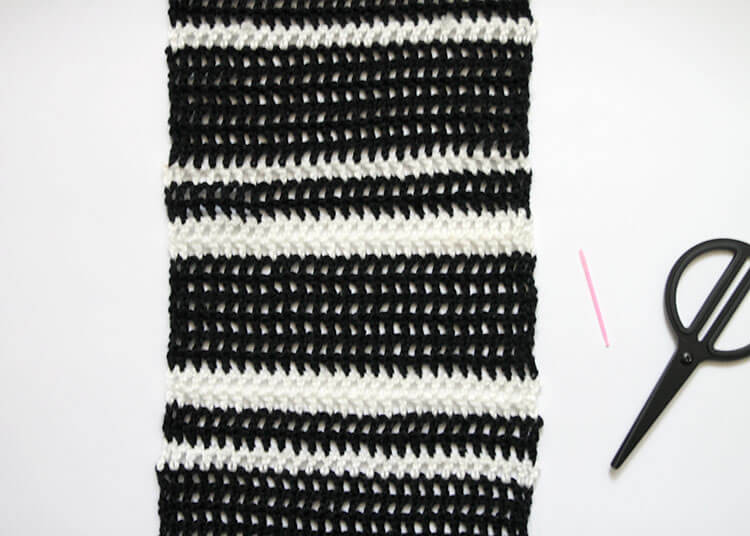
Row 1: Starting with black yarn and your I (5.50 mm) hook, chain 52, skip 3 ch (counts as first dc and ch 1), dc, *ch 1, skip next ch, dc, repeat from * until you reach end of chain (26 dcs, 25 ch 1 spcs).
Row 2: Ch 3 (counts as first dc and ch 1), dc in next dc, *ch 1, dc in next dc, repeat from *until end of row (26 dcs, 25 ch 1 spcs).
Rows 3 on: Repeat Row 2 until you reach your desired length. I worked 102 rows for a scarf about four feet long. To create the windowpane pattern of the scarf, you need to change yarn colors following this pattern: *6 rows of black, 2 rows of white, 2 rows of black, 1 row of white, 6 rows of black, 1 row of white, 2 rows of black, 2 rows of white, repeat from * ending with 6 rows of black until scarf reaches desired length.
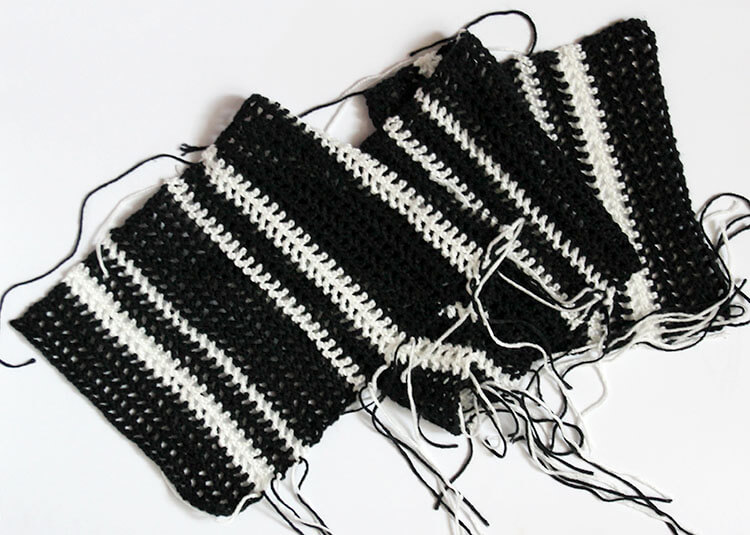
When you have reached the end of the scarf, use the yarn needle to weave in all those ends.
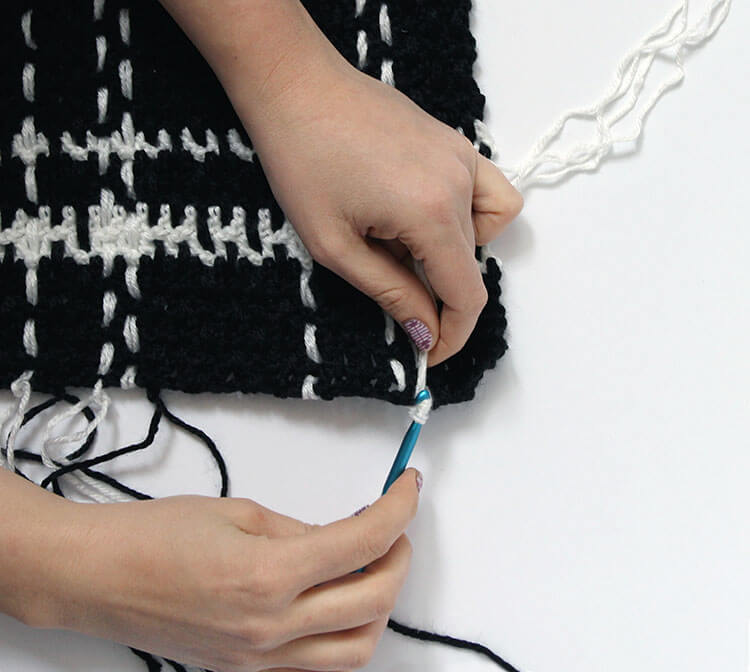
Now it’s time for the fun part – creating the plaid design! Start by cutting a length of yarn more than twice the length of your scarf. Fold that piece in half and thread the yarn needle onto the open end. Pull the looped end through one of the bottom corner mesh spaces of the scarf and then pull the other end through the loop using the needle to join the yarn onto the scarf (see photo below).
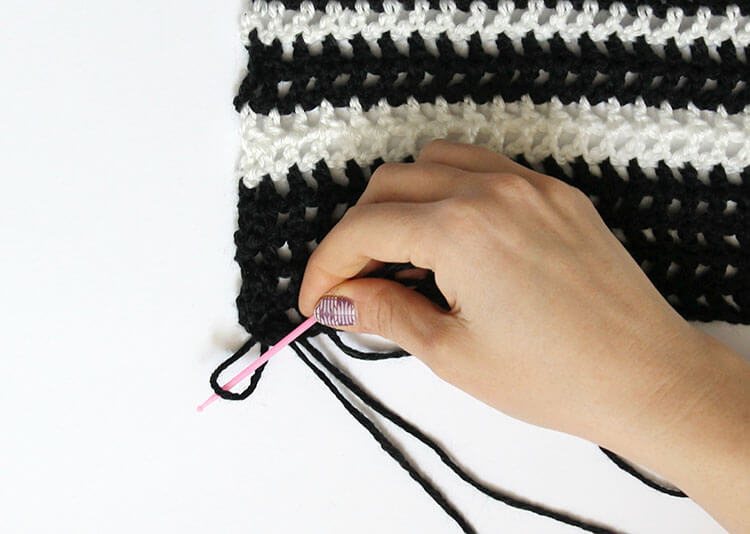
Then weave the doubled up piece of yarn through the mesh alternating over and under the mesh. Make sure not to pull the yarn too tight so you avoid any bunching in the scarf.
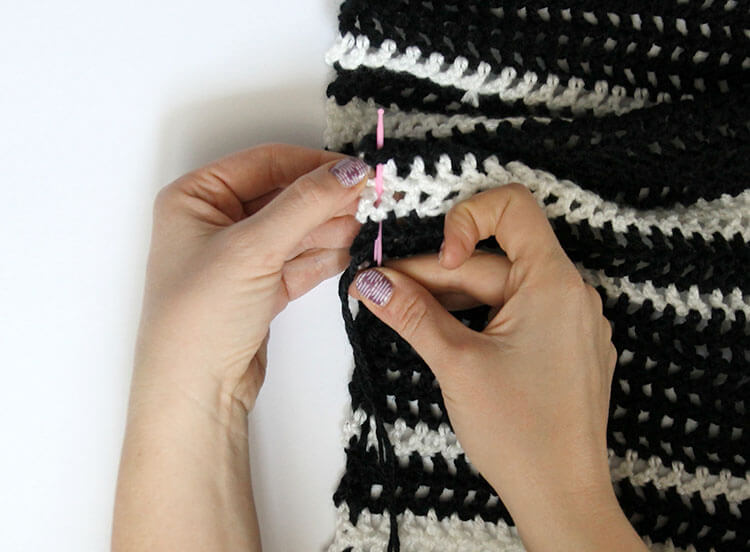
When you get to the other end, double knot the piece of yarn (again, don’t pull too tight!) and weave in the ends. Repeat this process for each mesh column following this color pattern: 3 columns of black, 2 columns of white, 2 columns of black, 1 column of white, 6 columns of black, 2 columns of white, 2 columns of black, 1 column of white, 6 columns of black.
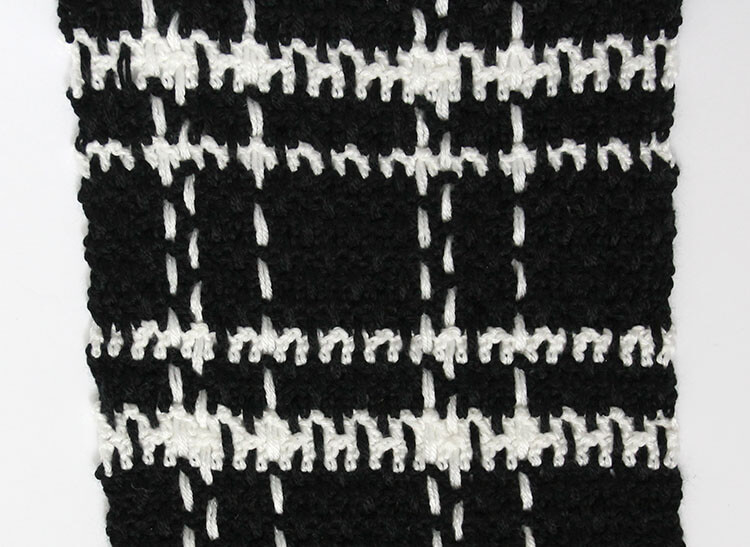
Pretty soon you will have a beautiful plaid pattern.
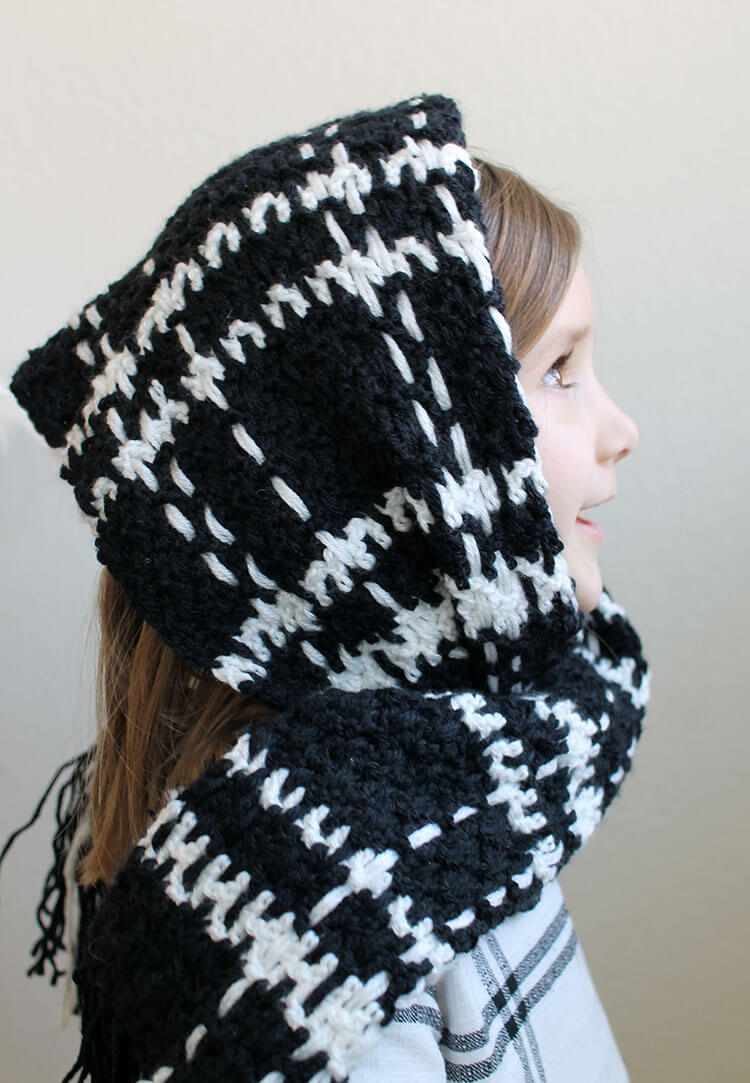
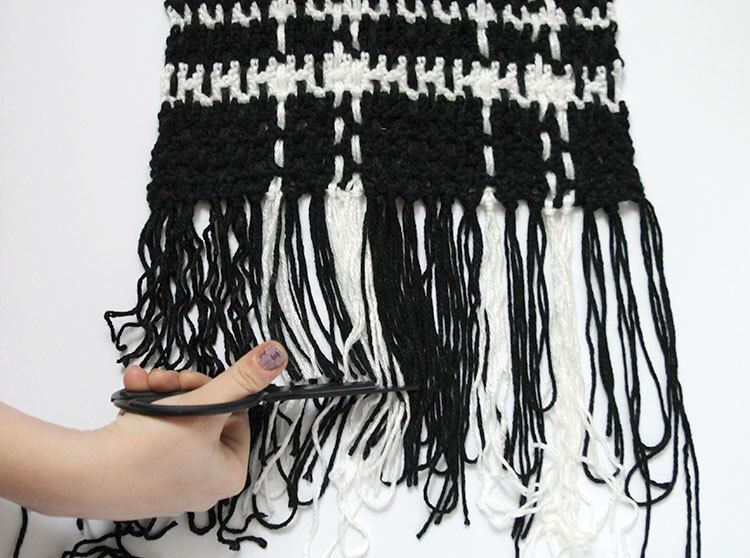
If you like, your scarf can be all done at this point, but I decided to finish mine off with tassels (because who doesn’t love tassels?). I added one tassel to the bottom of each column and matched the color of the tassel to the yarn used in that column.
To add tassels, just take two lengths of yarn more than double your desired tassel length. Fold the two lengths in half and pull that folded loop through the end of the scarf. Pull the tail ends through the loop to attach the tassel to the scarf.
Finally, trim all your tassels to the same length.
Just a little trim, and your scarf is all finished! Ready for keeping your warm in style.
And how cute is it on my little model in her adorable plaid dress. Plaid on plaid? I say yes!

This woven plaid technique could of course be done in whatever colors and patterns your little heart desires, and don’t limit yourself to scarves either! Baby blankets, pillows, afghans – the sky’s the limit!
If you make your own Windowpane Plaid Scarf, I would love to see it! Share it on my facebook page, tag me on instagram or twitter, and be sure to use the hashtag #persialou so I see it!
Happy Crocheting!

If you like this post, you may also like:


Comments + Project Love
Julie isaksen says
Hi! I am brand new to crocheting….never done it before. I’ve always been a knitter. I have a question on my first crocheting project….the simple slouch hat. I’ve learned on YouTube how to single stitch, double stitch, etc. I also learned the magic loop. I am confused about how many stitches to include in the magic loop to get started on this project. Can you clarify? Love your blog so far…..
Alexis says
Hi Julie! You should have a ch 3 (which counts as a dc) and then 11 additional dc all worked in the magic loop. So a total of 12 dc. Good luck!
Kelly says
Another fabulous project by the crochet queen 🙂 Love the black and white.
Alexis says
Thank you, friend! 🙂
Rachel says
What a fun design! I would never have thought to crochet plaid, but you pulled it off!
maria corona says
i am going to try to crochet this beauitful scarf!!!
Jane says
I love the design of your scarf. Thank you for tutorial.
Lin says
I have been trying to figure out how to crochet a Christmas plaid throw blanket. Your Windowpane scarf pattern has unlocked the secret. This will be fun. Thanks for the idea.
Alexis says
Oh, good! So glad it was helpful for you. I know your Christmas throw will be beautiful! 🙂
Sarah says
Hi! I’m trying this pattern for the first time and I’m having a difficult time getting started. What does the abbreviation “25 ch 1 spcs” in the first part of the directions mean?
Also, I keep ending up with one ch after dc 1, sk 1 for the first row. Is this supposed to happen?
Alexis says
The information in the parentheses just tells you what you should have when you are finished with the row. So, you should have 26 double crochet stitches and 25 chain one spaces. I’m not sure what you mean by your second question. Do you mean you have an extra chain left over? You should be ending with a double crochet in the last ch. I hope that helps. Good luck!
AmyT says
Thank you for sharing this pattern, I LOVE plaid and it is pretty much not seen in crochet except for buffalo plaid which I also love doing! I am not quite clear on how you threaded the first piece of yarn for the columns or how you do the columns…a video would be so helpful 😉
Tasha says
Suggestion – perhaps carry some of the yarn so there isn’t as much weaving in tails?
Pat says
I once tried your pattern but didn’t really look like plaid, it turned out I made a mistake in making the double crochet. Now I’ve learned my mistake, I’ll make it again in pink, red and purple, thank you for the tutorial!