This post was originally created by me for Darice.
I think it’s kind of funny how crafting techniques come in and out of style. Like… macrame, which is making a big time comeback right now and was like really NOT cool not too long ago. I kind of fought the macrame trend, but I have to say its growing on me a bit. There may even be a macrame project showing up here later this week.
Maybe.
I would say that plastic canvas is definitely out of style right now, but I’m trying to give it a little makeover with this project. What do you think? Can we make plastic canvas happen?

Do you agree that maybe there’s some potential there? Maybe it’s just nostalgia convincing me, but I think there is.
When I was a kid my grandma taught me how to make things using plastic canvas. I specifically remember making coasters and a little box to keep them in. She still makes things out of plastic canvas. A few years ago, she made me a pretty little notebook covered in plastic canvas embroidered with pansies on the front, and it helped me to see the potential in plastic canvas.
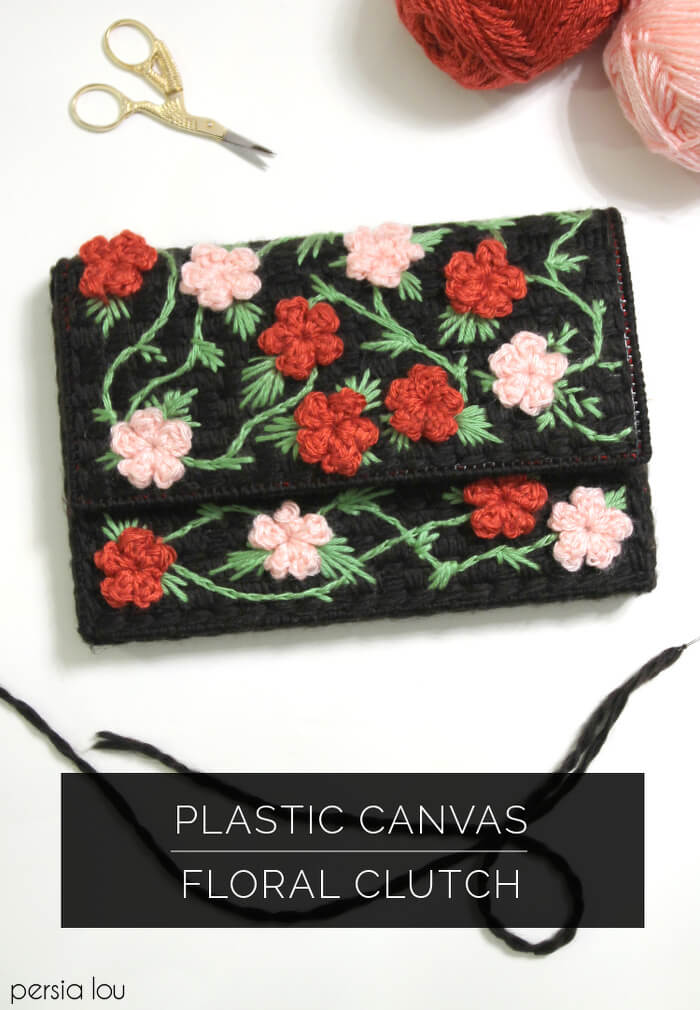
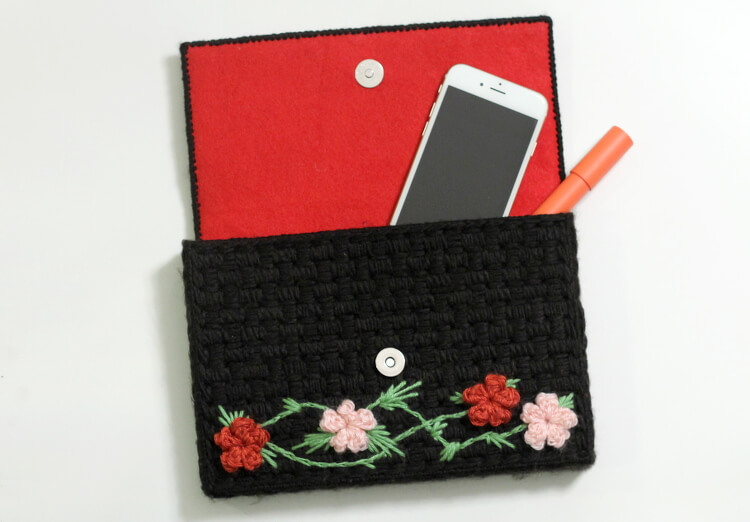
Anyway – for this clutch I combined plastic canvas with a little crochet, and I’m really happy with the pretty little thing I ended up with. If you are interested in trying plastic canvas out, here’s a project to get you going!
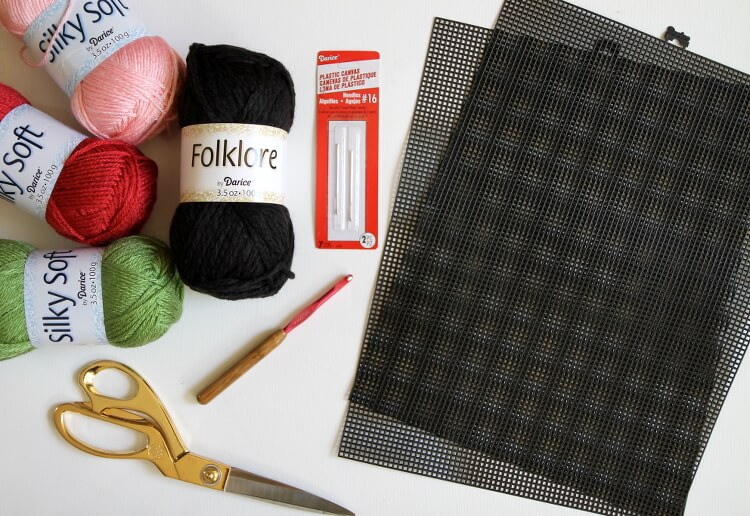
Supplies (I’ve included affiliate links below. Thanks for supporting Persia Lou!):
- Black Plastic Canvas (I used two pieces)
- Worsted Weight Yarn in Black, Pink, Red, and Green
- Plastic Canvas Needle
- Size I Crochet Hook
- Scissors
- Felt for lining
- Magnetic Purse Clasp
Step One – Cut the Plastic Canvas
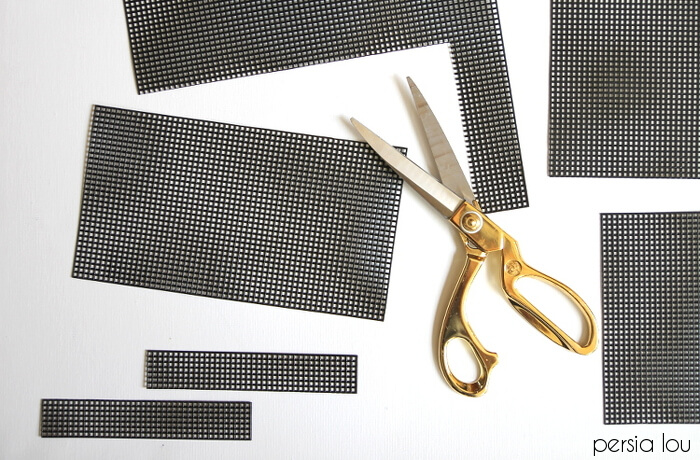
Bust out those scissors and snip, snip! There is something satisfying about cutting through plastic canvas. I’m not sure what it is, but give it a try and let me know if you agree.
Try to cut close to the line so you don’t have a bunch of little nubs on the edge. To create the clutch form, you will need to cut the plastic canvas into six pieces two 9″ x 6″ (the front and back pieces), one 9″ x 4″ (the flap), one 9″ x 1″ (bottom), and two 6″ x 1″ (the sides).
Step Two – Stitch Pieces
I covered the pieces with a basket weave stitch pattern. I really love the texture this gives the bag, and I think it gives it a bit of a vintage basket purse look.
To create the basket weave pattern, start by pulling the yarn up in the bottom right corner and leave a tail of a few inches on the back. Work four stitches four squares long, making sure to work the stitches over the tail on the back.
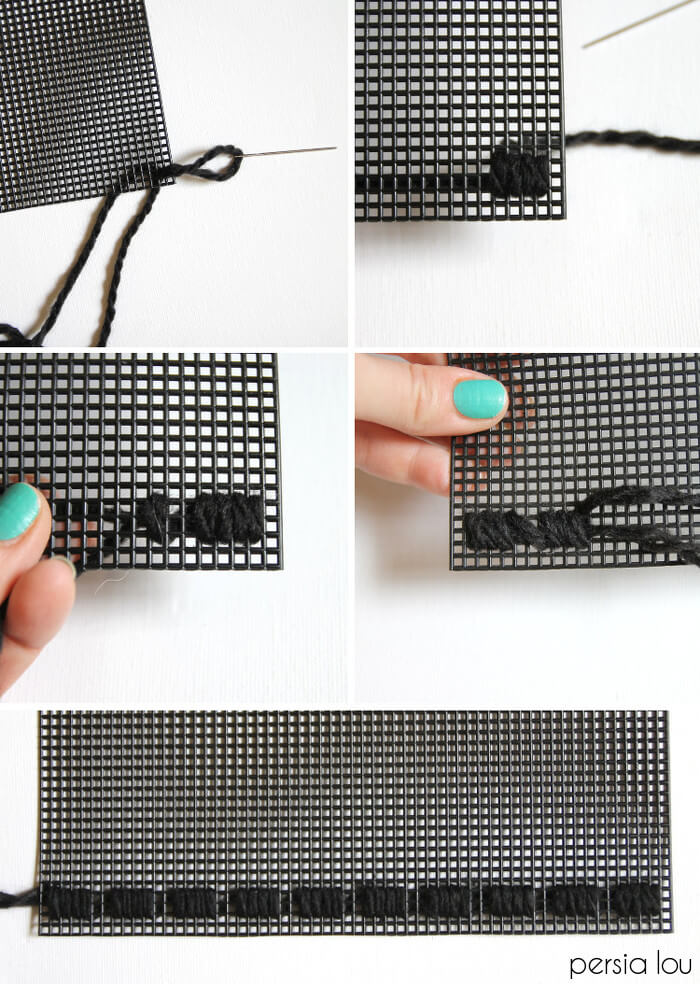
Skip two squares and work four more stitches in the same manner. When you reach the end of the row, go back and work horizontal stitches in the spaces between.
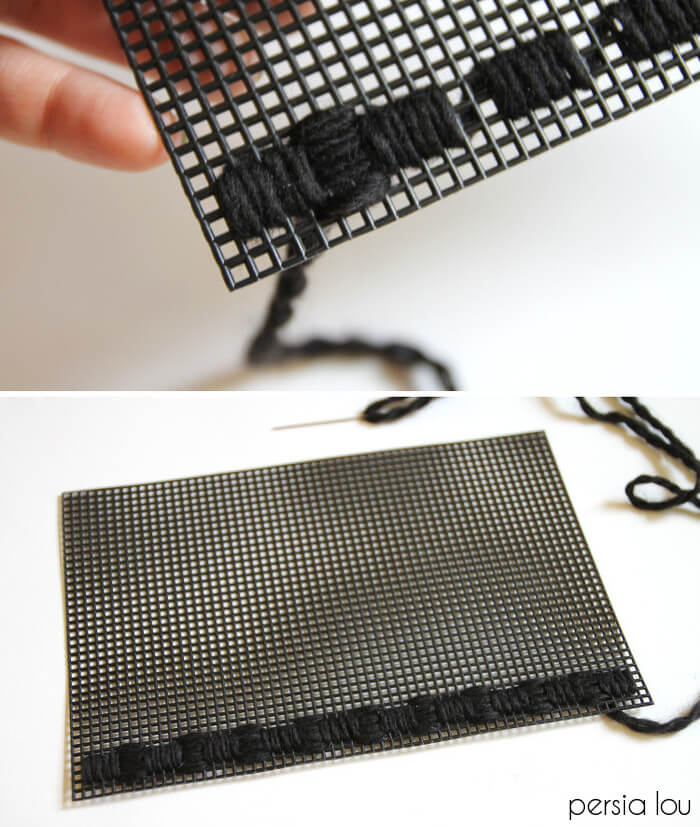
The groups of stitches overlap a bit so the entire surface is covered by the pattern. It will take some time to cover all of the pieces with stitches, but it’s a great project to keep your hands busy while watching TV.
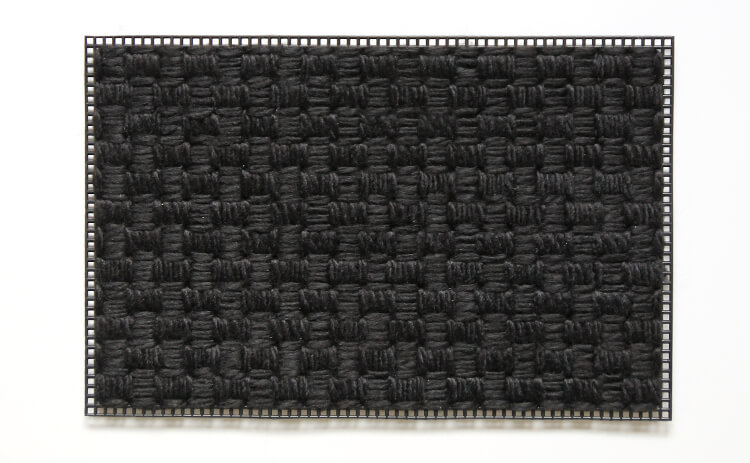
Yay! All done! Now it’s time to crochet some cute little flowers.
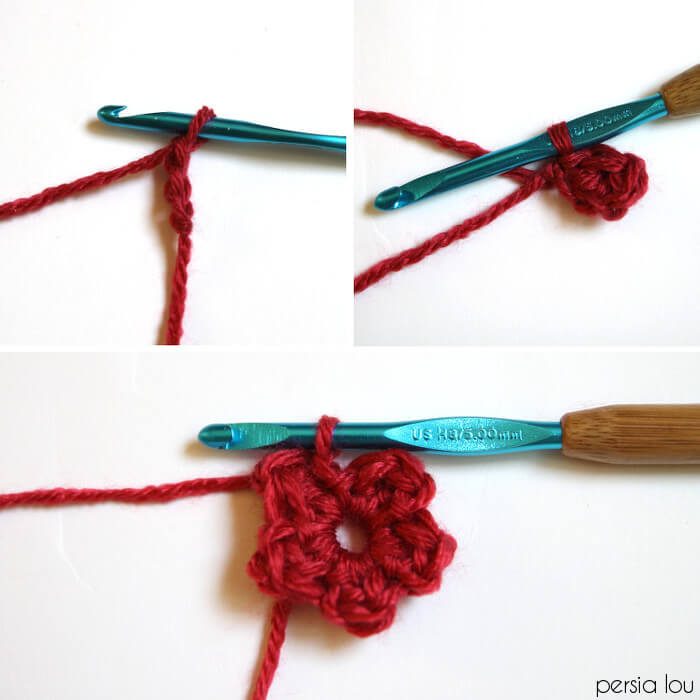
Step Three – Crochet Flowers
These little flowers are made by following a super simple pattern. You can make a whole garden in very little time.
Tiny Flower Pattern:
Chain 3 (counts as first dc), work all stitches in the first chain. Half treble crochet (htrc), double crochet (dc), sl st (first petal formed). *Dc, htrc, dc, sl st (second petal formed), repeat from * three times to make five total petals.
I made thirteen total flowers to decorate my DIY clutch. To sew them to the clutch I pulled the yarn around the flowers in between the petals to give them more definition.
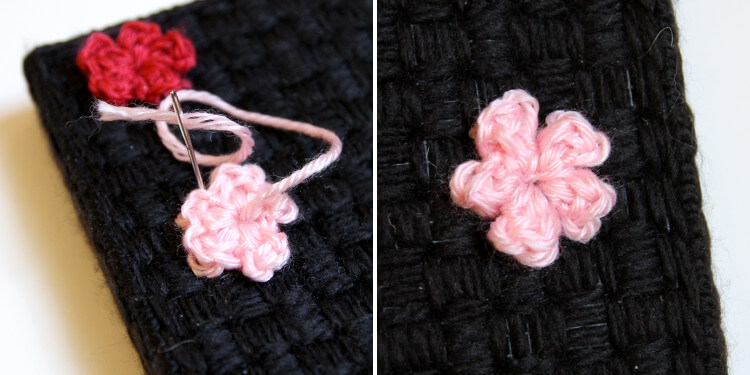
If you aren’t a crocheter or you want your bag to be less three-dimensional, you could absolutely embroider flowers instead.
Step Four – Embroider Leaves
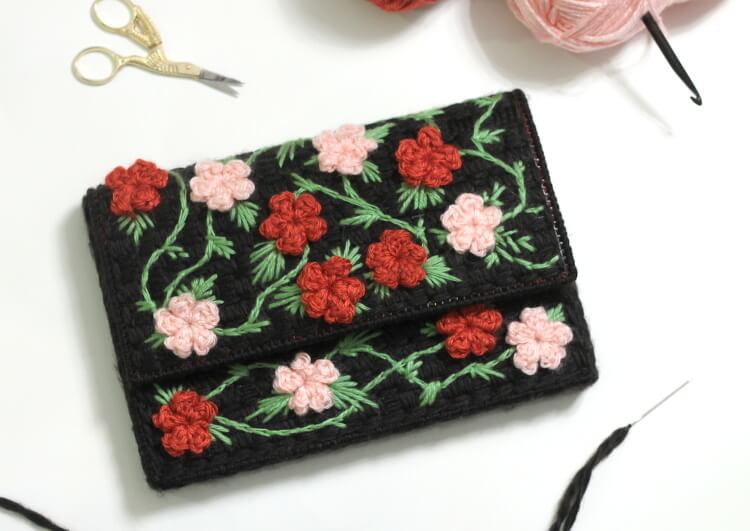
I used green yarn to embroider leaves and vines around the flowers. To create the leaves, I used long stitches to describe the leaf shape like so:

Step Five – Sew Pieces Together
I actually sewed the clutch together before embroidering the leaves, but it would have been much easier to embroider the pieces first. Oops! Go ahead and learn from my mistake.
To piece the clutch together, start by sewing the sides, bottom, and flap to the back piece. Make sure the yarn wraps around the edges of the plastic canvas.

Then, finish by sewing the front piece to the sides and bottom.
Step Six – Add Magnetic Clasp and Felt Lining
Add the metallic clasp to the front of the DIY clutch by pushing the prongs through and folding them flat. Then cut a piece of felt to fit on the inside of the clutch.
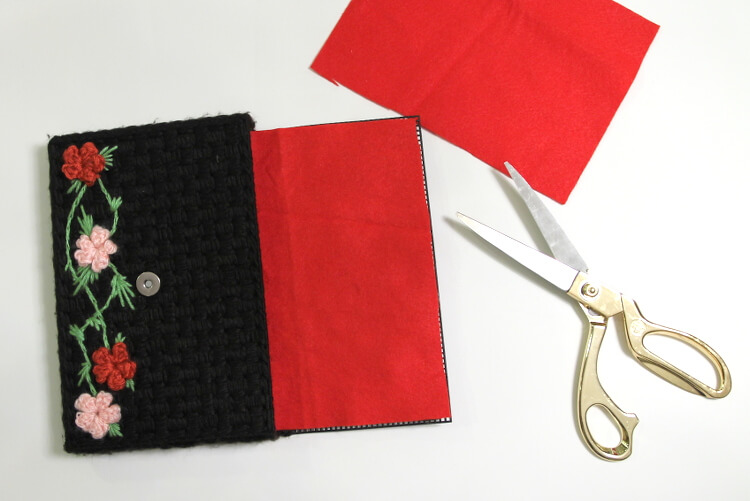
Attach the other side of the metallic clasp to the felt that will be attached to the flap. Then use a little hot glue to secure the felt lining.
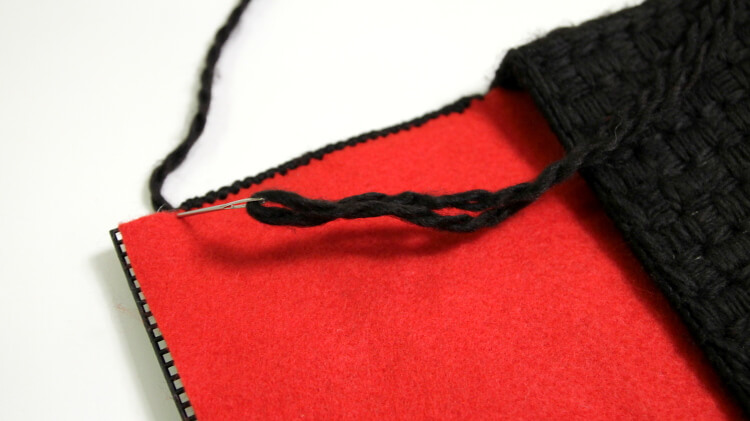
Step Seven – Finish Flap Edge
Finally, use a piece of black yarn and a needle to wrap the edge of the flap and secure the edge of the felt.
 And ta-DA! You are done. Fill that cutie clutch up with your necessities and hit the town.
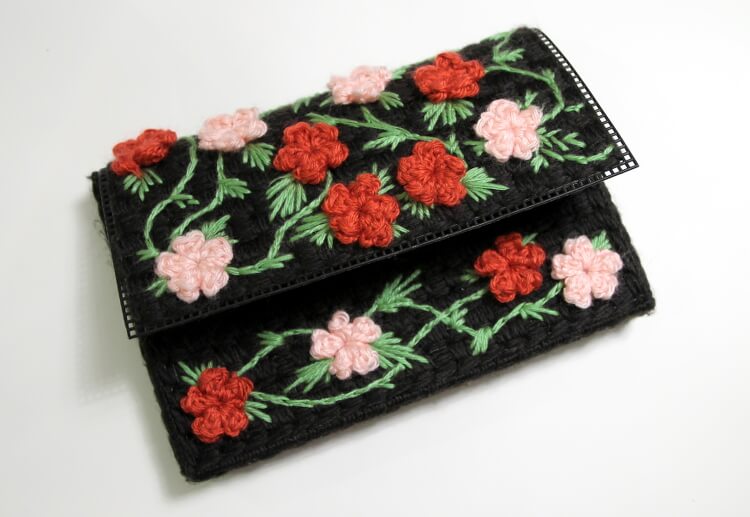
 I am thinking about adding a gold chain strap. What do you think? Cute or no?
And if you made it all the way through this long post, THANK YOU! Seriously, thanks for being here and supporting me and this little blog. If you make your own clutch, I would absolutely LOVE to see it. You can share it to my facebook page, tag me @persialou on instagram, or just email it to me at persialou[at]gmail.com. Thank you!
Happy Making!

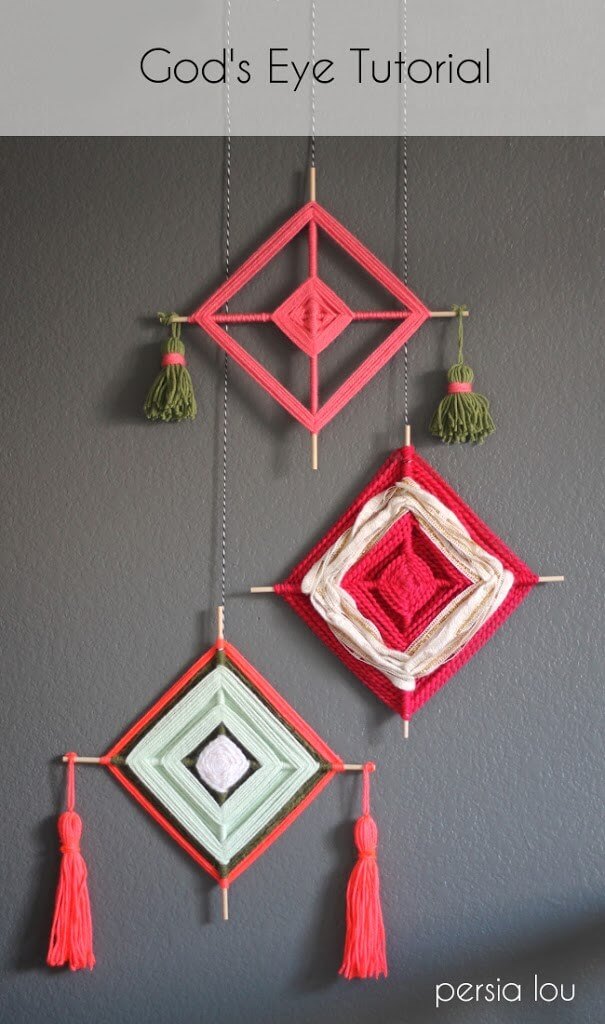
Looking for more creative inspiration? Check out these other projects:

Boho Tassel Bag – Free Crochet Pattern


Comments + Project Love
Heather says
This is really cute! Makes me want to get some plastic canvas!
persialou says
Thanks, Heather! And you should give it a try! 🙂
Maria says
Awesome! Thank you, Alexis! I am sure I will repeat this beautiful clutch!
persialou says
Thank you, Maria! Good luck! 🙂
Pops de Milk says
Love this! I’m a fan of plastic canvas projects, this one looks so fun!
persialou says
Thank you!! And thanks for the share on Facebook too. I so appreciate it! 🙂
sdorttuii plmnr says
Really Appreciate this post, is there any way I can get an email every time there is a fresh update?
persialou says
Hi! You can subscribe to the newsletter, which comes out (somewhat) weekly with updates. 🙂
doubleJ says
oh my god! it’s so wonderful! i really really love it! you have amazing talent! i love that flowers and colors no, actually everything is so nice!weel done!<3
persialou says
Thank you so much! Made my day. 🙂
Nichola says
This is super gorgeous and would not look out of place in a swanky boutique! Well done! Just a quick question about yarn amounts – how many skeins of the black did you use?
persialou says
Just one skein of the black. Thank you! 🙂
Sara says
I work with teens at a public library and I think my girls would love this. About how long does it take you to make one of these? Just the clutch, not the crocheted flowers, too. Thanks!
Alexis says
I’m not sure. It’s been a couple years since I made this one, but I would guess probably about a few hours. 🙂 Have fun!
Candace says
Plastic canvas is le bombe. I make purses and earrings.
Soncie says
Alexis, honey, you’re a DIY rock star! You make it look sooo easy!
Thanks for sharing your incredible DIY projects with the rest of us mortals! 🙂
persialou says
Aw shucks. Thank you! Made my day. 🙂
Tracy says
Wow! You did a super job with both the design and the tutorial. Thank you so much!
Alexis says
You are so nice! Thanks so much for coming by! 🙂
Ei says
You have some of the best step-by-step tutorials for your projects. I came here by way of Ravelry for a crochet project, but have been inspired by your other projects. Thank you for sharing your talents.
Alexis says
Thank you so much! What a sweet comment. 🙂
Rebecca says
Is the back of the clutch left unadorned?
Alexis says
Hi! Yes. I just covered the back panel with the basket weave pattern in black. You could definitely add flowers to the back too if you like!
Rebecca says
I am just about finished and have enjoyed every minute and every stitch! I didn’t find the closure at Michaels so I am going to see if Hobby Lobby carries it. Sewing the pieces together looks tricky but I shall try. Thanks for replying.
Alexis says
Oh yay! I’m so glad you enjoyed making it! I would love to see it! You can share it to my facebook page (facebook.com/persialou) or tag me on instagram (@persialou) if you use either of those. Thanks so much for stopping by! 🙂
Aleksandra says
This clutch is so lovely that I need to make it! Actually I ran through your crochet tutorials and I’m so glad you post instructions for cute yet useful things, not only granny-like coasters 😉 You got me inspired.
Alexis says
Thank you so much, Aleksandra! I love making non-granny crafts. Ha! 🙂 Thanks for stopping by and leaving a comment. Makes my day.
Emily B says
I think this clutch is so cute! Super cute and EASY!
I’m actually working on 3 right now for my wedding, but I had a question. Does the felt lining go all the way around the inside or is it just on the back of the clutch? I don’t think my piece of felt will fit from the flap to the front and the tutorial doesn’t talk about two pieces. Thanks!
Sally Bermilda Perfuffle says
Where did you get the magnetic clasp for this clutch?
Thanks!
Alexis says
I’m not sure if this is the same exact one, but it is similar to what I used: https://amzn.to/31sewFC
Dolly Titus says
You say a htrc are talking in British terms or US terms I have never heard of a half treble crochet how do you do it? Do you yo 3 times and then go through st and yo and pull through all 3 yo to get you htrc?
Rebecca Payne says
So cute and clever.
Kanati says
Aww yes! I remember making a few of these years ago….they were fun to make and always turned out really nice. Yours is just adorable! Yes, add a strap of some kind to it, even just a short strap, like a wrist strap would be cute. The type I made was very close to yours, but opened a bit wider with 2 slots or pockets inside with a Velcro closure, and some had a zipper closures. They made great makeup bags to slip into your purse and even to put in with your luggage while traveling. Seems like I even used part of the pattern and made a cover for my Bible with a zipper too. Again, yours turned out so cute! Keep up the good work!