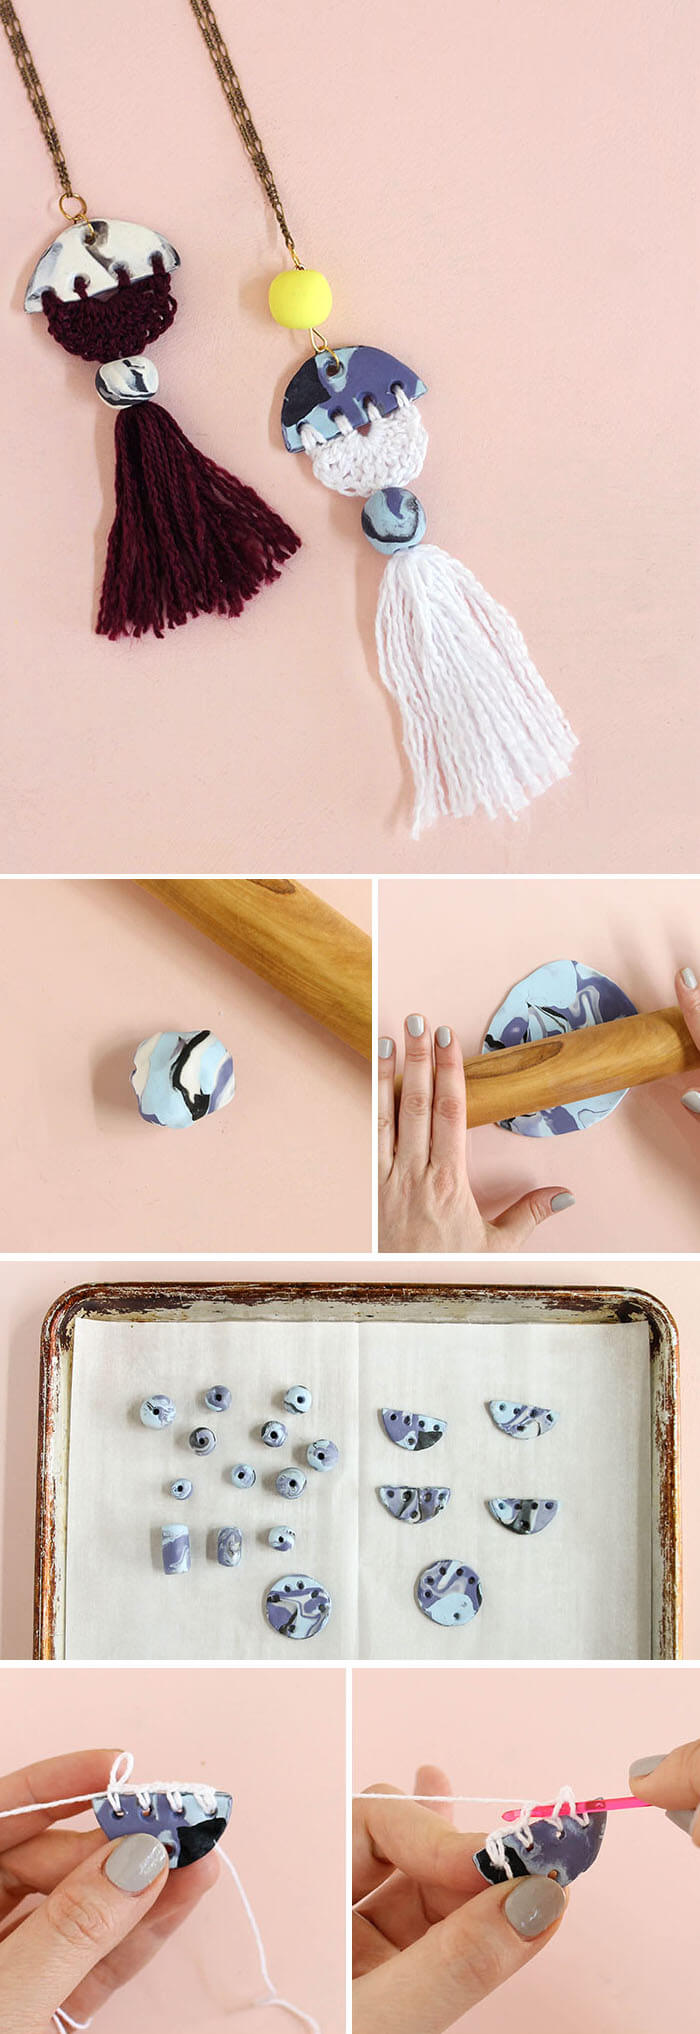
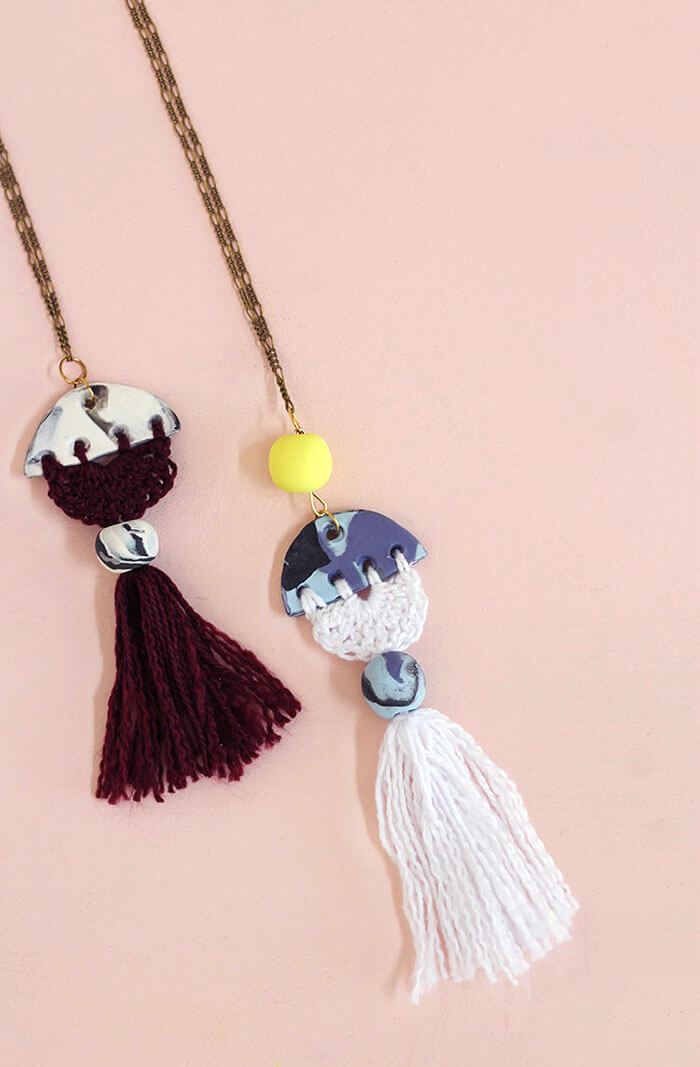
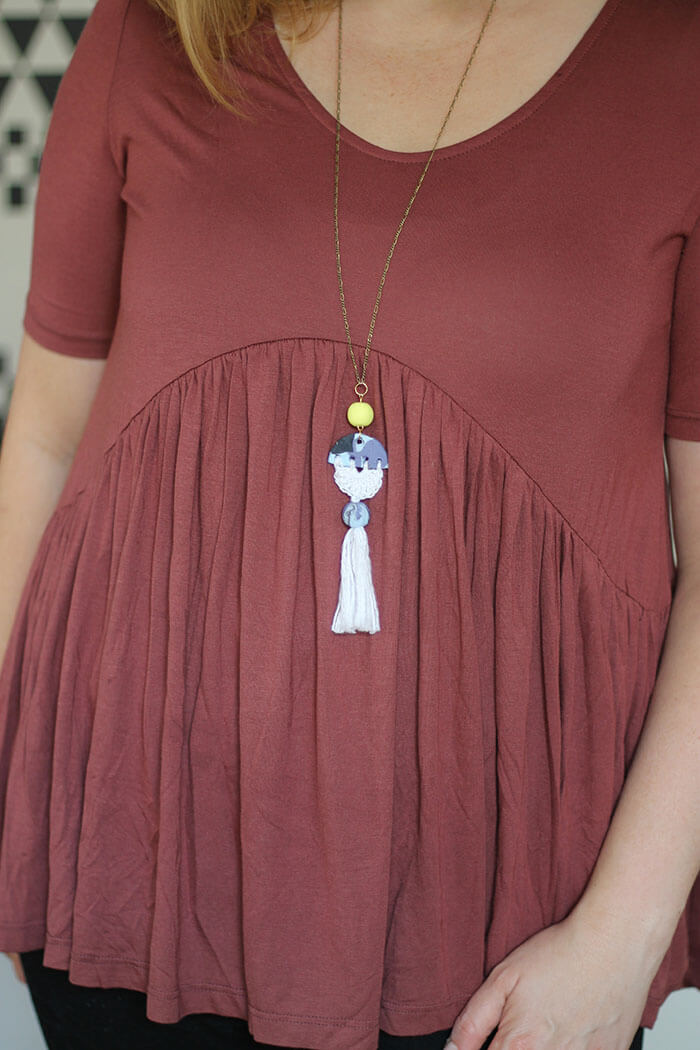
This Modern Tassel DIY Necklace combines marbled clay and a little bit of thread crochet for a really unique piece of jewelry. So much fun to make and easy to customize – you can make a whole bunch in an afternoon! This post was originally shared at Crafts Unleashed and contains affiliate links, which help to support this blog. Thank you!

I have been wanting to try to combine clay and thread with maybe a little crochet thrown in too for a while now, and these modern tassel necklaces are what I ended up with. These babies were really so much fun to make! You get to do some clay marbling, some crocheting, make a tassel – it’s like all of my favorite things rolled into one.
I really kind of dig them and now I want to make all kinds of things with clay. So much fun, you guys! I’m going to walk you through all the steps to make your own DIY necklace in case you like them as much as I do.
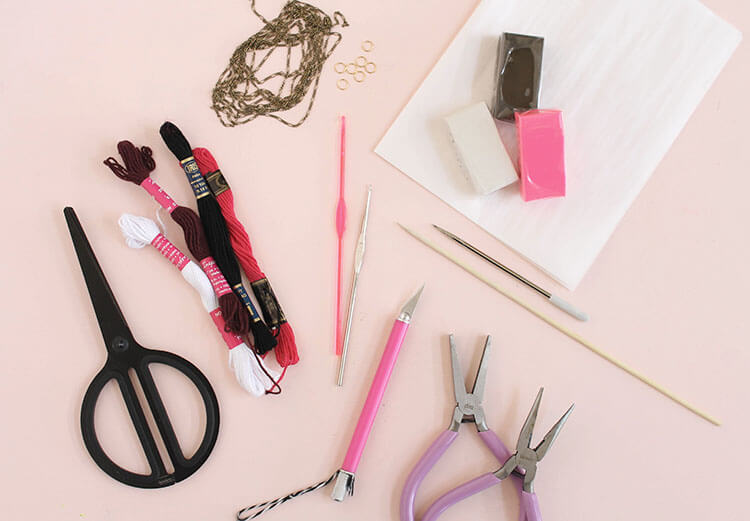
Modern Tassel DIY Necklace Supplies
- Oven Bake Clay
- Craft Knife
- Bamboo Skewers
- Parchment Paper
- Jewelry Pliers
- Embroidery Floss
- Crochet Hooks – 1.50 mm and 3.00 mm or D hook
- Small Chain
- Jump Rings
Step One – Marble Clay
This step was maybe the one I had the most fun with. I haven’t done much clay marbling in the past, so I was really excited to give it a try. I found it to be really simple and addicting. I could seriously do this all day!
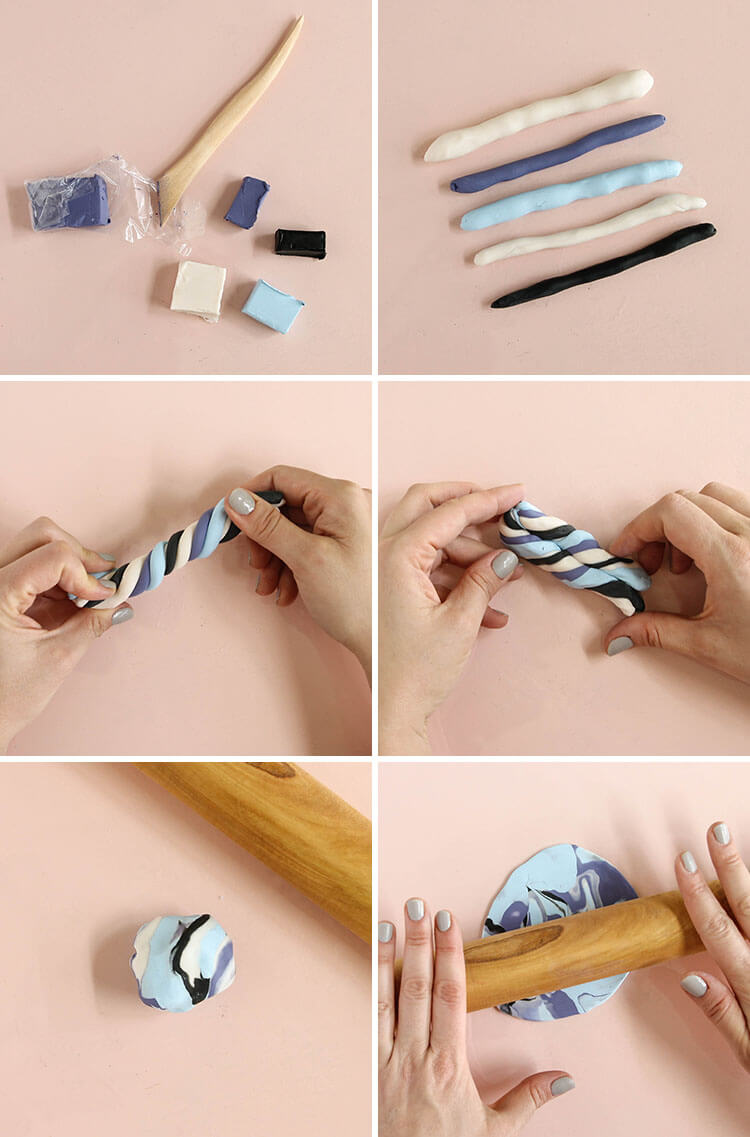
- Start by selecting your colors and tear or cut off a little bit of each color. Larger pieces will give you more of that color in the finished piece.
- Roll each piece into a little snake. I was going for more white marbled through so I did two pieces of white clay.
- Twist your snakes all together.
- Fold that large twisted snake in half and twist again.
- Smoosh your twist into a ball.
- Roll it out with a rolling pin or other round tube.
- Admire your beautifully marbled clay. Good job you!
Step Two – Cut Circles
Once you have your clay marbled as you like it, use a small circle shape as a template to help you cut out circles. I used a little lid. I actually pressed the lid into the clay like a little cookie cutter, but simply tracing around your template with a craft knife would work great too.

Smooth the edges of your circles a bit with your fingers, then cut in half with your craft knife and a straight edge. Use a bamboo skewer to pierce a hole at the top of your semi-circle and four holes evenly spaced along the bottom edge.
Step Three – Make Clay Beads and BAKE!
Next up, BEADS! These were also super fun to make. Grab the leftover marbled clay or choose a fresh contrasting color and get rolling. Just gently roll a small piece of clay into a little ball and then push a bamboo skewer through the middle to make a hole.
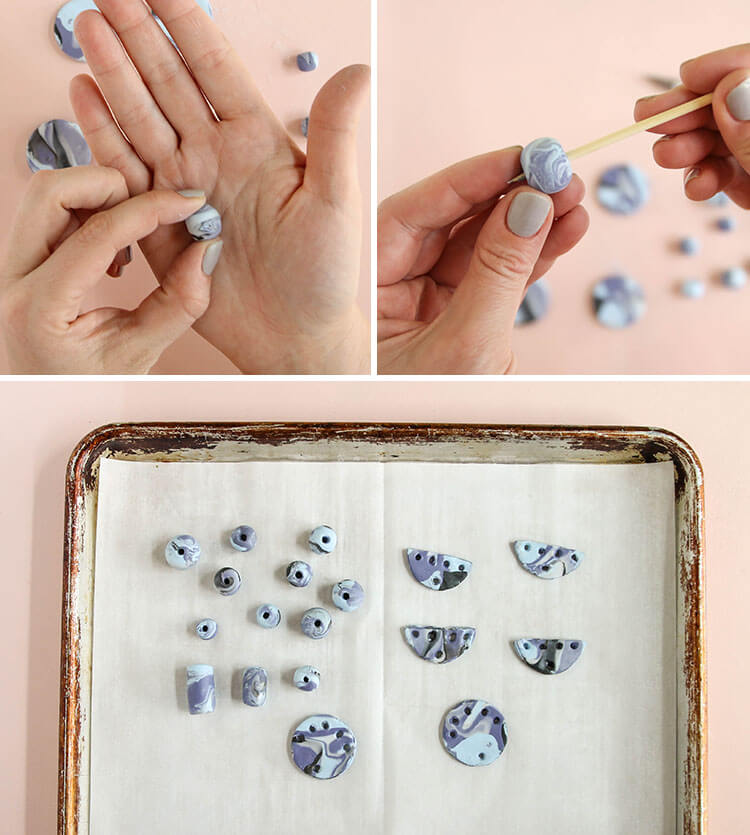
When you are all done, place all of your beads and marbled semi-circles (and whatever other amazing creations you have come up with) onto a parchment lined cookie sheet. Bake at 275 degrees for 15 minutes per 1/4″ of thickness.
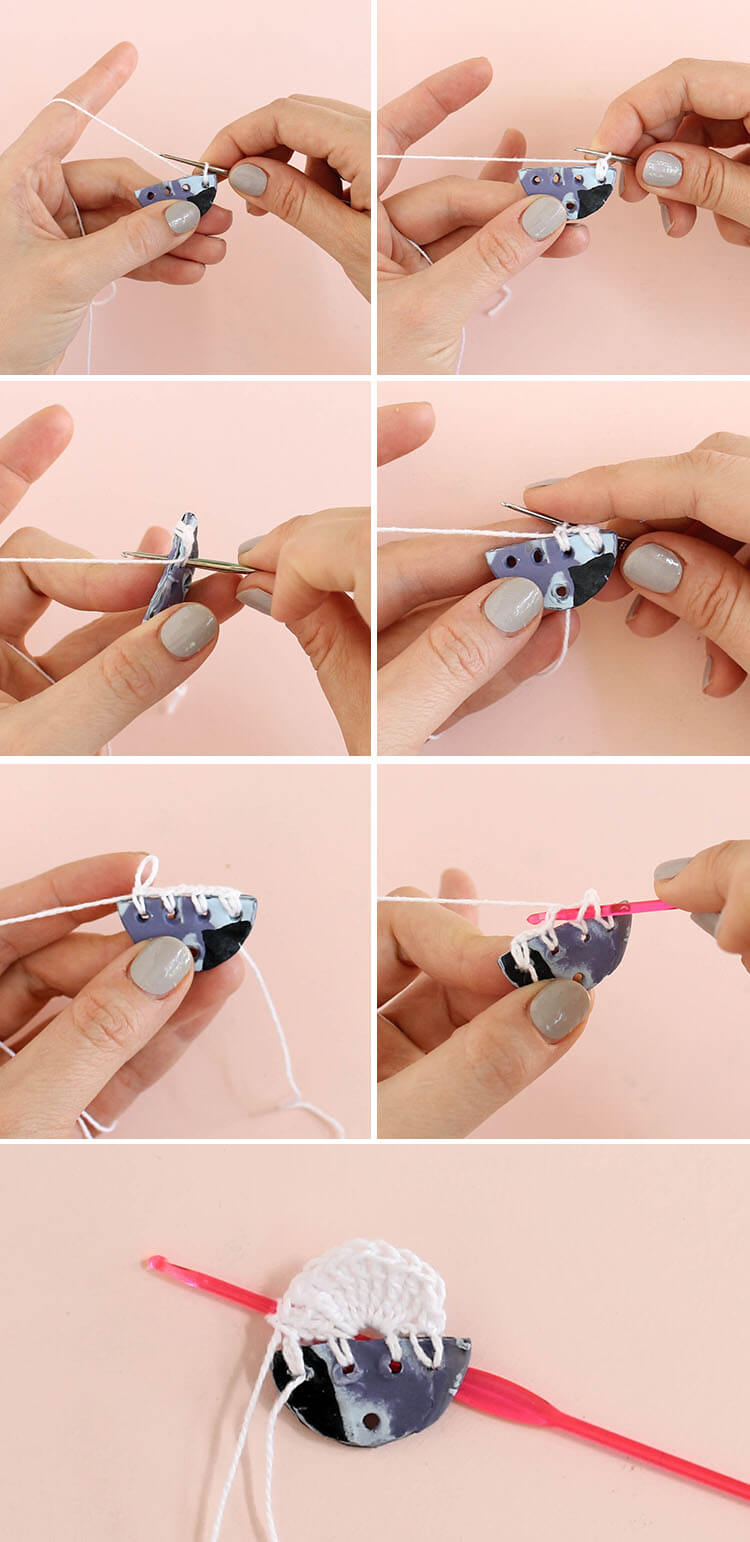
Step Four – Crochet
When your clay pieces are done baking and cooled, you can add a crochet semi-circle to the bottom of your clay semi-circle. I love the way they go together! Grab your smaller crochet hook and embroidery thread! (I am using American crochet terms.)
- Join your thread to the piece through the hole on the right side.
- Chain one and work a single crochet through the same hole.
- Chain two. Work a single crochet through the next hole.
- Work two chains between each hole and one single crochet through each hole.
- Switch to the larger crochet hook. Chain one and work one single crochet stitch in the single crochet stitch. Then, work nine treble crochet stitches through the center chain two space.
- Work one single crochet in the last single crochet stitch to form the shell. Finish off and use a needle to weave in your ends. Ta-DA!
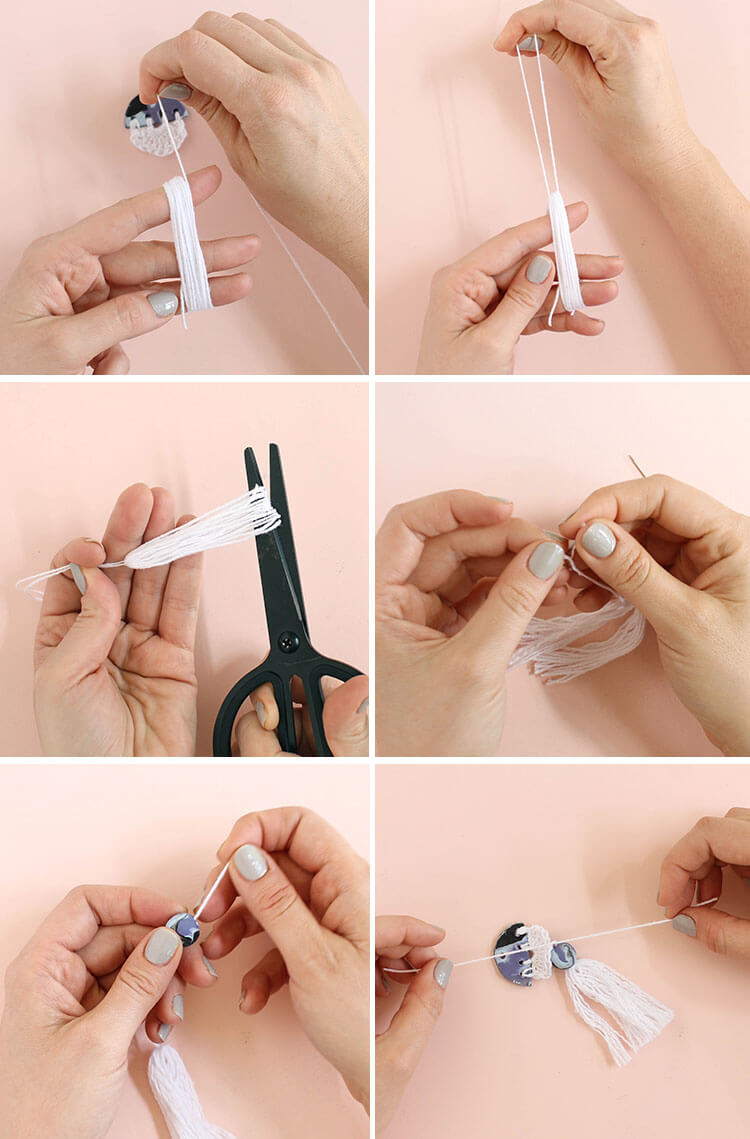
Step Five – Add Tassel
Now our DIY necklace is getting some awesome tassel flair. It’s so easy to make a little tassel. Here’s how:
- Wrap the embroidery floss around your fingers several times until your tassel is as full as you want it to be.
- Tie a piece of thread in a double knot around one end of the loop.
- Cut the other end of the loop.
- Use your fingers and a needle to unravel each strand of embroidery floss to make the tassel a bit fuller. This is totally optional and takes a few minutes to do, but I like the way it looks.
- Select one of your awesome handmade beads and thread it onto the top of your tassel.
- Tie the tassel onto the base of the crocheted piece with a double knot. Clip off the excess.
Step Seven – Attach Chain
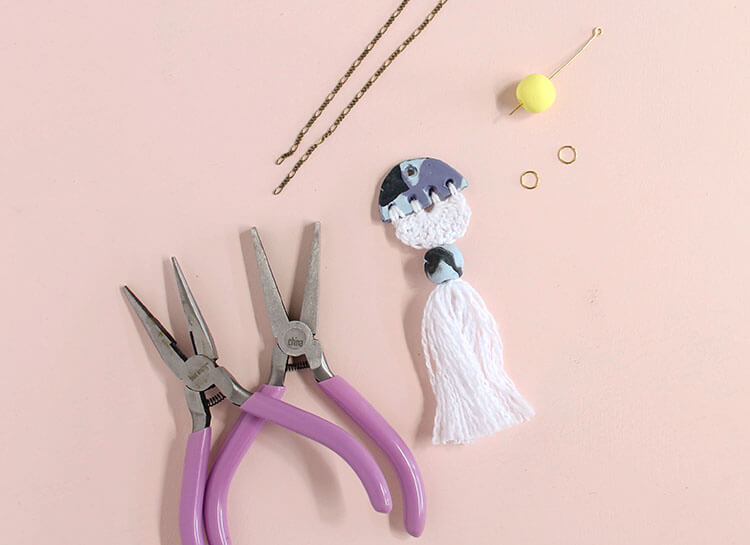
Almost done! Finish up your DIY necklace by adding a jump ring through the top hole of the clay semi-circle. Then use your pliers and a jump ring to attach you awesome tassel pendant to the chain. If you want, add another contrasting bead above the pendant like I did with the blue and white necklace. That’s it!
I have worn both of these necklaces several times since making them. I really like the combo of the clay and thread. It’s a great contrast and the marbling just puts it over the edge.

If you make your own Modern Tassel DIY Necklace, it would make my day to see it! Share your photos to my facebook page or tag me on instagram or twitter (@persialou), and don’t forget to use the hashtag #persialou for a chance to be featured.
Happy Making!

Other stuff you might like: