This post contains affiliate links. Thanks for supporting Persia Lou!
Today I am teaming up with some of my very favorite bloggers for a fun Craft Wood Challenge! Each blogger had to make some wall art or decoration using the craft wood you can find at your local craft store. After you check out what I made, be sure to see all the other sweet projects at the end of the post! (Psst – they are awesome!)
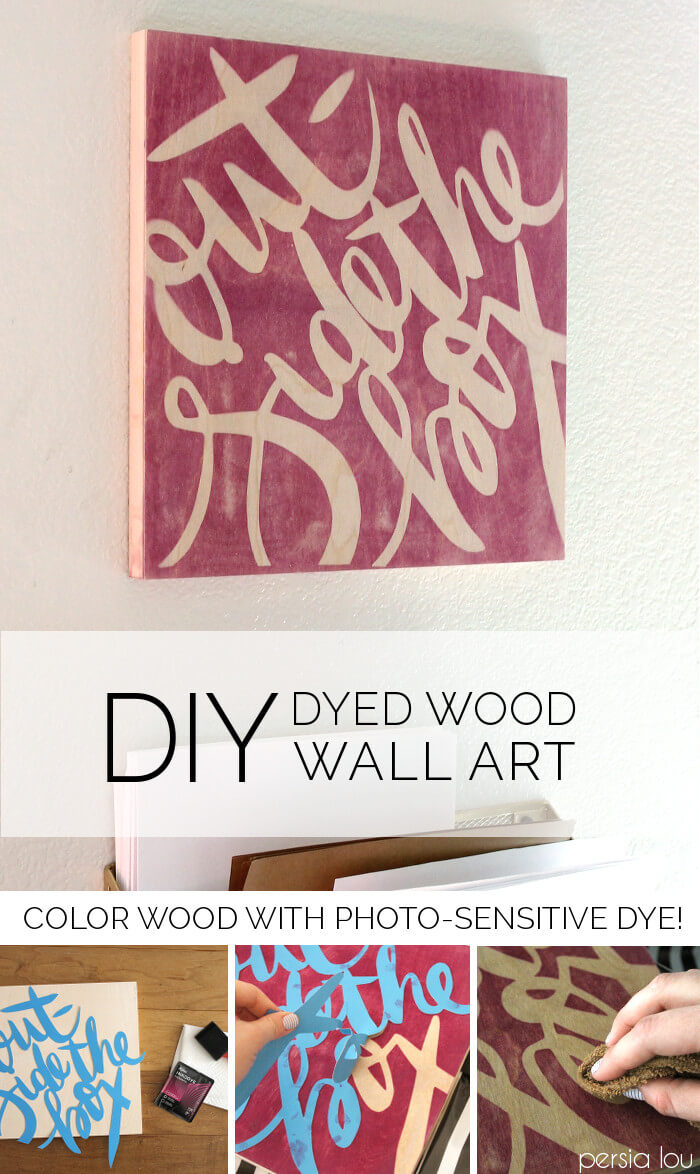
But for now – Have you guys heard of Inkodye? It’s a photosensitive dye, which means you can dye things with THE SUN.
No joke.
So, obviously, I have been wanting to try it since I heard of it, and this seemed like the perfect opportunity to give it a go.
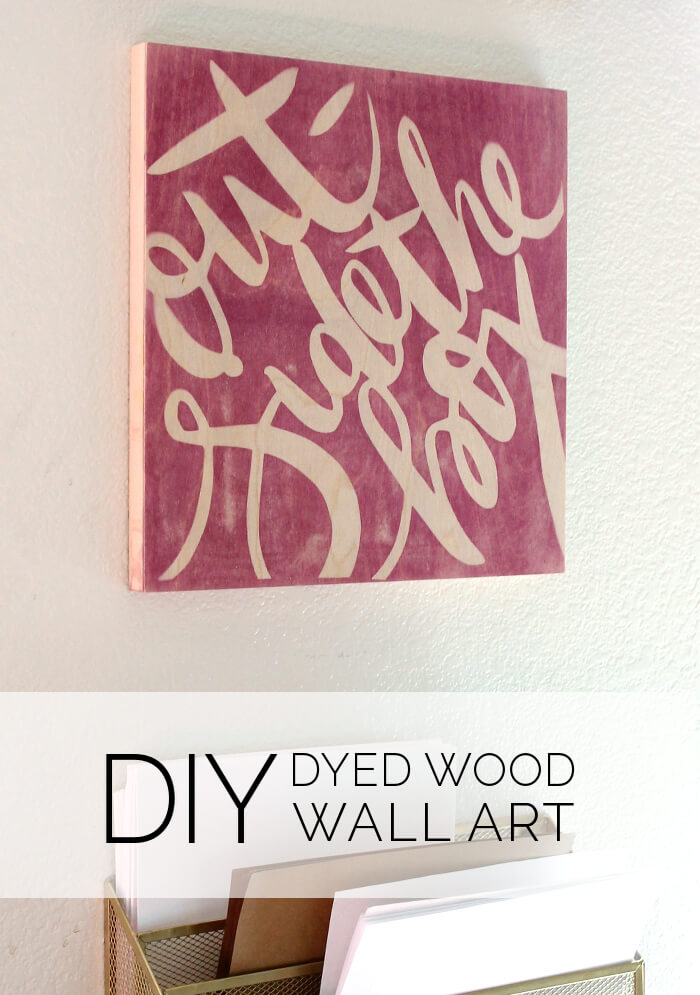
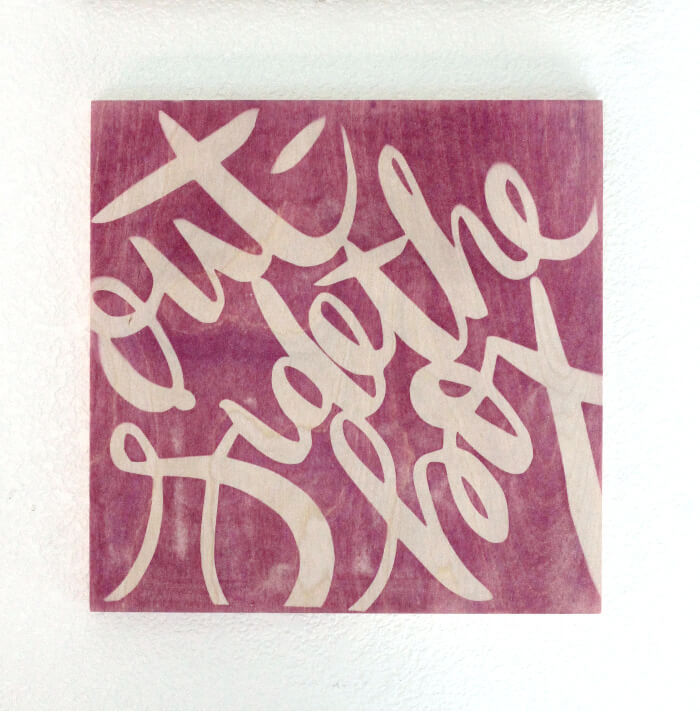
I went over to Michael’s and picked up a 12″ wooden canvas. It’s just a square piece of wood, but it has a canvas frame on the back, which makes it easy to hang. Perfect!
Ready to see how I made it? Let’s do this! Here’s everything I used:
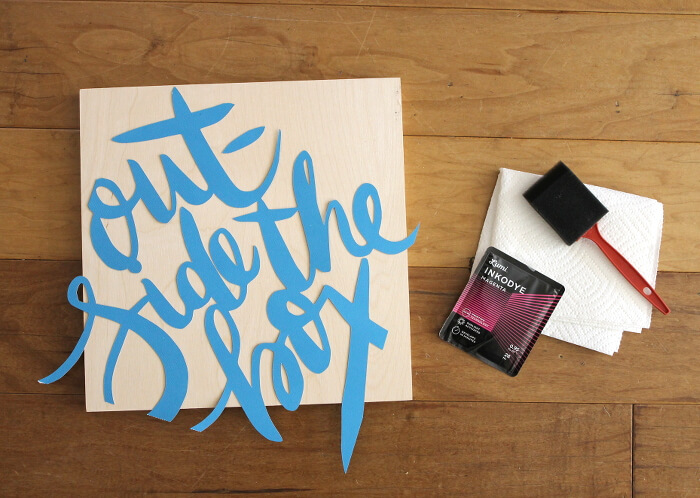
- 12″ x 12″ Wood Canvas
- Inkodye (I used magenta)
- Cardstock
- Silhouette, cutting machine, or craft knife
- Piece of glass or acrylic
- A sunny day
- Hot water, detergent, and an old rag
I started off by lettering my phrase. I wanted to hang this piece in my in-process craft room, so I thought something kind of inspirational would be good. And since the canvas was square, “outside the box” came to mind.
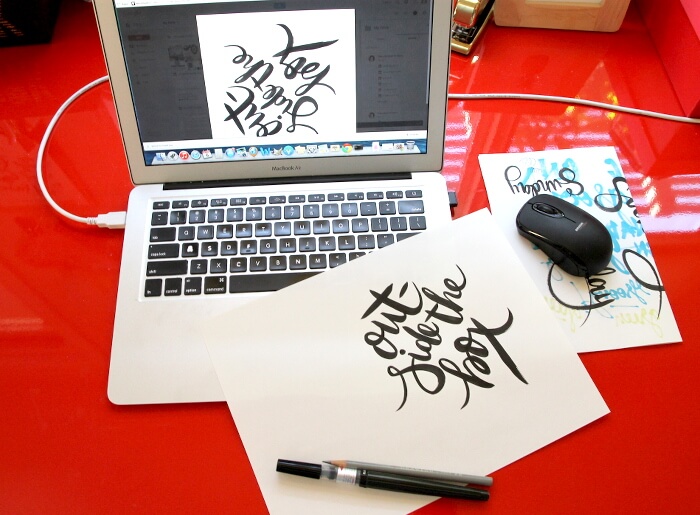
I scanned my lettering into my computer, and played around with it in photoshop a bit to get it the placement right. Once I was happy with it, I used my Silhouette to cut the design out of a piece of cardstock. I designed it so all of the words touched, which meant the phrase came out all in one piece. If hand lettering scares you or if you don’t have a Silhouette, you could totally print out a phrase and cut it out with a craft knife.
 Now it’s time to dye some wood!
Once the dye is in the sun, it will start processing right away, so it is important to prep everything before you begin the process. You want to add the dye to the canvas in a kind of dark or shady place. I worked in my garage, which worked great. Wherever you decide to prep your canvas, be sure to protect any surfaces you are working on – this stuff will stain anything porous – wood, fabric, concrete, etc.
So, apply the dye to the top of your canvas, spread it over the entire thing. Then, use a paper towel to wipe off the excess dye. The canvas shouldn’t be too wet. Now, position the cardstock cut-out onto the canvas and top it with the piece of glass or acrylic (this keeps the paper positioned and prevents it from blowing away in the wind). Carefully carry it out into direct sunlight.
As soon as I took the canvas out into the sun, the dye began to darken:

After about five minutes, it was a nice deep color. Cool, right?! When it’s all done processing, bring it back inside out of the light and prepare to be wowed.
 Putting the glass on top of the cardstock gave it such a nice clean print. I love it!
To prevent the letters from darkening in the light, you need to wash off any remaining dye. I filled up a bowl with hot water and detergent and used an old rag to scrub the dye off the canvas.
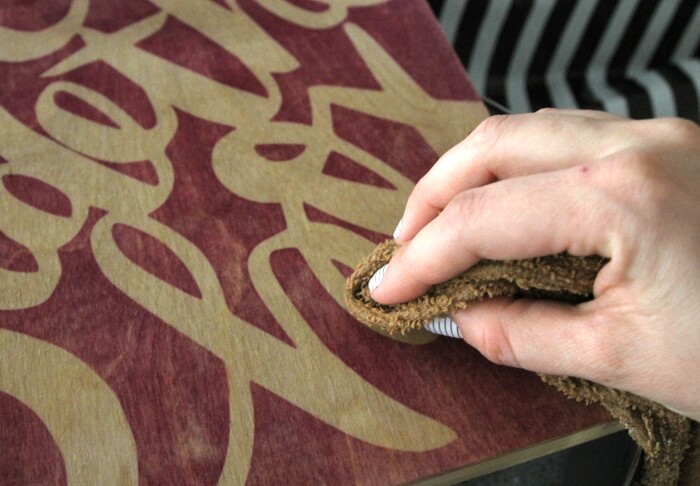
The dyed portion lightened a bit as I did this, but it also let the wood grain show through more, which I thought was great. When it was all dry, it was ready to hang up!
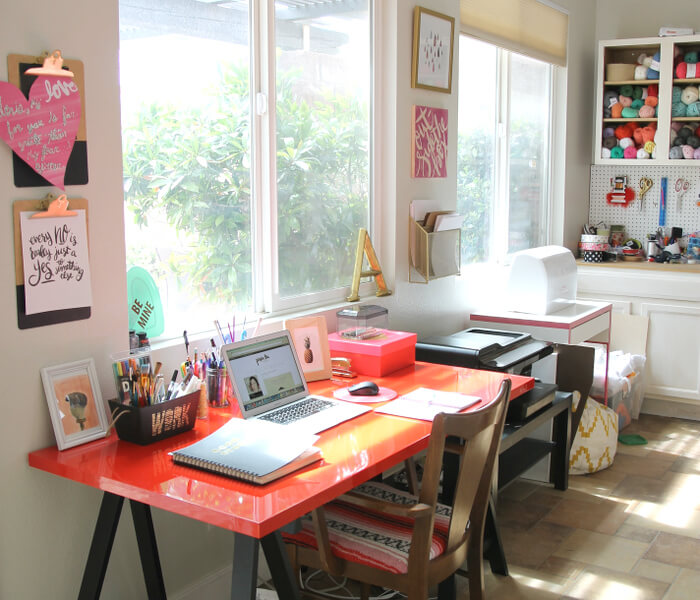
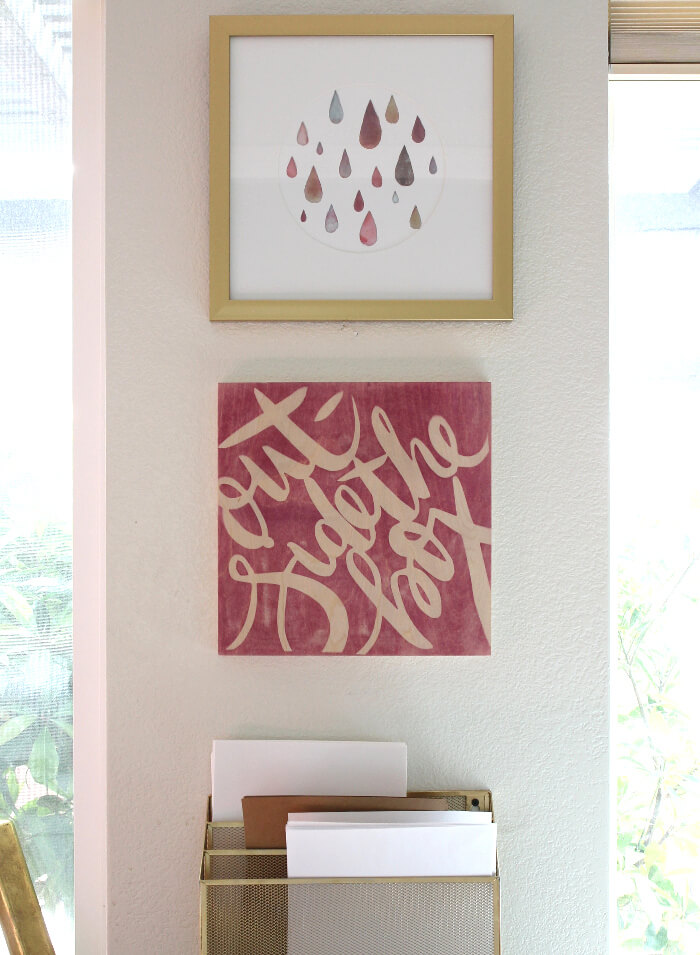
I added it to my in-progress craft room, and I like it with hanging over the printer for now.
 I had a lot of fun making this little project, and I’m definitely looking forward to trying more lumodye projects in the future.
Now, who’s ready for more great wood projects?!
These ladies are all so, so talented. I know you are going to love what they have made. Go ahead, and get clicking!


Comments + Project Love
Anu says
Always love your lettering. The dye on the wood looks so pretty!
persialou says
Thanks, Anu!
Anna @Annabode says
This is so cool! I’ve never heard of inkodye, but now I’ll have to try it 🙂 The color you chose goes so beautifully with the rest of the room too, especially that raindrop artwork above it. I wish I had such a pretty space to work in!
persialou says
Thank you, Anna! It is so cool! I can’t wait to play around with it some more!
Amy W says
This is INSANELY cool. Your hand lettering knocks my socks off every time, too.
persialou says
Thank you! You are too nice!
Jennifer @ Brave New Home says
What an amazing piece! Seeing it on your wall I kinda can’t believe you made that. Inkodye…what an interesting idea!
persialou says
What a great compliment! Thanks!
Bri says
Wow! That is so cool, I’ve never seen anything like that dye!
persialou says
So cool, right? It was really fun to play around with.
Colleen Pastoor says
This is crazy cool! I need to find something to dye with this stuff! plus… anything with your handlettering is a total win in my books 🙂
Amy @ Homey Oh My! says
This is really, really cool, and your lettering keeps getting prettier and prettier- I LOVE IT.
Trisha D. @Black and White Obsession says
Gosh, your handwriting is off the HOOK!
persialou says
Haha! Thank you so much!
Breanna says
That is so cool! I need to get my hands on some of that stuff 🙂
Bethany says
This turned out great! I’ve never heard of the dye before, but it looks like so much fun. Pinned!
Tan of Squirrelly Minds says
I’ve never used photosensitive dye but man it looks like fun!
ps, your craft room is TO DIE FOR. I just love all that light
Monique | WritingMonique says
Wow, wow, wow! Absolutely gorgeous!
persialou says
Thank you so much!
Brynne@TheGatheredHome says
This is so cool Alexis! What a neat process! And I love the phrase you chose!
persialou says
Thanks, Brynne!
Javacurls says
I love the way this came out!! I actually received a Inkodye kit for Christmas. This will be a great first Inkodye project!I do have one question… In your instructions, you said to apply Inkodye to the entire canvas and then lay your words on top of the wood. Did you wash off the Inkodye that was under the card stock after you put it out in the sun? The area under your words came out so crisp and clean I was just a little confused and thought maybe I should apply the card stock to the wood and then put the Inkodye on top. Any advise you can offer, would be great! Thank you!! 😉
persialou says
Hi! I covered the entire thing with inkodye and then scrubbed it off after when I brought it inside. The wood that was under the cardstock has gone a bit pink since so I would recommend really scrubbing it well to get all the ink off. One thing I read said to scrub it for 10 minutes. Putting the piece of glass on top will help you to get the crisp lines. 🙂 Good Luck!
Javacurls says
Thanks!!