
The Vintage Disneyland Room is slowly coming together, and this is probably my favorite completed project so far. The kids’ room’s design is inspired by the Disneyland attraction posters of the 50s and 60s. To keep with that theme, I decided I wanted to give the furnishings a mid-century modern feel.
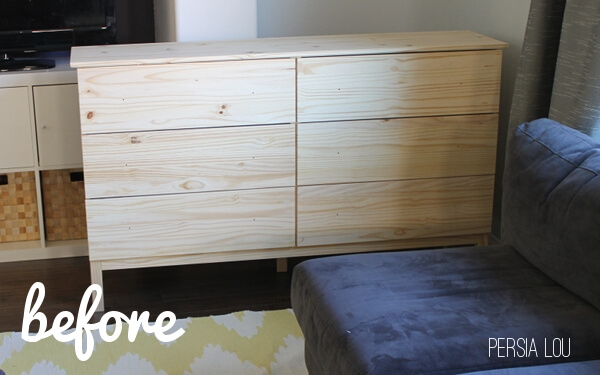
We bought this inexpensive (but real wood!) Tarva dresser from Ikea with the idea of sprucing it up a bit:

I searched pinterest for mid-century dressers to inspire me, and loved the look of painting the sides and top, but keeping the drawer fronts wood tone (like this beautiful piece from Dream Green DIY and this one from Wood Bird Design)
We started out by building the entire dresser. In some Ikea hack tutorials, they paint or stain before assembling. It is probably easier to paint a bunch of flat boards rather than an assembled dresser, but we thought the dresser might go together better and more easily before it was painted. The plan was to paint everything a chartreuse semi-gloss, except for the drawers that would be stained, and then add brass pulls.
Here’s the dresser all assembled in our living room corner before we got to staining and painting:
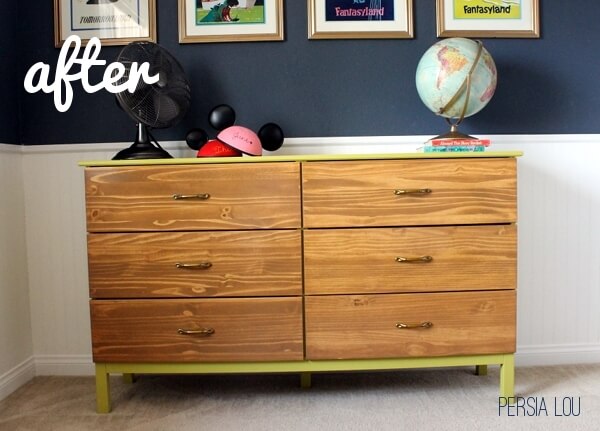
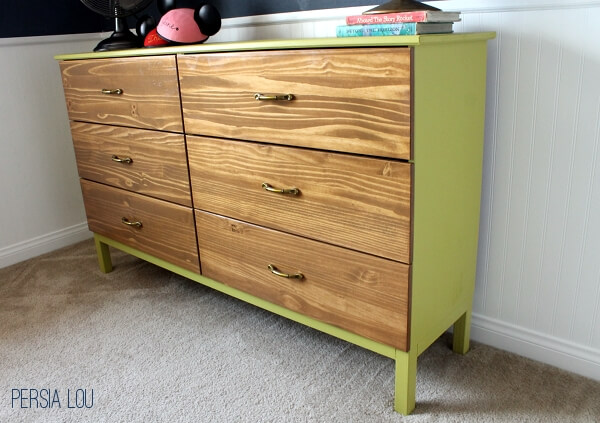
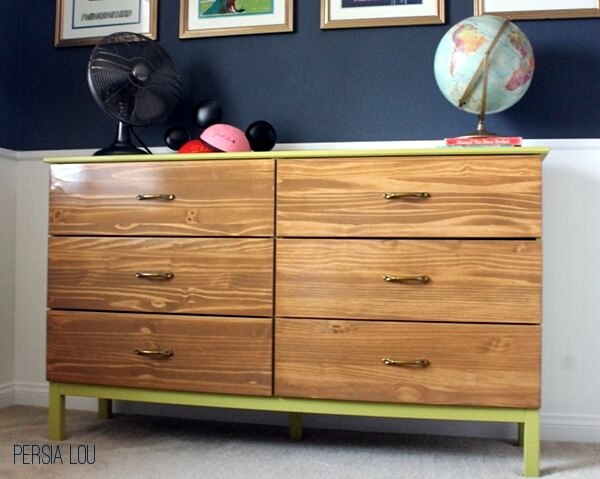
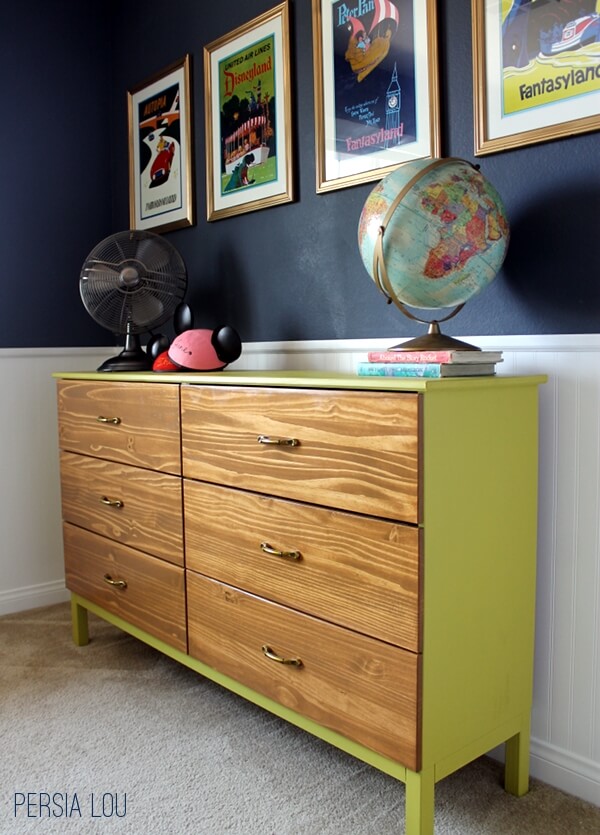
Annnnnd there’s the after. Have I mentioned I really like it?
To get this result, we first needed to fill the pre-drilled knob holes in the drawer fronts. Use a little bit of wood filler in each hole. Use just enough to fill in the hole, and try not to spread it around the hole too much because the filler may not take the stain the same way the wood does. You can see what the filled hole looks like here:
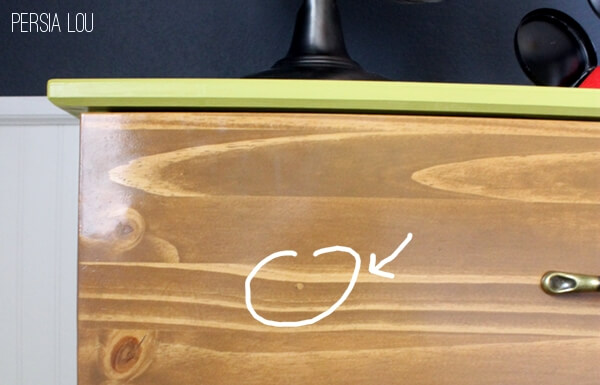
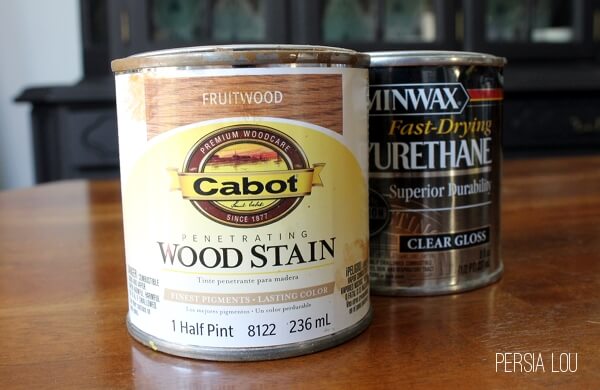
It’s really not too noticeable. After filling and sanding to remove any excess wood filler, we applied two coats of a medium tone stain and two coats of a gloss polyurethane.
Finally, we drilled new holes for the brass pulls we had selected, and then she was all done! Whaddya’ll think?
I can’t wait to show off the completed room! It’s coming along. Just a few more projects to finish up (like those dang quilts…)


Comments + Project Love
Brandi says
Beautiful makeover! I love the two toned look. The shade of green is such a great color.
Alexis says
Thanks so much, Brandi! I really like the way it turned out too!
Lindsey Buchholz says
This looks great! Love the look of real wood
Alexis says
Thanks, Lindsey! Me too!
ngnrdgrl says
Great Ikea paint job! I had actually been eyeing that TARVA with the intent to paint. Yours turned out lovely and so true to your inspiration photos. Thanks for sharing with us! Pinning it.
Alexis says
Thanks! I think it is actually a pretty good, sturdy dresser for the price. The drawers go in and out smoothly, which is important to me in a dresser. 🙂 Good luck with your project!
My name is Rita says
I am loving the green and wood stain combination! If you get a chance, please link this up to my linky party: http://suburbsmama.blogspot.com/2013/05/sunday-link-party-7.html
Alexis says
I will do that! Thanks!
Krista @thehappyhousie says
Wow! What a fabulous hack!! And you staged it well too… great job!!<br />Krista
Jenna LaFevor says
Awesome hack!!! Love the green! Jenna @ <a href="http://www.rainonatinroof.com" rel="nofollow">Rain on a Tin Roof</a>
Christina iGottaCreate says
Love it! Pinned it! Thanks for linking up at i Gotta Create!<br /><br /><3 Christina
Christina iGottaCreate says
Featuring you ~ you're a STAR over at I Gotta Create! Thanks so much for linking up. :)<br /><br /><3 Christina<br />http://igottacreate.blogspot.com/2013/05/fantastic-furnishings.html
Chrissy @ Adventures in DIY says
Just found your blog via Tater Tots & Jello. This dresser turned out wonderful!<br />I'm a big Disneyland fan, especially vintage Disney. Can't wait to see the completed room! <br />I'm now following via BlogLovin'. 🙂
Alexis @ persia lou says
Hi Chrissy! I am a huge Disneyland nerd. Almost to an embarrassing level. Almost. 🙂 Thanks so much for following!
Bethany says
Beautiful!! What brand/color is the green paint?
Alexis Middleton says
Thanks, Bethany! It is Valspar City Chartreuse.
monst says
Hi Alexis!I loved your hack!<br />What about the green colour you used?
Alexis Middleton says
The color is Valspar City Chartreuse. Thanks so much!
Krista thehappyhousie says
I love this fabulous transformation so much that I am featuring it today at the Get Your DIY On Challenge! Come by at 7pm EST to grab your button and bring along a holiday sign project if you have one to share! Hope your weekend has been awesome:) <br />~Krista
For My Love Of says
Wow! This project turned out beautifully! I'm feeling incredibly inspired to make the 5+ hour long (round trip) drive to ikea and try it out myself.
Ethan Smith says
Buy and sell new and used modern, outdoor, office, bedroom and home furniture.<br />Choose from a great selection of gently used furniture for every room in your home.<br />More here <a href="http://www.postallads4free.com/household_furniture-102.html" rel="nofollow">via link</a>