Learn how to make pins at home for Valentine’s Day! With this simple process, you can create your own custom lapel pins in the style of enamel pins right at home with just a few simple supplies. They make great Valentine’s Day gifts when paired with my free printable cards. Thanks to DecoArt for sponsoring this post, which also contains affiliate links that help to support this site. Thanks!

It is a dreary, cold, rainy day here, but I am ready to cheer things up with some hearts and candy and lots and lots of pink. Anyone else ready for all the pink and all the hearts?! I’m feeling like this world can definitely use some more love, so I’m ready to bring on Valentine’s Day!

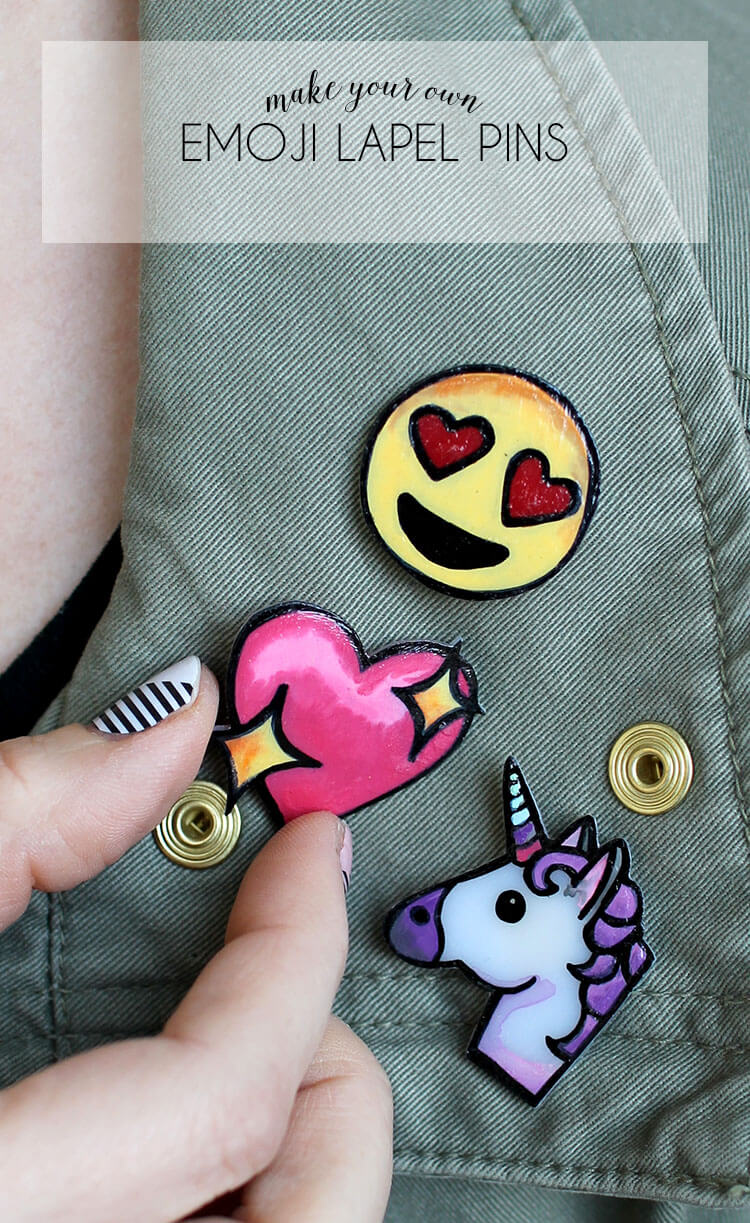
My first V-Day craft of the season are these cute little DIY lapel pins. This is actually my third time sharing this trick for making your own pins at home (check out my emoji pins and sweet shop pins), but I love making these guys and wanted to put a Valentine’s Day spin on things! I also whipped up a some free printable cards to attach your finished pins to, which make them the perfect little gift for your favorite valentine (or galentine!). Okay, let’s learn h0w to make pins!
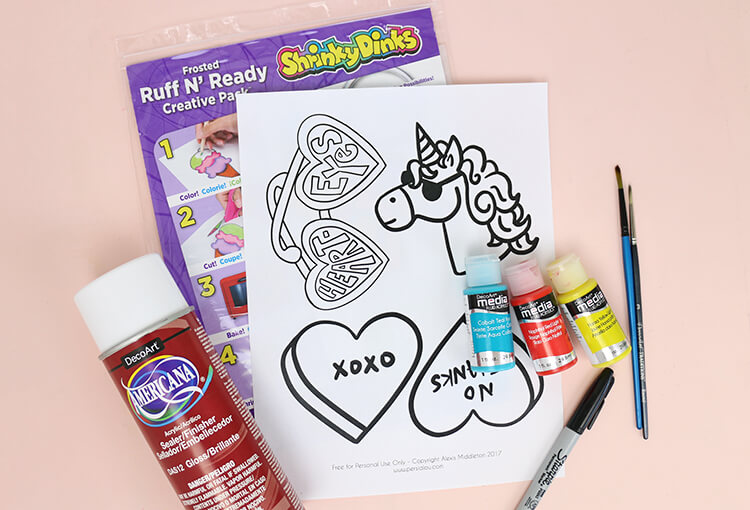
DIY Valentine’s Pins Supplies:
- Plastic Shrink Film (For this batch, I used frosted, but I have used white in the past and the finished pins are more opaque.)
- Acrylic Paints (I used and recommend DecoArt Media Fluid Acrylics because the are highly pigmented and flow like a dream so you need just a drop.)
- Black Permanent Marker
- Small Round Brushes
- Pin Backs
- Hot Glue Gun
- Gloss Varnish (You can use spray or brush on)
- My Valentine Pin Designs Download
- My Valentine Pin Cards Download
How to Make Pins:
Start by printing out the Valentine Pin Designs PDF (included in the supply list above). I have included several designs – heart glasses, a unicorn, and conversations hearts (two with phrases and two left blank for you to add your own phrases). You might also want to check out my emoji pins and sweet shop pins for more ideas and design choices. If you are using the “frosted” shrink film, which has a rough surface, then you are all ready to trace and paint. If not, you need to first lightly sand the surface of your shrink film before proceeding. This will allow the ink and paint to adhere to the plastic surface. When you have your printed designs and your roughed up shrink film, you are ready for the fun part!

- Place your shrink film on top of the printed designs and trace the design with a permanent marker.
- Next, use watered down acrylic paints and a small round brush to paint your designs. NOTE: It is important that your paint is thinned out quite a bit. When the shrink film bakes, it will shrink up a lot and if you have thick layers of paint it will bunch up on the surface of your pin. The DecoArt Media Fluid Acrylics are great for this because they are thinner than most craft acrylic paints. Also, be aware that your colors will darken after baking for the same reason, so paint your designs lighter than you want the finished pieces to be.
- If desired, go back over the black lines with your permanent marker again once the paint has dried.
- Finally, cut out your designs on the outside edge with a pair of sharp scissors. Cut carefully and go slowly! The shrink film can tear if you aren’t careful and that is very sad.
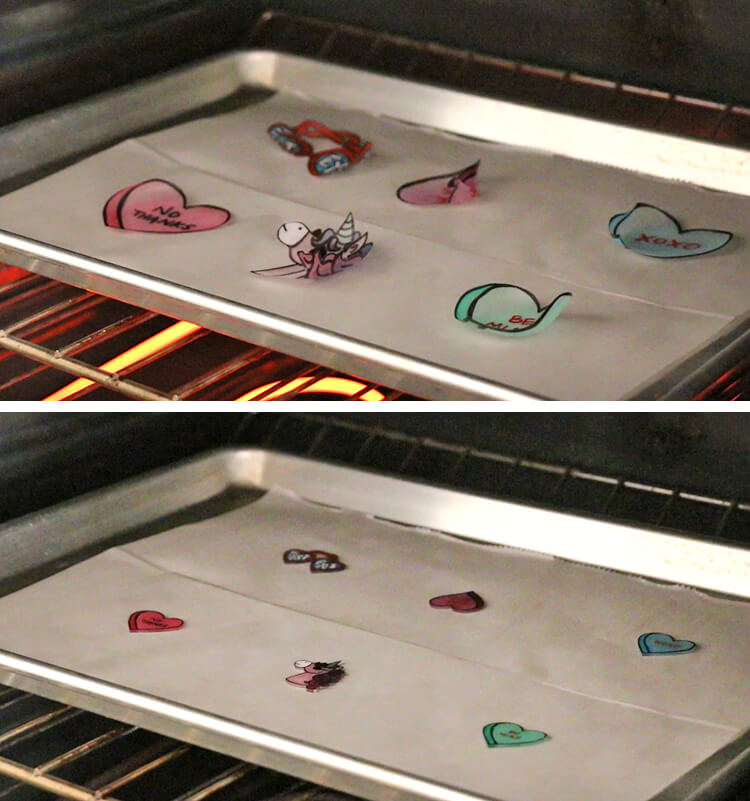
The next step in how to make pins is to bake them! Place your designs colored side up on a baking sheet lined with parchment paper or tin foil. Follow the baking instructions that came with your shrink film. Different brands have different instructions, so stick with what your label says. The brand I used here baked at 325 for 3-5 minutes. Your pins will curl up as they shrink, but should lay completely flat again when they are done.
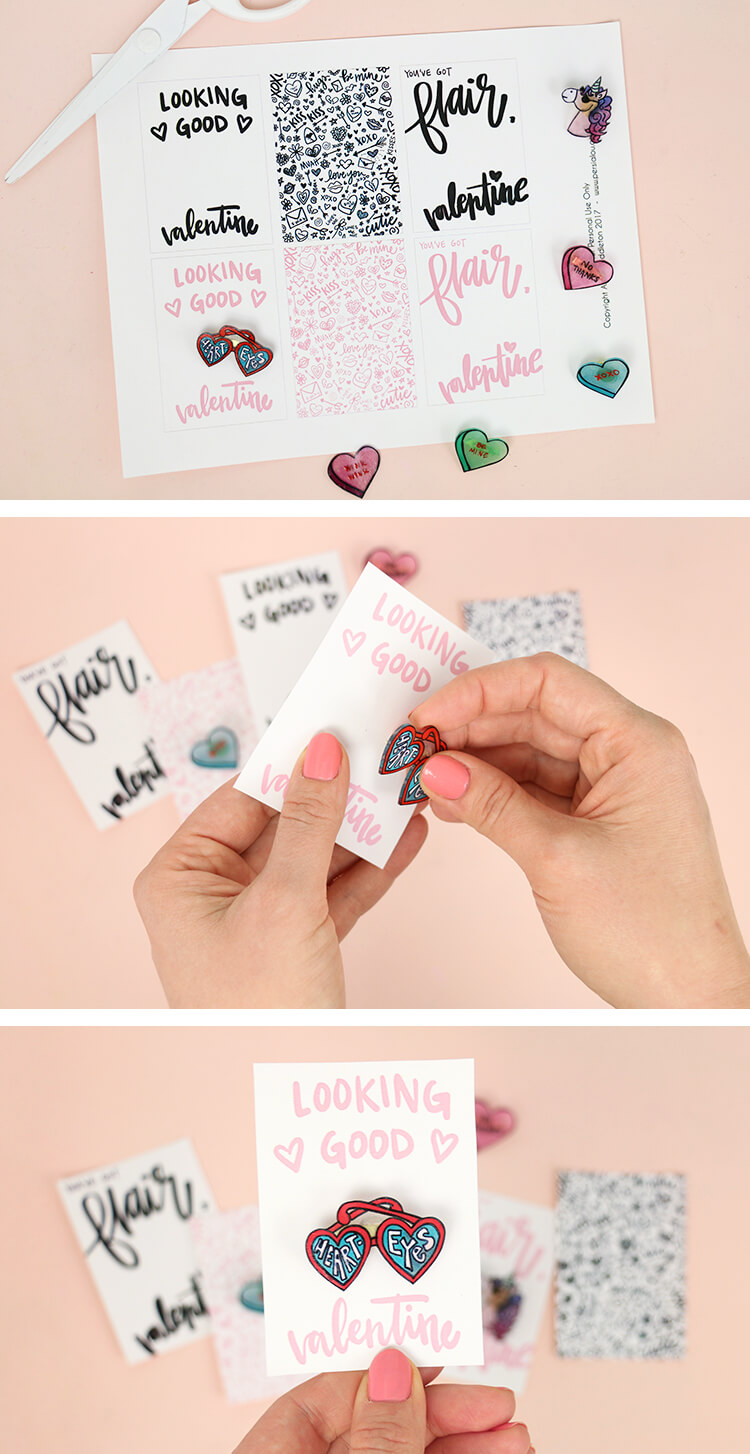
Only a few more steps to go. When your designs have cooled, take them outside and give them a few coats of gloss varnish. This will make them extra glossy like enamel pins and give them a much more finished look. Finally, use a hot glue gun to attach the pin backs, and you are all done!

Now you know how to make pins at home! It’s an super easy and fun way to DIY your own version of the enamel pin trend.
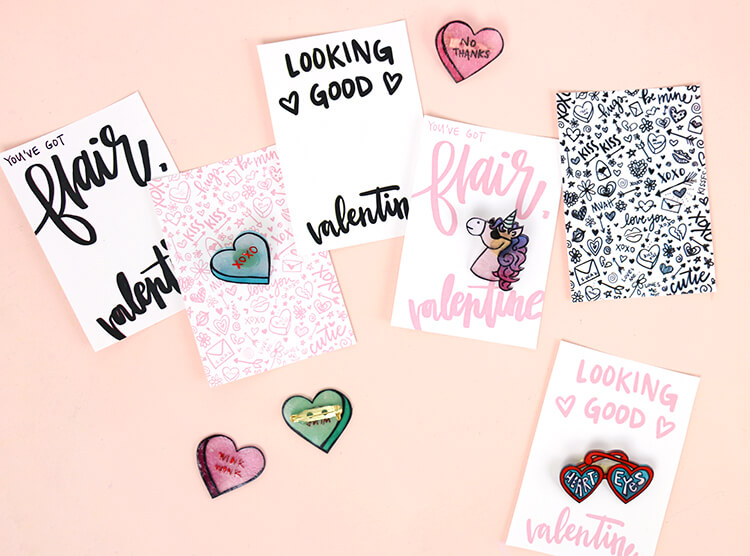
To turn them into simple valentines, all you need to do is print off my free pin valentine cards – there are three designs in two colors for you to choose from. Just print, cut, and attach your pins! You can just poke the pin through the card or use a hole punch.
That’s it! Your cute homemade pins are all ready for handing out to your best pals. Aren’t these a fun little Valentine’s Day treat?


I even added one of my emoji pins into the mix, because that heart eyes guy is kind of perfect for Valentine’s Day, dontcha think?

I also made a little video of these cuties. I love watching them shrink up in the oven, don’t you? So cool!
That’s it for today! Yay for learning how to make pins! If you make your own DIY pins at home, I want to see them! Share your photos to my facebook page or tag me on instagram or twitter (@persialou), and don’t forget to use the hashtag #persialou for a chance to be featured.
Happy Valentine’s Day and Happy Making!

If you liked this post, you might also enjoy these:
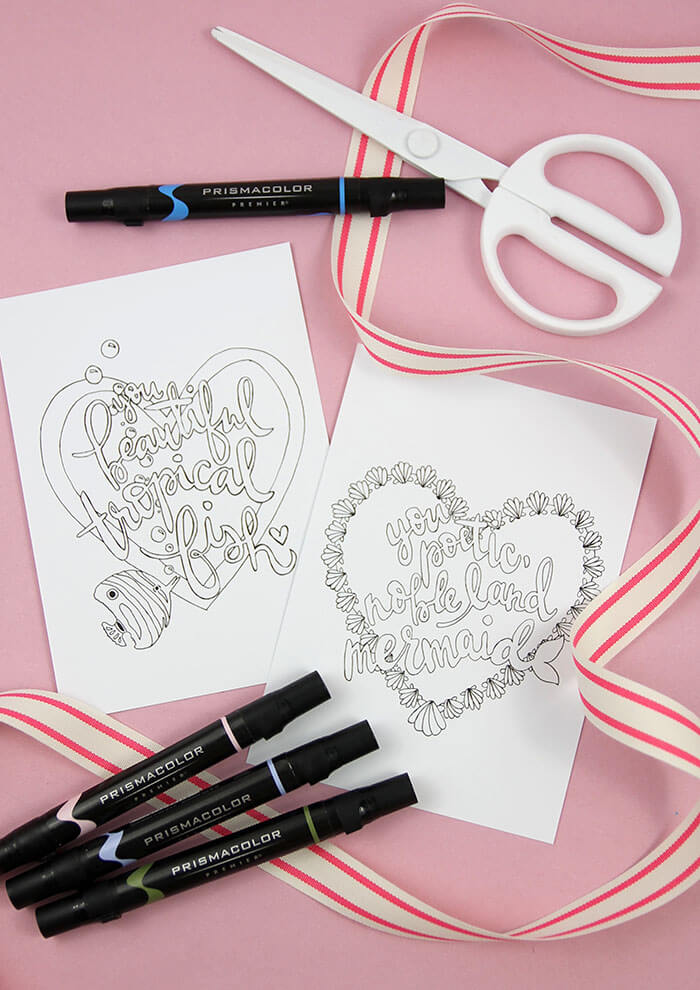
Printable Galentine’s Day Coloring Pages


Comments + Project Love
Amy | Delineate Your Dwelling says
Gah! I LOVE these so much. Pinnnnned.
Lauren says
I am so excited for these! I am a teacher who loves to bake so I normally make giant heart cookies for my kiddos on Valentines Day, but this year I have a student with allergies. These are perfect and nut free ;)!
Thanks so much for sharing, and I’ll make sure to share with you when I get them finished!!
Alexis says
Oh I love that idea! And I would love to see them! Thanks so much. 🙂