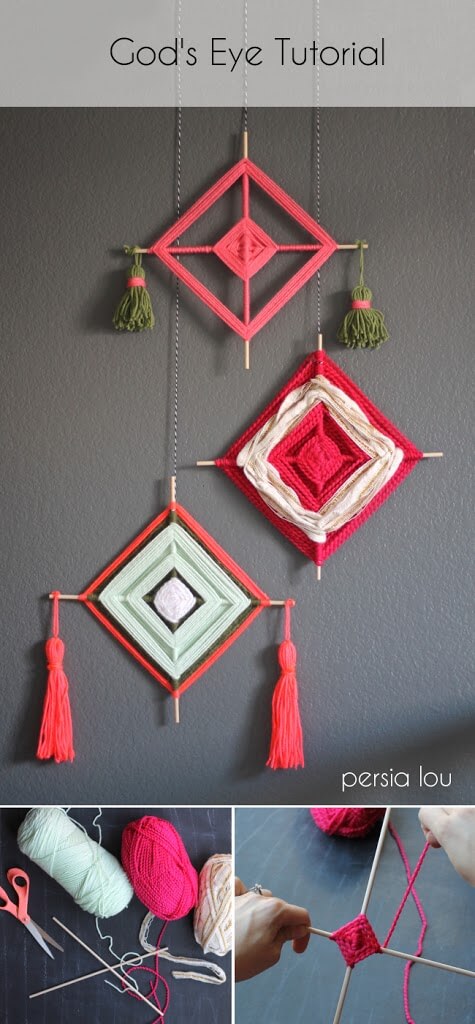
Learn how to make a god’s eye craft (or ojo de dios) with this step by step photo tutorial! All you need is yarn and sticks to make this beautiful traditional craft. Make it with the kids or on your own for a colorful wall hanging! I originally shared this project over at at Craftaholics Anonymous. This post contains affiliate links, which means I may make a small commission if you use my links and make a purchase. Thank you!
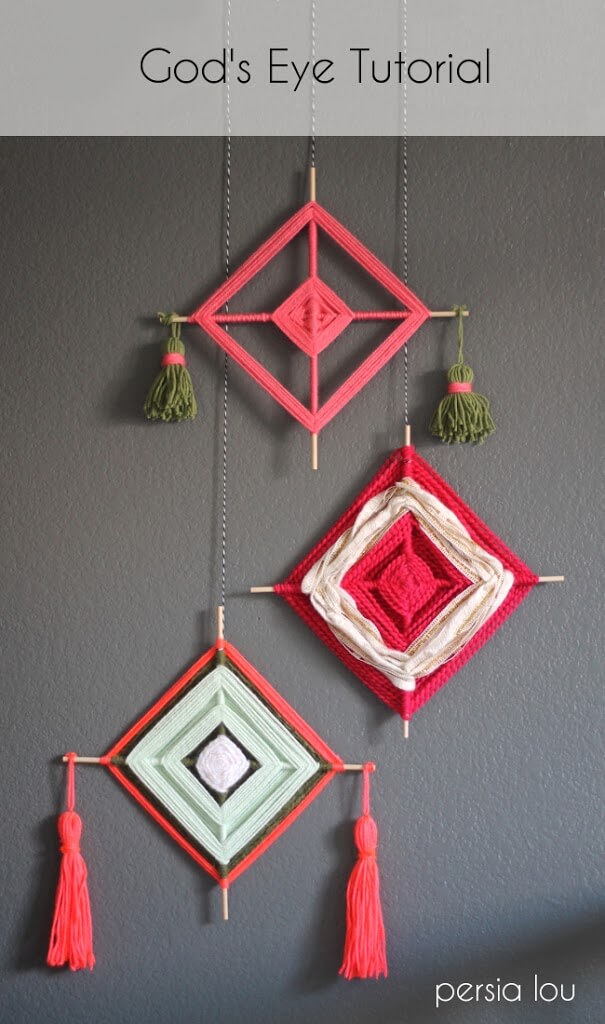
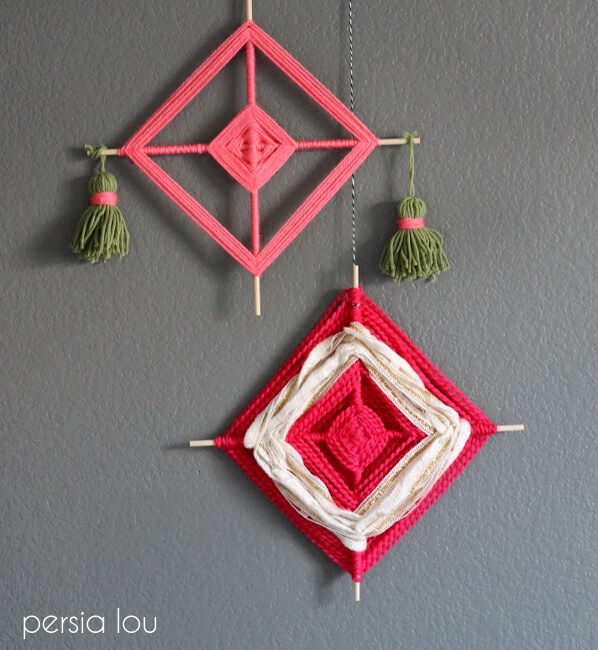
Macrame and woven wall hangings are a big DIY trend right now, and when I was planning my daughter’s recent camp-themed birthday party, we decided to make a classic camp craft with a similar kind of vibe for party decorations – God’s Eyes (aka eye of god /ojo de dios). They were perfect for the summer camp theme of the party, but I think they look pretty great too and so we picked out a few favorites to live permanently in my daughter’s room as colorful craft wall hangings.
I never actually made a god’s eye craft as a kid, so these aren’t so nostalgic for me – I just like the way they look! But if you made them as a kid, this might be a little trip down memory lane. 🙂 I spent some time playing around with different wrapping techniques and fibers to create different looks, and I thought it might be helpful for others to share what I learned with you all here. Okay, let’s get making!
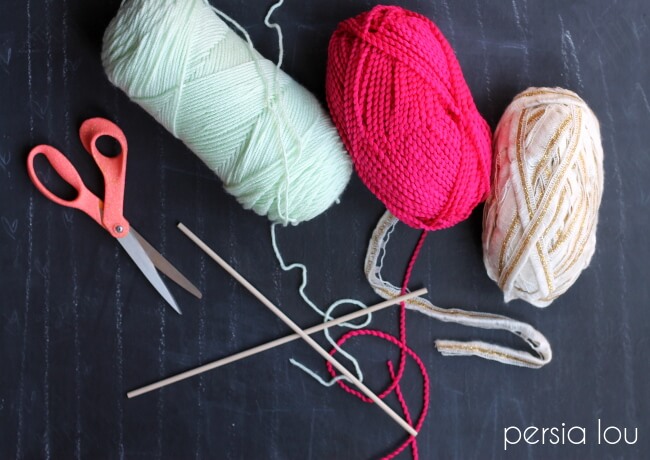
God’s Eye Craft Supplies:
- Dowel Rods
 (these are often made with popsicle sticks, but I like the look of the dowel rods)
 - Yarn (try using various colors and weights – like a bulky pink yarn or metallic ribbon yarn)
- Scissors
And that’s all you need! You may already have everything on hand to get making!
God’s Eye Craft Instructions
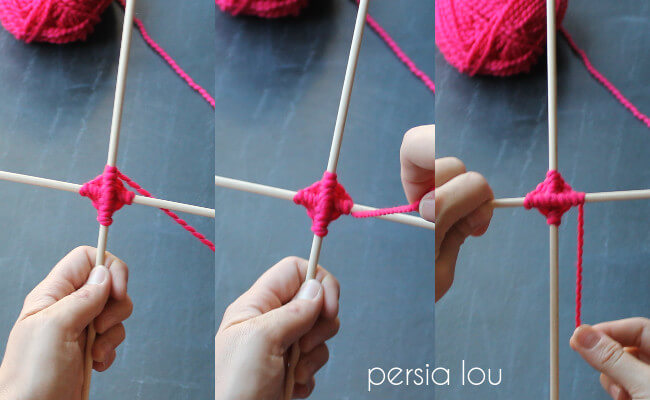
Step One. Tie Dowels Together.
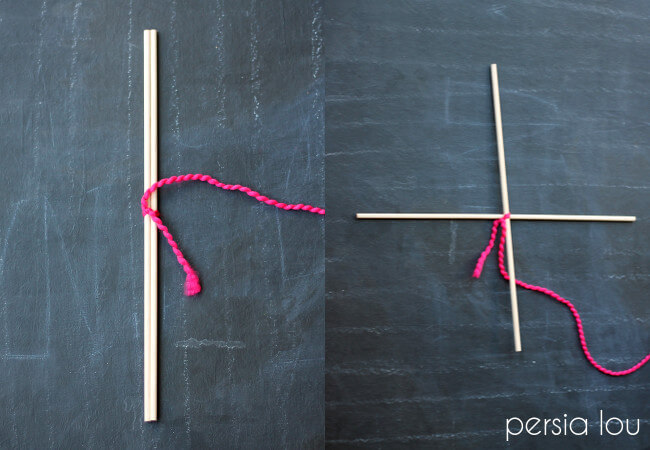
Start by taking two dowels and tying them together in the middle with a piece of your yarn. Use a double knot to keep them securely connected. Next, twist the dowels so they are perpendicular to one another, and then you are ready to wrap.
Step Two. Wrap!
There are basically two ways to wrap the yarn around the dowels: over and under. By alternating the way you wrap the yarn, you can create different designs.
To wrap the yarn over the dowel, pull the yarn across the top of the dowel. Then, wrap it under the bottom back over the top, and onto the next dowel. Like so:
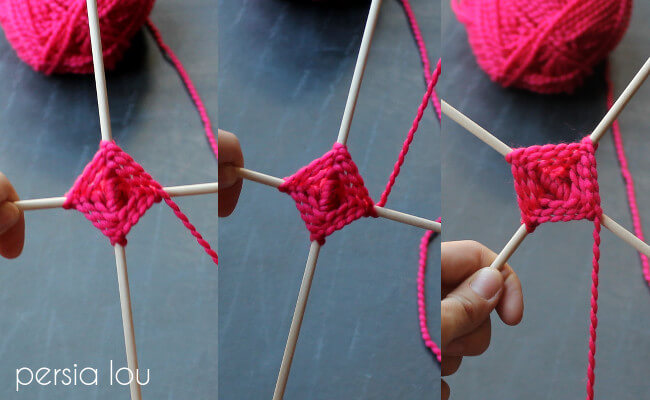
To wrap the yarn under, pull the yarn beneath the next dowel. Then, wrap the yarn up over the top of the dowel, back behind the dowel, and then move onto the next dowel. You can see this in the image below.
If you wrap the entire piece in one direction, this is what it will look like on each side:
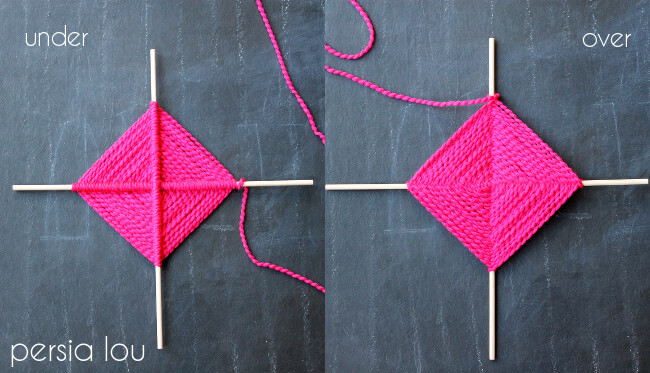
The over side looks flat, while you can see the yarn wrapped around the dowels on the under side.
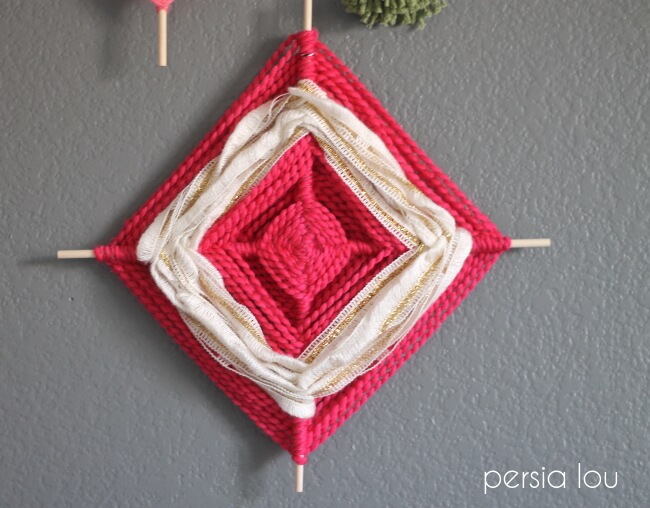
If you alternate the direction you wrap every other dowel (over, under, over, under, etc.), it will look something like this:

And to get the look above, I alternated under over and then changed directions every inch or so. Isn’t it fun the different looks you can get without even changing the yarn? But changing the yarn is easy peasy too.
Step Three. Changing Yarn.
While working with even one color of yarn can make a beautiful gods eye, I have a feeling you are going to want to add in some more color and texture with some different yarns.
Switching yarns is simple. All you need to do is tie the current yarn to a new piece of yarn with a double knot and keep wrapping. That’s it! Super easy. To keep everything looking tidy, you can trim and tuck in the ends when you are done wrapping.
I liked playing around with different weights and types of yarn. The thick ruffle yarn I used on some of my pieces created great texture.

Step Four. Add Tassels or Pom Poms.
When you are done wrapping, your god’s eye craft can be all finished OR you can add a little something extra with some simple tassels or pom poms. I decided to add tassels to some of my pieces and I love the way they turned out. You could also add pom poms using my favorite pom pom makers or even just your fingers using this method.
How to make your own yarn tassels:
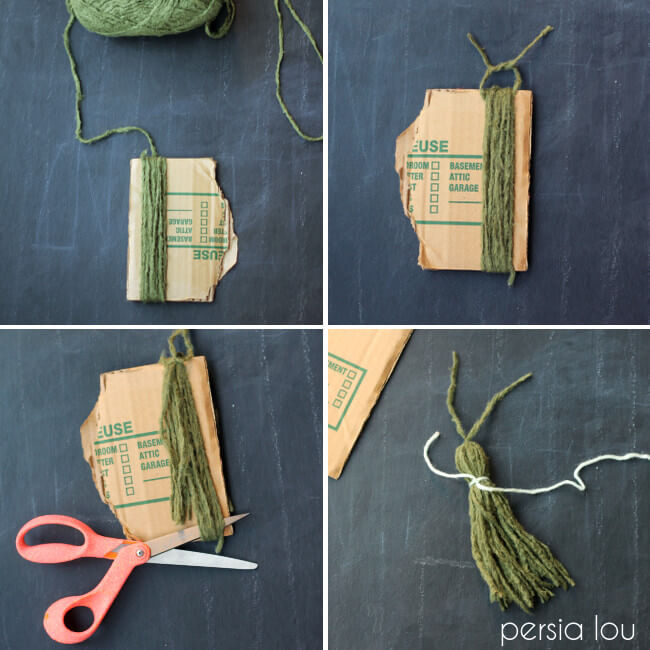
- Grab a scrap piece of cardboard, and wrap your yarn around and around until you have a loop of yarn the desired size.
- Tie one end of the loop together with a small piece of yarn.
- Cut the opposite end of the loop off the cardboard.
- Tie and then wrap another piece of yarn around about an inch below the knot at the top of the loop. Secure the ends of the yarn with a dot of hot glue.
Tie the tassels to the ends of two dowels, hang, and enjoy!
And that’s it! I think they are pretty great. Did you ever make a god’s eye craft back in your camp crafting days? What do you think of them as crafty wall hangings now? Tell me all about it in the comments.
Happy Making!

If you are looking for more simple yarn crafts, check out my simple diy macrame plant hanger here.


Comments + Project Love
Emily McCauley says
Geez, I made so many of these as a kid and now look how badass they could be as home decor! And I have a TON of yarn that needs to be used so even better 🙂
Brynne Delerson says
These are so cute and I love how you turned a kids craft into modern home decor! I am REALLY into yarn projects lately – love these!
Colleen says
These look so good as home decor! I remember making them with Popsicle sticks and you wouldn't want to welcome those babies into your house. I love how you turned them classy 🙂
Anam (Delicious and DIY) says
I never knew tassel making was so easy. They look so good.