You know all those beautiful, spacious, organized craft rooms you see all over blogland? Yeah… I don’t have one of those. Instead I have tucked my sizable craft supply stash into random corners all over my house – in the closet under the stairs, in the cabinets in the hallway, in a kitchen cabinet. You get the idea.
As much as I love looking in five different places to find that one piece of fabric or ball of yarn I’m looking for, I’ve decided to try and improve the situation by converting our infrequently used loft into a more useful craft/office space. Which means I need some storage for all that stuff.
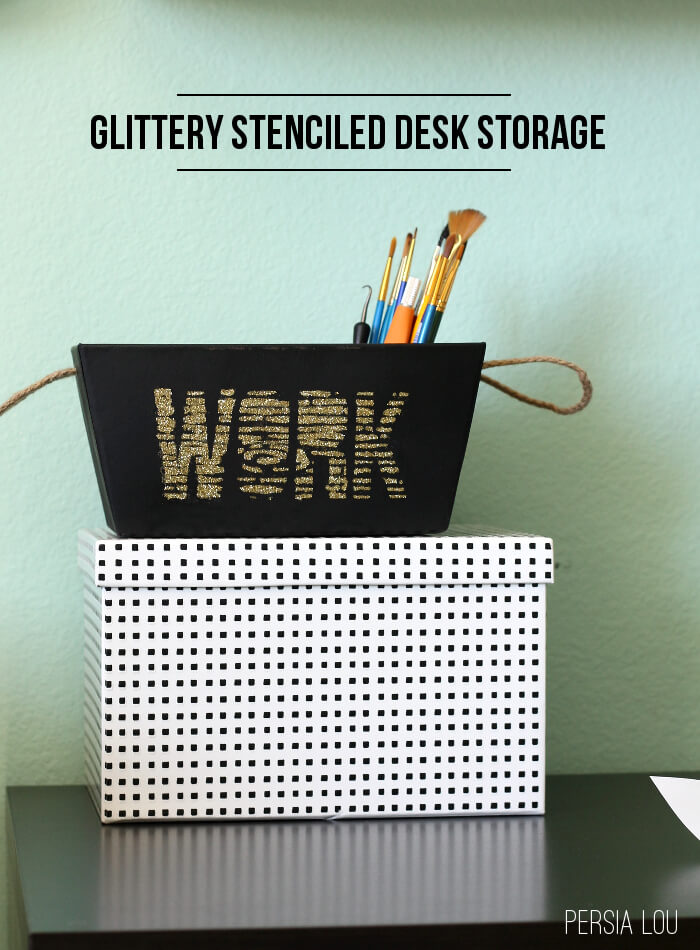
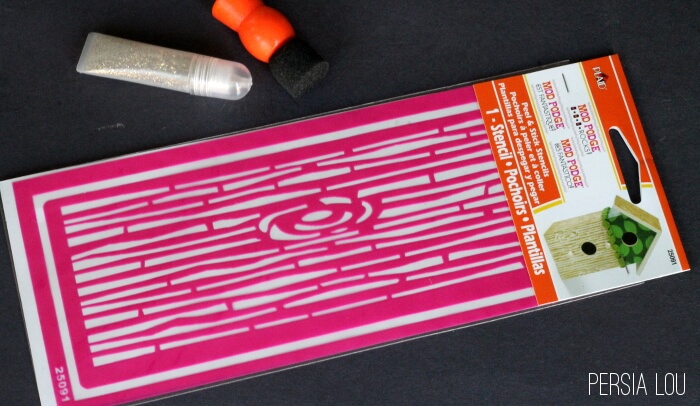
When I got the opportunity to try out one of the great new Mod Podge Rocks stencils, I immediately thought of fancying up some storage for my desk. The fabulous Amy of Mod Podge Rocks blog sent me the wood grain stencil, which I was super excited to try out.
I don’t know about you guys, but I feel like I am constantly distracted, so I wanted my pretty desk storage to be a little bossy too. I wanted something that reminded me to get to work and stop checking facebook.
The idea was to stencil letters onto my little box, and that, my friends, required a stencil over a stencil. Yeah, I know. Crazy, right? Here’s how I did it.
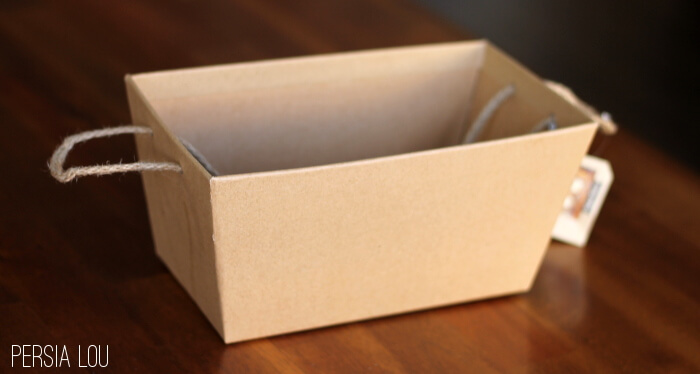
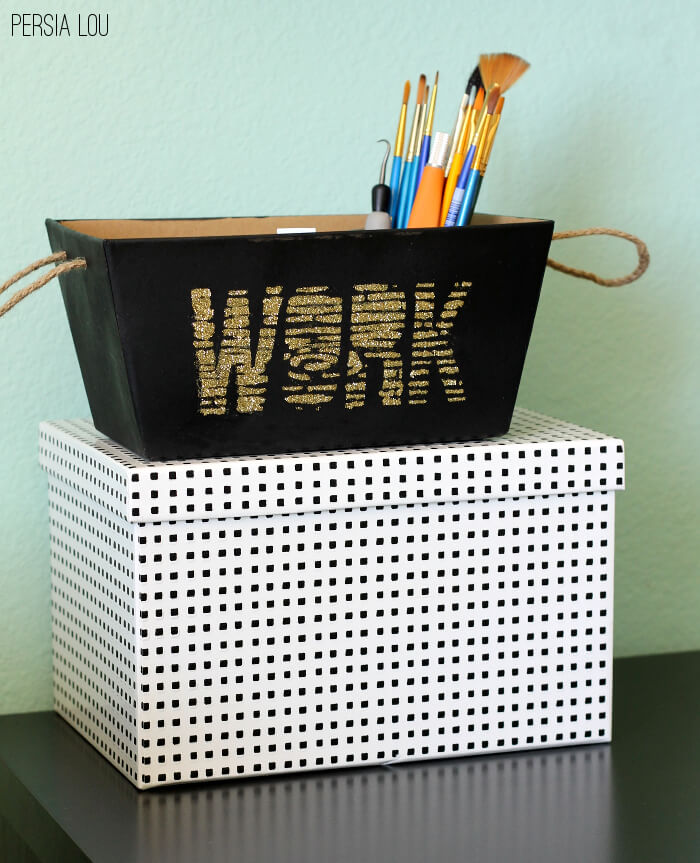
I started with this little paper mache box/basket that I picked up for three bucks from the dollar bin section at Target. I thought about leaving it the kraft color but ultimately decided to spray paint it black.
Next, I cut a stencil of the word “work” out of freezer paper. I used my Silhouette, but you could do this super easily with a craft knife.
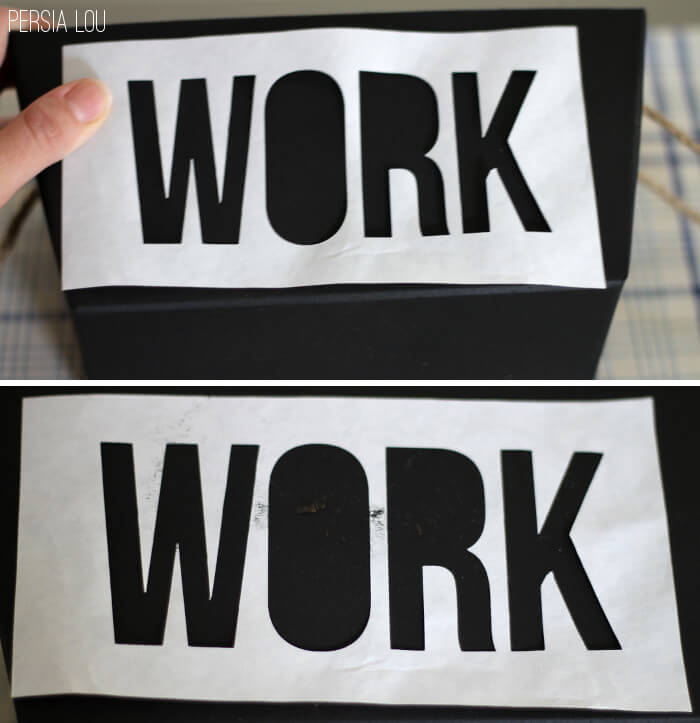
I used my iron to attach the freezer paper stencil to the box. I wasn’t sure how this would work, but it actually worked pretty well. The only problem was that it melted the paint on my box in a few places (you can see it in the picture above). I would recommend using a lower heat setting and trying to avoid putting the iron directly on any painted spots.
Next I placed the Mod Podge Rocks stencil over the top of the freezer paper stencil. The cool thing about these stencils is that they are sticky on the back so they stay in place really well.

I applied Mod Podge over the stencils, peeled both stencils off (I didn’t want the freezer paper to get stuck to the box), and sprinkled gold glitter over the Mod Podge. After the Mod Podge had dried for five minutes, I shook the excess glitter off. While my box was drying I cleaned all the excess Mod Podge off the stencil and reattached it to the backing so it’s all ready for my next stenciling project.
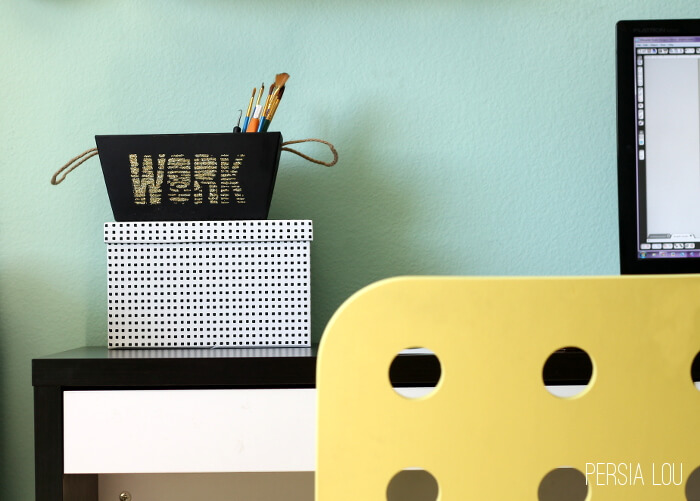
And that’s it! Right now my little box is holding my watercolors, palette, and brushes. It makes me want to go get to work. Plus, I think it’s kind of pretty. I really like the wood grain texture filling in the letters.
And – hey – good news! You can win one of these awesome stencils! There are lots of great designs in simple patterns that you can use over and over again. Enter the giveaway in the Rafflecopter widget below. (GIVEAWAY NOW CLOSED)


Comments + Project Love
Bonnie says
oooh fun! stencils on everythingggg. i love the one on the top right with the cut out diamonds.
Lori says
Cool idea. I've never stenciled on top of a stencil before.
Amy @ Homey Oh My! says
So. Creative. I really love your decision to paint the tote black ;).<br />I'd love to win the polka dots stencil, though the wood grain pattern you used would be a close second!
Amy Anderson says
OMG you turned this into letters?! You are amazing. Thank you.
Amy Krist says
Here comes another Amy! This is so pretty and a bit funky. Love it!
Melody says
The keys.
Melody says
The keys.
Val Manchuk says
Awesome project! I like the gold on black; high impact! <br />p.s. – You will really enjoy having your own craft space!<br /><br />Val
WritingMonique says
It look amazing. Love the combination between black and gold! <br /><br />www.writingmonique.com
Laura Mason says
I like the woodgrain stencil best, but the polkadots are pretty neat too. And, I like how you layered the wood grain and your word 🙂
Sebastian Chuter says
This is totally cool! I never imagine that I found this new idea! I can be an amateur in home decoration yet I can be the cool guy in small professional ideas. Can I borrow this one for my new cabin? I want to surprise my kids for a new work! Classy!<br /><br />Sebastian of<br /><a href="http://balihutsuperstore.com.au/bali-huts-thatched-roof/" rel="nofollow"><b>Bali Hut Super Store</b></a><br />
Katie Nathey says
Maybe I'm just lame but I seriously never thought about putting a stencil like that over a word! You're so creative and I love how this turned out! Pinned 🙂
Michelle says
What a great idea, your glitter stencil turned our really good too! <br />I would love the bottom right stencil with the pretty pattern! Thanks for hosting such a great competition 🙂
WoodsofBellTrees says
How cool and cute! I really love how you layered the stencils! 😀
RaChil Luke says
My favorite stencil is the wood patterned one as well. My mind was also blown by stencil-inception! Great work, and I wish you luck with your craft space :)<br />Found you at Link it or Lump it
Jessica says
These are so cute…the possibities are endless!!! I love the polka dots!
TSaunders says
I love the wood grain! It's been my favorite since I first heard about these.
nurse cindy says
i love them all!
Donna Marie Rosato says
This is a great idea. I would never thought to use two stencils at once. Very creative. Love it.
Doodlebug Road says
Anxious to try these out over time.