Make your own adorable Easter Bunny treat baskets with free bunny printables! These cute little baskets are so easy to put together and so much fun to give. This post may contain affiliate links, which help to support this site at no extra cost to you when you make a purchase through one of our links.

This year is just flying by! Can you guys believe we are already halfway through February? It’s Valentine’s Day this weekend, and even though it still may feel very wintery in your neck of the woods, spring is coming soon! And with spring comes Easter! I know, I know. It’s still super early, but today I’m sharing a simple little Easter craft project / gift idea to get us in that springy Easter kind of mood.

How to Make Your own DIY Paper Bunny Baskets
I have created some simple little bunny printables to make it super easy to make these cute little Easter bunny treat baskets. All you need to do is print the bunny faces and feet out and glue them on to these cute paper berry baskets. So easy! Also, I’m kind of obsessed with the baskets and currently planning 10289397 berry basket projects.

And, I mean, what’s better than a fluffy pom pom tail?? Okay. Let’s get crafting. Here’s everything you will need for your own bunny baskets.
DIY Paper Bunny Basket Supplies:
- Paper Berry Baskets
- Paper Shred Basket Filler
- 1.5 inch Pom Poms
- Scissors (Or you could cut the pieces with your Silhouette using the Print and Cut Feature.)
- Hot Glue Gun
- Fillable Eggs, Easter Stickers, and other Easter treats
- White Cardstock
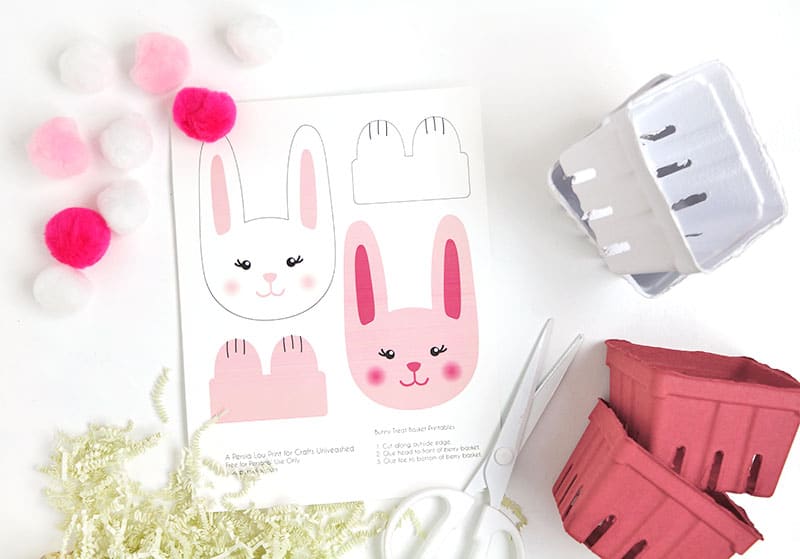
- My Bunny Treat Basket Printables (download from the link at the end of this post)
Step One. Cut Out Bunny Printables.
Start off by printing the bunny pieces printable, which you can download from the link at the end of this post, on white cardstock. The file contains both pink and white head and feet pieces. Then, just use a pair of scissors to cut the pieces out along the outside edges. Easy peasy.

Step Two. Glue On Bunny Pieces.
Next, using a hot glue gun or other permanent adhesive, attach the bunny head to the front of the basket and the feet to the bottom of the basket so the little paws stick out.

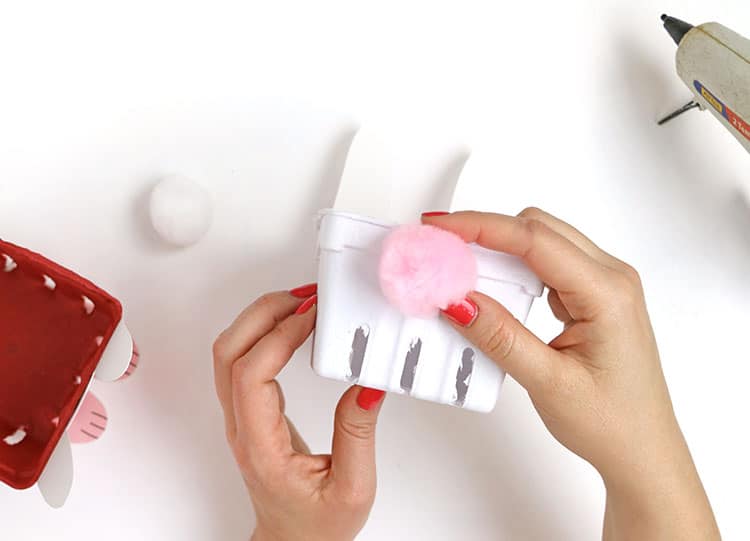
Then, it’s time for my favorite part! Finish off your cute little bunny basket by gluing a pom pom onto the back of the basket.
Step Three. Fill Basket.
Finally, fill your basket up with whatever Easter goodies or treats you like. I like to start with some paper shred to give you a nice base. Then add toys, stickers, candies, or other treats on top.


And that’s it! I love a cute and easy little gift DIY, don’t you?

Want More Free Printables?
Don’t miss our free printable library!
Okay, ready to get your free printable?
Free Easter Bunny Basket Printables

Before grabbing that printable, I would appreciate it if you pinned the image above to one of your Pinterest board’s. Spreading the word about our free printables helps to keep them free! 🙂
Please Note: This printable is free for personal use only. Please do not sell or redistribute in any way.
When you click the link below, the PDF file of the bunny basket pieces will download. You will need a PDF reader such as Adobe Reader installed on your device to open the PDF file.
GET MY FREE EASTER BUNNY BASKET PRINTABLES
If you use these printables to make your own bunny baskets, I would love to see them! Share your photos to my facebook page or tag me on instagram or twitter so I can see them. 🙂
Until next time, Happy Making!


Comments + Project Love
Morena says
they are great !!!! thank you