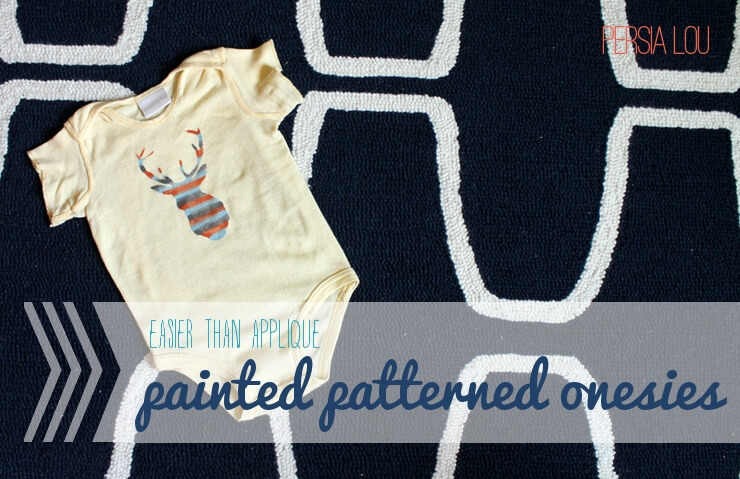
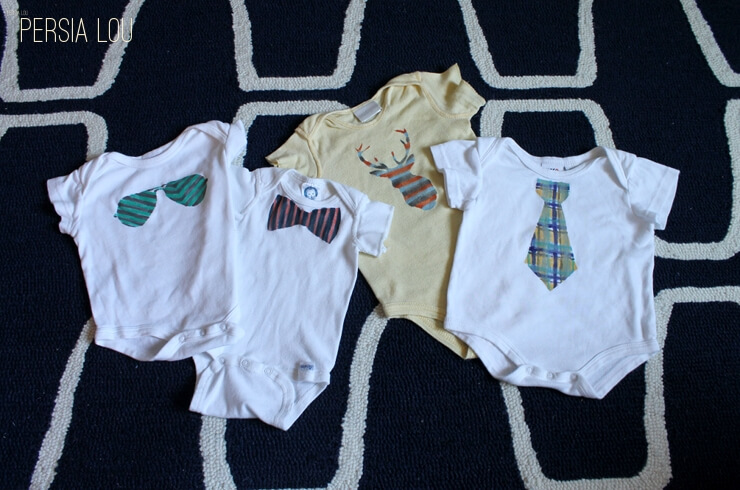
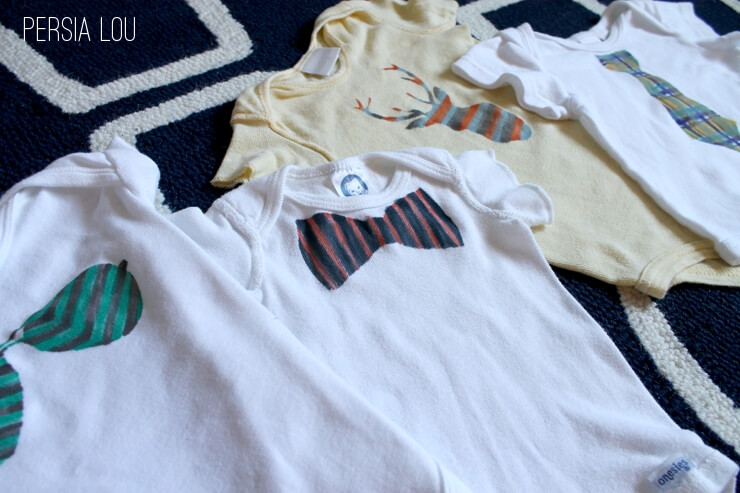
Recently, I was getting a gift ready for a baby shower and I had a white onesie that I wanted to applique a bow tie onto. But I didn’t have any wonder under and I have had trouble doing applique on knits without wonder under. And then I thought, “Well, I have freezer paper.” The thing that is so fun about applique is the patterned fabrics you can use, right? Well, why not create a pattern with paint?
This might not be groundbreaking stuff, but it was a total Aha! moment for me. I think it creates a cool effect, and it was definitely easier for me than the applique route. Plus I can create any pattern I want regardless of what options I have in my fabric stash.
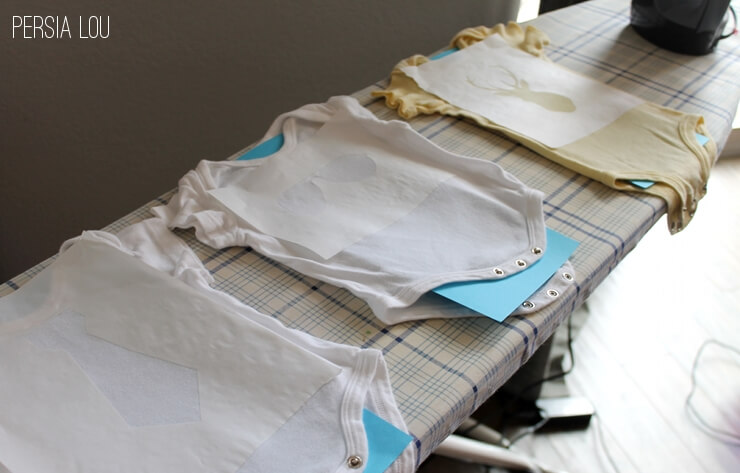
Here’s how we do it: Start off by finding some images you like and print them off. You can print directly onto freezer paper, but I usually just print on regular paper, tape it on top of my freezer paper, and then cut through that and the freezer paper at the same time with an Xacto knife. When your images are cut out, iron them onto your onesie (or fabric) shiny side down.
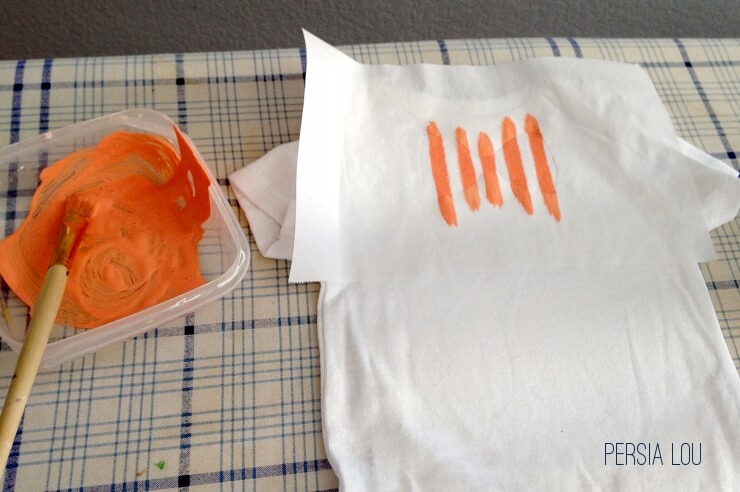
Mix up your fabric paint. I used regular old craft paints with textile medium and a little water to thin it out a bit.
THEN – (this is the part where this gets a little more exciting than your regular freezer paper stenciling) – rather than just filling in your stencil with a solid color, paint stripes, or zig zags, or plaid, or any other pattern your little heart desires! Go crazy!


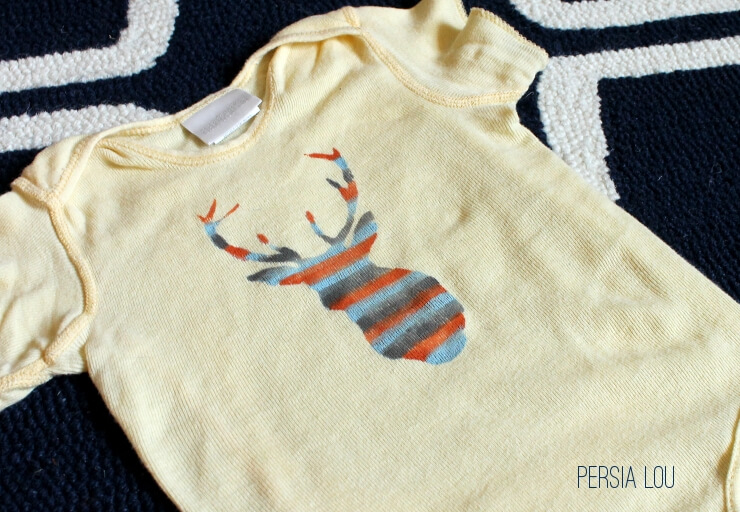
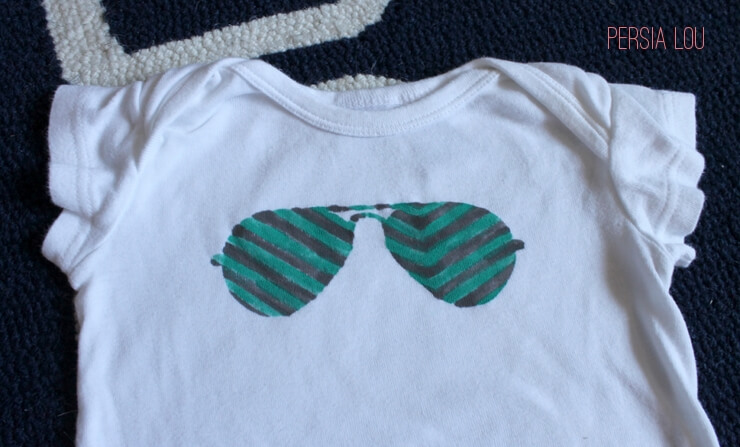
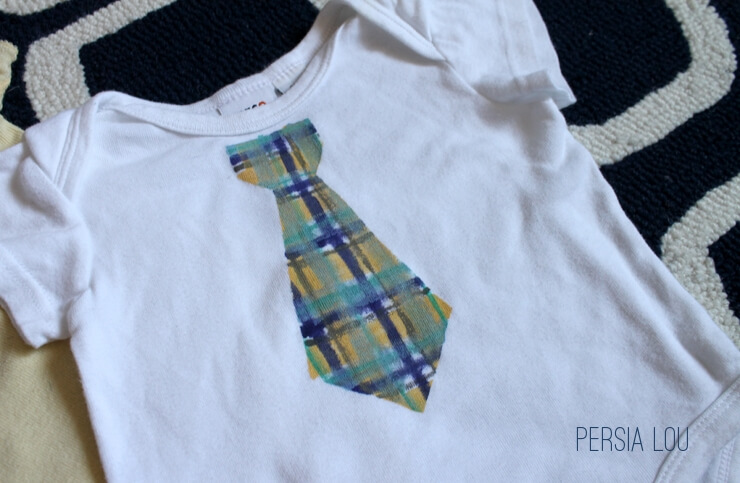
And then, after the paint has dried a bit, pull off your freezer paper, and Viola!
 I mean, it’s pretty cool, right?
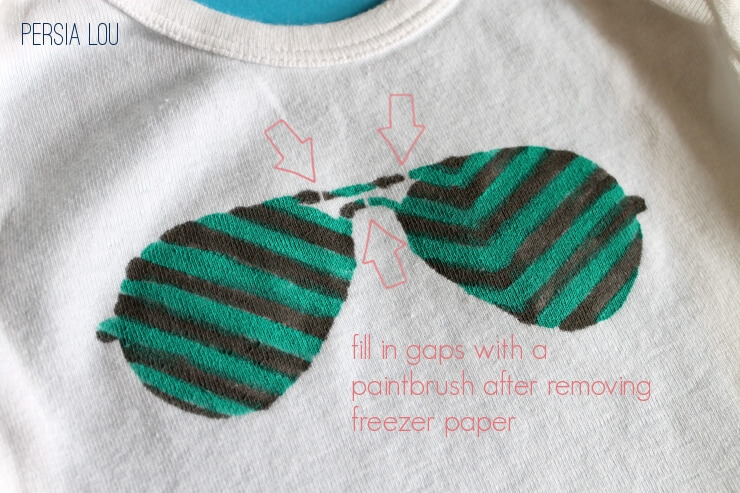
Ooh! Here’s a good tip. If you are cutting out an image that has a hole in the middle–you know, like a little island where you want to keep the freezer paper–don’t completely cut it out. Instead, leave little freezer paper bridges that will connect that island to the outside of your stencil. Then, when you remove the freezer paper, just go back and fill in the gaps (like so):
Easy Peasy. So, get busy and go make some for yourselves!
Update: Check out a girly version of this technique here.


Comments + Project Love
Paula @ Sewy Stuff says
Oh my! How cute! Thanks for sharing. 🙂
Alexis Middleton says
Thanks, Paula! 🙂
Heidi Amber says
So cute and so unique! The idea is new to me and I love it :)<br />Heidi @ handmadefrenzy.blogspot.com
Alexis Middleton says
Thanks, Heidi! I know freezer paper has been done a lot, but for some reason painting a pattern in the stencil seemed new to me too.
Christine says
It's so funny to hear you talk about how "easy" some of your crafts are…. lol. You're amazing!
Alexis Middleton says
Ha! Well… I really do think this one is pretty straightforward. Really. Truly.
EmerJa says
Totally in love with this technique and the amazing results!! :)<br /><br /><br />www.emerjadesign.com
Virginia Megin Gallagher says
These are super cute! I could see using this technique on pillows, etc., too.<br />Thanks for sharing at Brag About It this week.<br />~ Megin of <a href="http://www.vmg206.com" rel="nofollow">VMG206</a>
Alexis Middleton says
Absolutely! Pillows could be awesome! I've actually had one idea in mind… We'll see if it happens. 🙂
Tori Grant says
So cute!! I am featuring this tomorrow! Thanks for linking up to Tell Me Tuesday!! 🙂 Have a great week! 🙂 Tori
Alexis Middleton says
Awesome! Thanks, Tori!
Olivia Rukat says
This is great! Ive been tye-dying onezies for new baby friends! I will have to try this next! Thanks!