*This project was originally created by me for Craftaholics Anonymous. For your convenience this post contains affiliate links. Thanks for supporting Persia Lou!
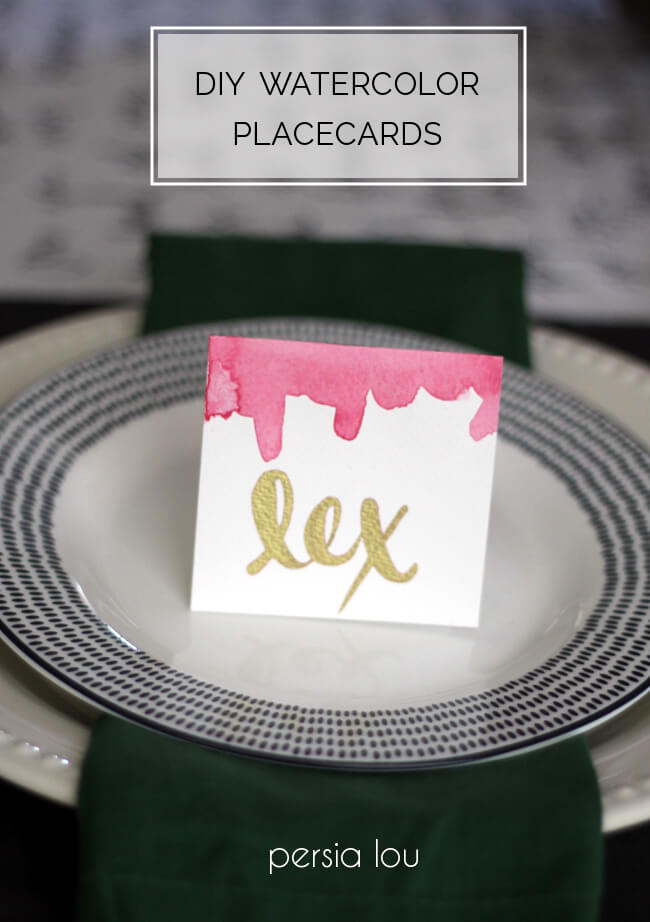
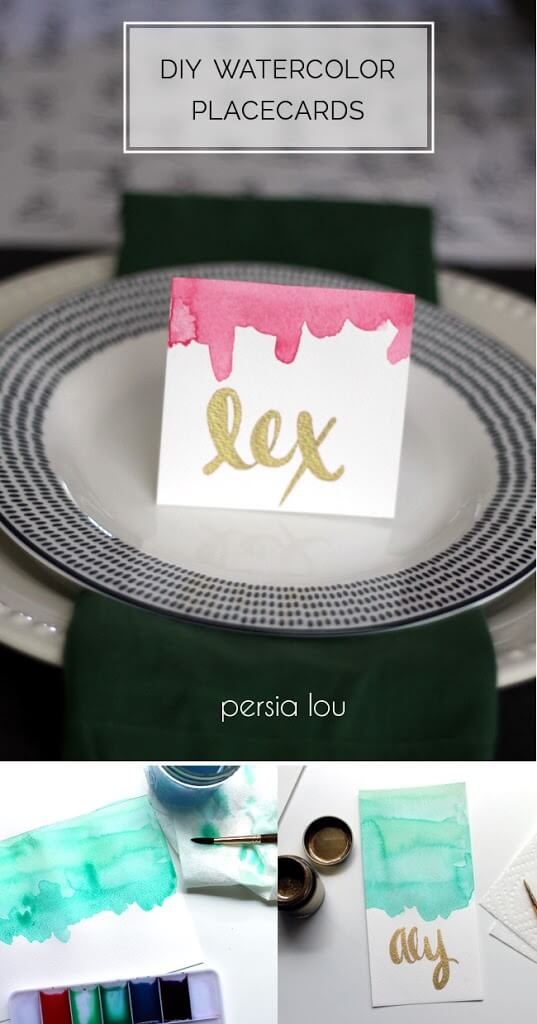
Earlier this month I shared the gratitude tablecloth that I made for Thanksgiving this year. I also gave a little sneak peek of our Thanksgiving table including some pretty watercolor place cards, and today I have a step-by-step tutorial to help you make your own!
These are really simple to make and are such a pretty addition to any special dinner occasion.
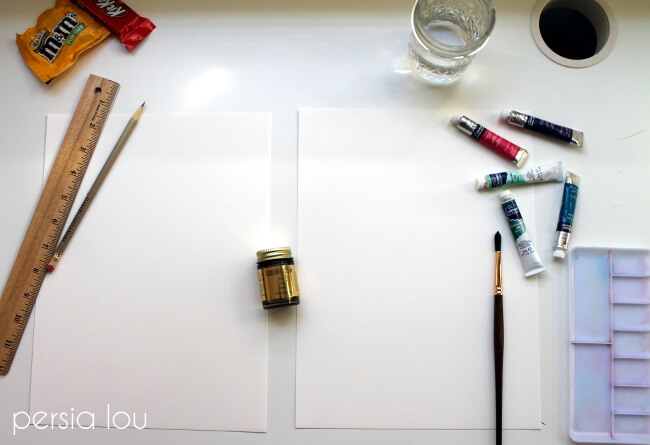
To make your watercolor placecards you will need:
- watercolor paper
 (I used 90 lb)
 - watercolors (tube or pan colors will work just fine)
- water
- paper towels
- ruler
- pencil
- watercolor brush
- inexpensive small round brush
- liquid gold leaf
- candy – this is optional, but recommended
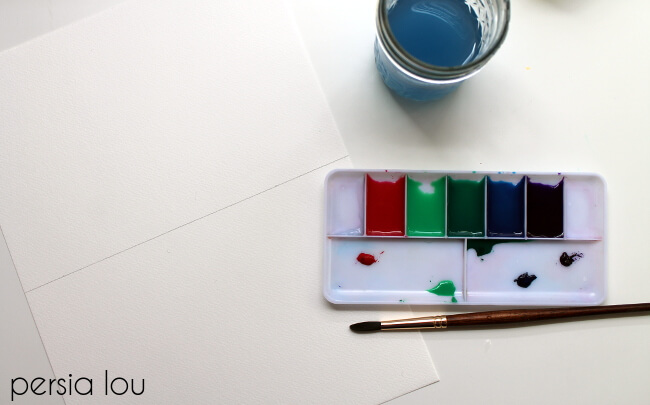
Using your pencil and ruler draw a light line across the middle of the paper so you have two 6×9″ halves.

If you are using tube watercolors, mix up the colors you want to use.
Starting at the pencil line, paint the a light wash about an inch and a half down from the line (to lighten the color, add more water). Then paint about another inch and a half below that with a darker wash. Blend the colors together.
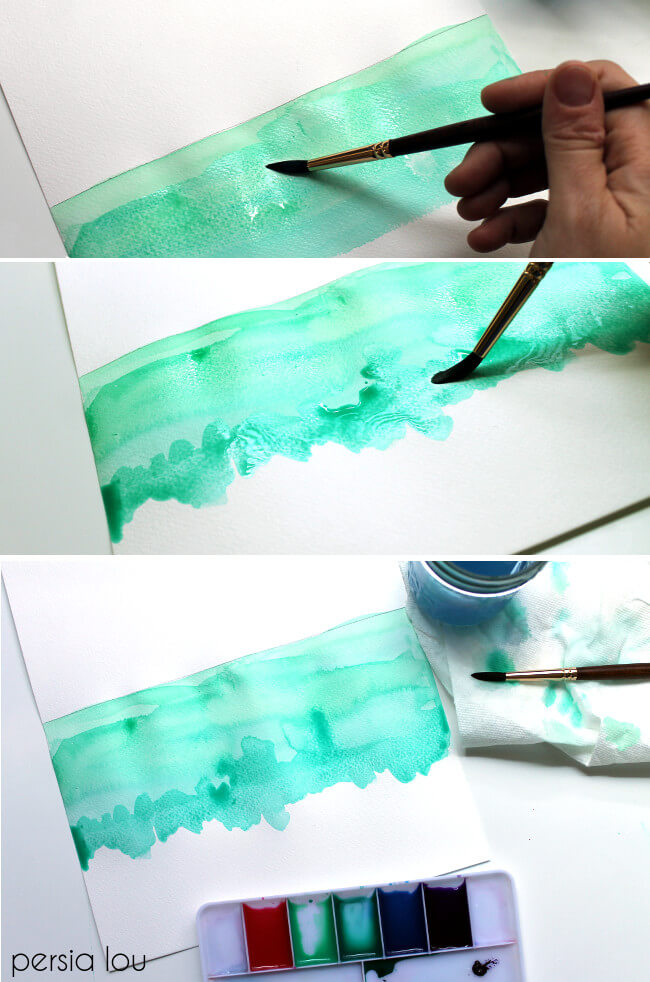
With the darker wash, paint in a zig zag motion over the edge down below the midpoint between the pencil line and the bottom edge of the paper. this gives the watercolor portion an uneven edge. Feel free to play around with colors and designs.
Next, repeat this painting process starting at the top of the paper, and then set it aside to dry. When your paintings have dried, but are still slightly damp, you can put a heavy book on top to help flatten out any warping of the paper.
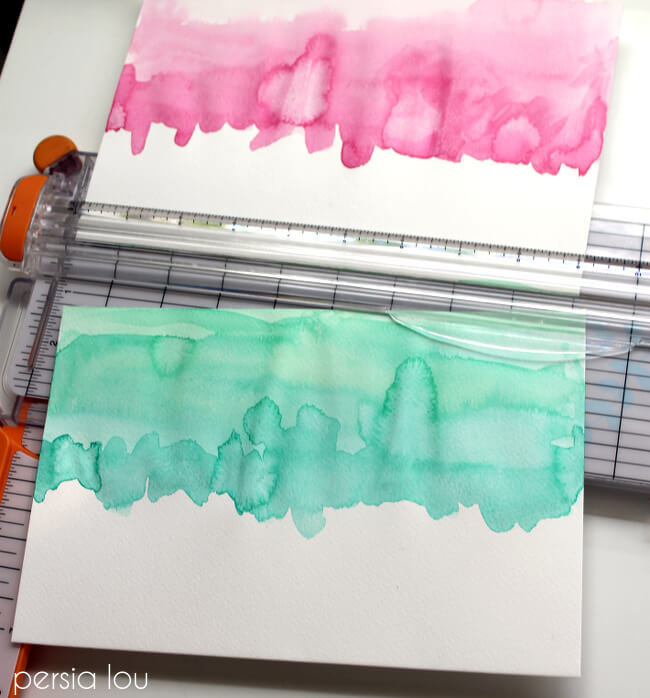
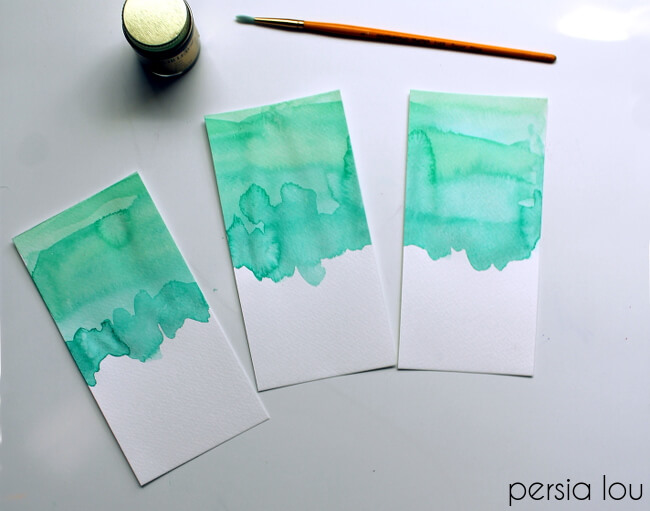
Cut the paper in half along the pencil line. And then cut each half into three 3×6″ rectangles.
To add the names to the placecards I used liquid gold leaf and a small round paintbrush. Be sure to use an inexpensive paintbrush you don’t care about because the liquid leaf will ruin it.

To create a calligraphic effect, try holding the brush at a right angle to the paper. When you move the brush upward, use very light pressure, so the line is thin. When you move the brush downward, use more pressure, which will create a thicker stroke.

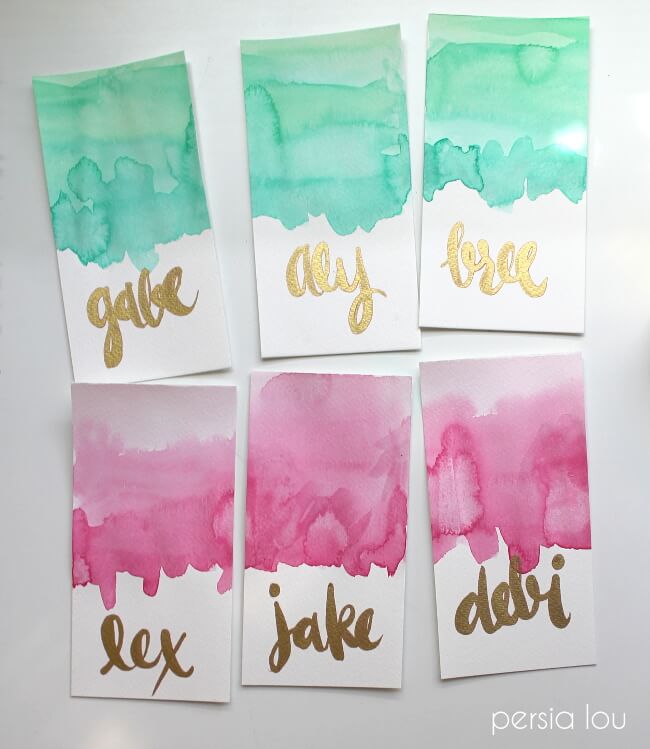
When the lettering is dry, fold the cards in half and your place cards are all done!

I really love that the backs of the placecards are pretty too. They will be adding a nice pop of color to our Thanksgiving feast.
Do you ever use place cards for Thanksgiving?


Comments + Project Love
Colleen says
These are GORGEOUS. Again, here's me telling you I need to get proper watercolours so I can try copy your project… but what I love most is how pretty the names are. I just bought proper (not dollar store) paint brushes so I'm going to try your technique out!<br /><br />On another note- yes! We used place cards for our thanksgiving this year… but that was back in October. I'm
Amy @ Homey Oh My! says
I was so thinking you watercolored each individual place card, but no, you're way smarter than I am. SO pretty, Alexis. Your calligraphy skills are amazing!!
Design Eat Repeat says
These are so adorable and gorgeous! And I love the use of the gold leaf! I've never crafted with that before, but it looks oh-so-tempting!
SheridanR says
I love love love it! Thanks for such a simple but effective tutorial. I especially love the calligraphy tip!!!!