Kid’s birthdays are a big deal, but that doesn’t mean they have to be a big stress! Today I’m sharing some simple ideas for making your child’s birthday extra special without going crazy. A big thank you to #HallmarkatWalgreens for sponsoring this post!
My sweet little girl is turning 7 later this month, and it is a big topic of conversation in our house right now. My kids are all obsessed with their birthdays and love to talk about them year round. It doesn’t matter if their birthday is one month or ten months away – they love to talk about what kind of party they want to have, how they want to decorate, what kind of cake they want, and on and on and on.
Sometimes it can be a little exhausting, but overall, I have to admit that I kind of love it. I love an excuse to be creative and come up with little surprises for them. That doesn’t mean we have huge themed parties every year (we definitely don’t), but I try to find fun and simple ways to celebrate each child on their special day and throughout their birthday month.
My daughter loves cards. She is constantly writing notes and making cards for everyone in her life. It’s pretty cute. Because she loves cards so much, I thought it would be fun to pick out a few extra special cards for her. I took my two boys with me over to Walgreens to check out their selection of Hallmark cards, and I was immediately drawn to the Hallmark Signature cards. My boys loved them too. We picked out three cards that we knew my little girl would love.


Aren’t they gorgeous? My daughter loves things that are unique, creative, and colorful (kind of like her mom), and these cards totally fit the bill. Walgreens has a whole selection of Hallmark cards including ones with favorite characters, light up cards, and even cards with sounds, so you are sure to find the perfect card for your little one! I wrote a special little note in mine telling my little girl how much I love her and had the boys write notes in theirs as well.

I personally chose to give her the birthday badge Hallmark card because it comes with the cutest little wearable badge for the lucky birthday kid to wear – I mean, how cool is that?! I just love the idea of celebrating the birthday kid all day long. I knew it was the one as soon as I saw it, and she loved it too.
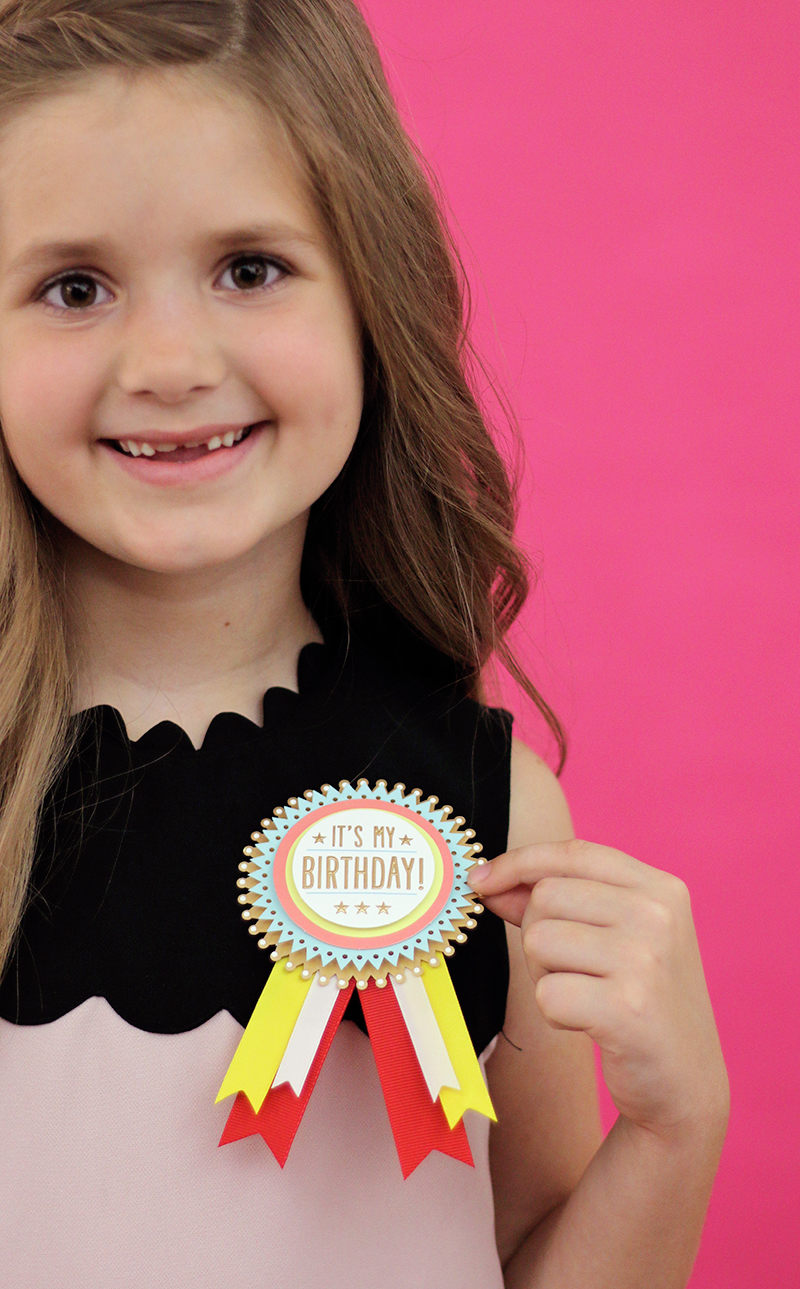
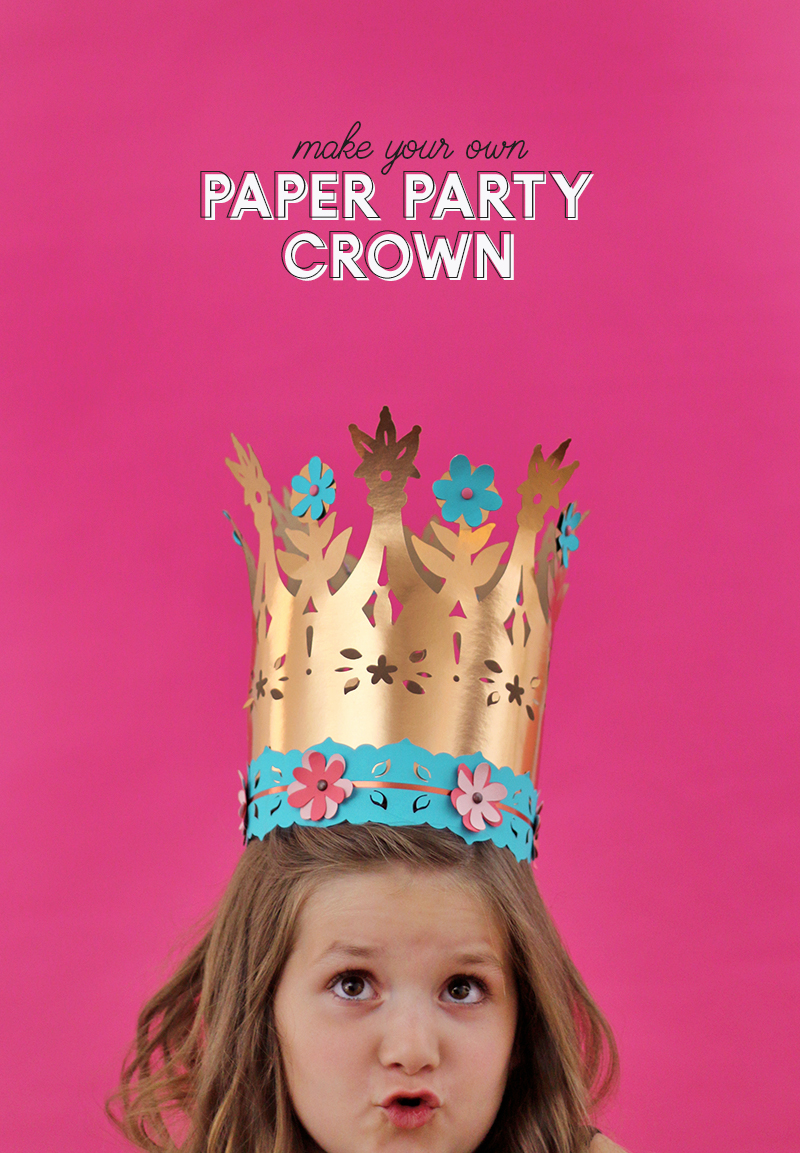
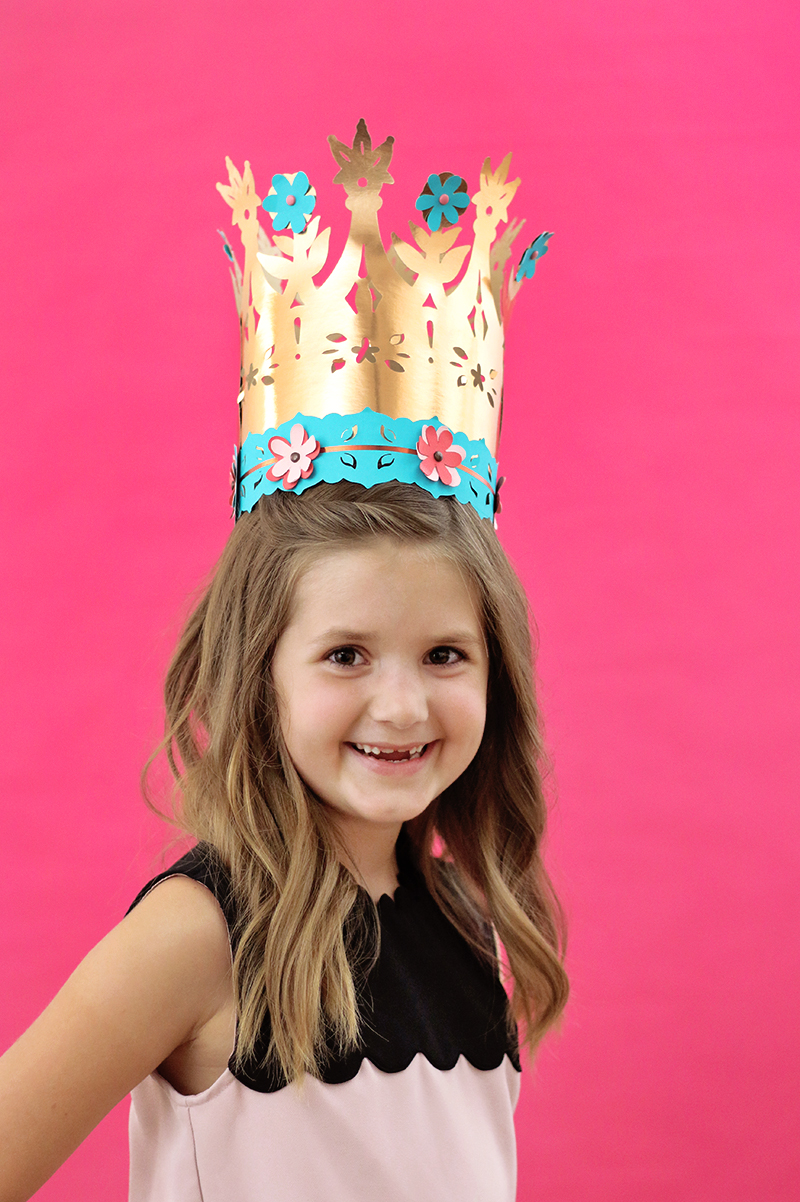
This cute Hallmark card with it’s adorable badge inspired me to make another fun wearable birthday craft for her big day because dressing up on your birthday is the best and I can’t help but throw some DIY in to any celebration. I loved the badge’s fun color scheme and layered, three-dimensional look and tried to incorporate those elements into a DIY paper crown. I’m really happy with the way it turned out, and it looks pretty cute paired with the Hallmark birthday badge:
![]()
I love taking something really simple like paper and turning it into something so special! These DIY paper crowns were so much fun to put together and are pretty simple to make with my free templates and cut files. If you want to make a paper crown for the birthday kid in your life, I’ve got everything you need to make your own below.
DIY Paper Crowns
DIY Paper Crowns Supplies

- Colored Cardstock (12″ x 12″ cardstock will make larger crowns)
- Electronic Cutting Machine (optional, but definitely makes things easier) OR Sharp Scissors and a Craft Knife
- Permanent Adhesive
- 1/8″ Hole Punch
- Brads (you can find colorful brads in the paper crafting section of your local craft store)
- Optional: Rhinestones, Glitter, Washi Tape
- Downloads – SVG (8.5 x 11 or 12 x 12), Studio (8.5 x 11 or 12 x 12), DXF (8.5 x 11 or 12 x 12), or PDF template
Step One – Cut
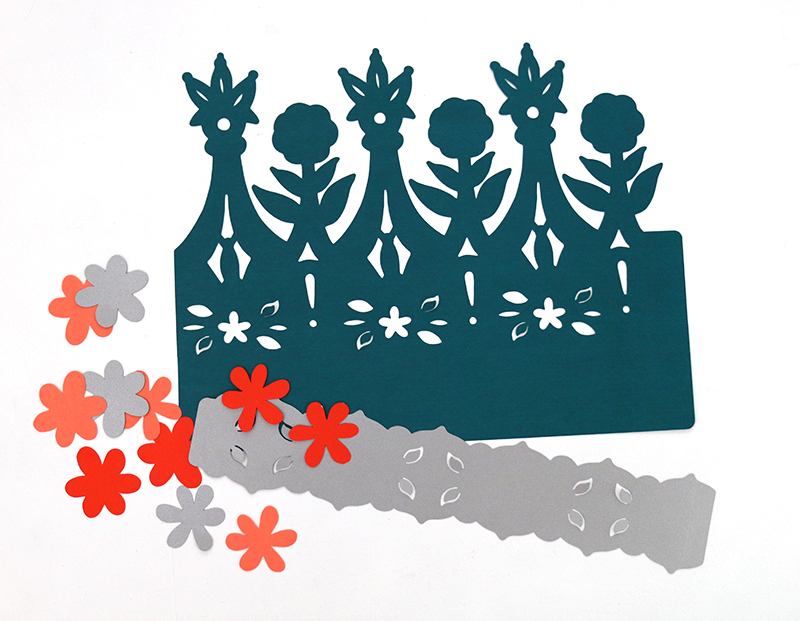
The first step is to cut out all of your pieces. I used my electronic cutting machine to cut out my pieces, which is definitely the easy way to go, but if you don’t have a machine – no worries – you can totally do this by hand. I would definitely recommend doing the cut outs with a craft knife if cutting by hand.
I have included two different sizes in the cut files above (in the supply list) – 8.5″ x 11″ and 12″ x 12″. If you cut the 8.5″ x 11″ size, your finished crown will be about 19″ in diameter and 8.5″ tall. The 12″ x 12″ size will produce a crown 21″ in diameter and 9.5″ tall. You will need to cut two pieces of both the crown and the band pieces and then a bunch of flowers in contrasting colors.
Step Two – Assemble

Start by gluing together the two crown pieces and the two band pieces with your permanent adhesive. There is a little tab on one end of both pieces to help you glue them together into one long strip. You should now have one long crown piece and one long band piece.
Next, attach the band to the bottom of the crown with your permanent adhesive. And that’s basically it. The base of your DIY paper crown is basically all assembled now! Easy peasy. All that’s left to do is decorate.
Step Three – Decorate
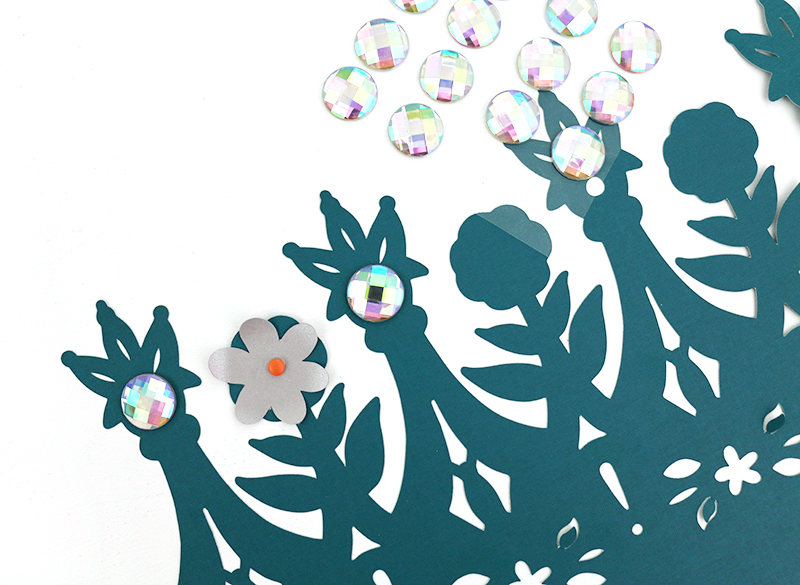
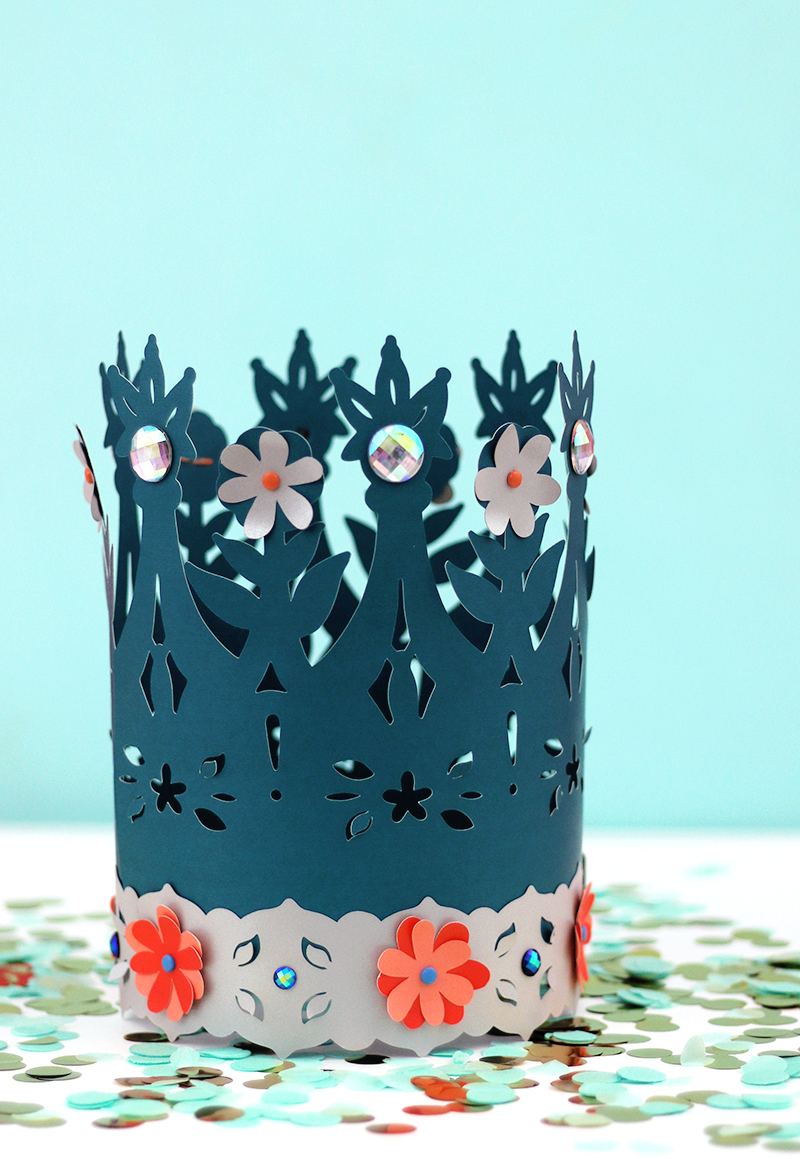
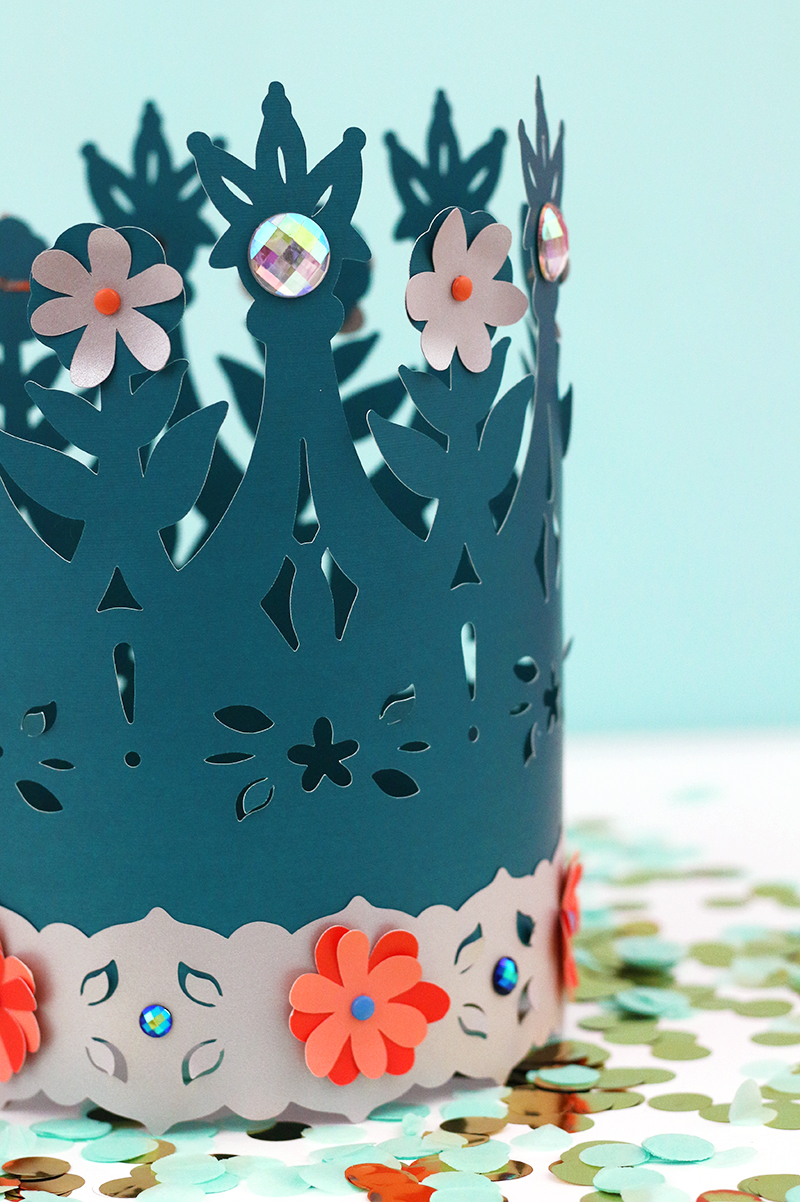
The cut files include flowers designed to be added to the crowns, but you can add on other decorations (rhinestones, washi tape, glitter, etc.) as you like. I picked up some adhesive rhinestones at the craft store and love the way they look. But whatever details you decide to add to your DIY paper crowns, you are definitely going to want to add some flowers. They give the crowns a really fun 3D look that I just love.
I have a few tips to help you achieve that great three-dimensional look. First, I recommend giving your flowers a bit more shape by curling the petals a bit by wrapping them around a pencil before attaching them to the crown.

Next, try out layering flowers to add more color and dimension to the crown. I alternated contrasting colors along the bands of my crowns. Finally, I love using small colorful brads to attach the flowers to the crown (you can find them in the paper crafting section of any craft store) because they add more color and texture to the design. My daughter was also pretty excited that the flowers would still spin around the brads, so there’s that bonus! 🙂

The last thing to do is glue your crown into a tube using your permanent adhesive making sure it is securely attached. And finally, give your beautiful crown to someone special to wear on their special day.
I love simple yet special things like these beautiful Hallmark cards and our little DIY paper crowns to make birthdays extra fun. This sweet girl really enjoyed receiving her special cards and loved the unique details on each one. I think she really enjoyed getting cards from each of her brothers too – her little brother’s note definitely made her giggle! (It mentioned, apropos of nothing, that cowboys are the best. ?) I really enjoyed getting them more involved, and I think we will make picking out special Hallmark cards a part of our birthday traditions in the future.


She was pretty impressed with that sprinkle card. I mean, how could you not be? And, of course, she wore her fancy crown while reading her cards (and all day after that – ha!). What are some of the simple things you do to celebrate birthdays in your home? Are Hallmark cards a part of your celebrations too?
Until next time, Happy Celebrating and Happy Making!


This is a sponsored conversation written by me on behalf of Walgreens. The opinions and text are all mine.

