I received product for this post, but all opinions are completely mine. This post also includes affiliate links. Thanks for supporting Persia Lou!
 Last week I had the opportunity to go to Snap, a creative blogging conference, and the closing keynote speaker was the amazing Heidi Swapp. I mean she’s amazing in the sense that she makes amazingly cool things and is a seriously successful business woman, but even more than that, she inspired every person in that big ball room who heard her speak. It’s possible that I cried… A little.
Because besides speaking about work and time management, she also spoke about showing love to those who are most important in our lives, and that was something that hit close to home. So, I already loved her amazing new Minc foil applicator, but after hearing her speak, I was even more excited to share it with you all as well the pretty, shiny print I made with it.
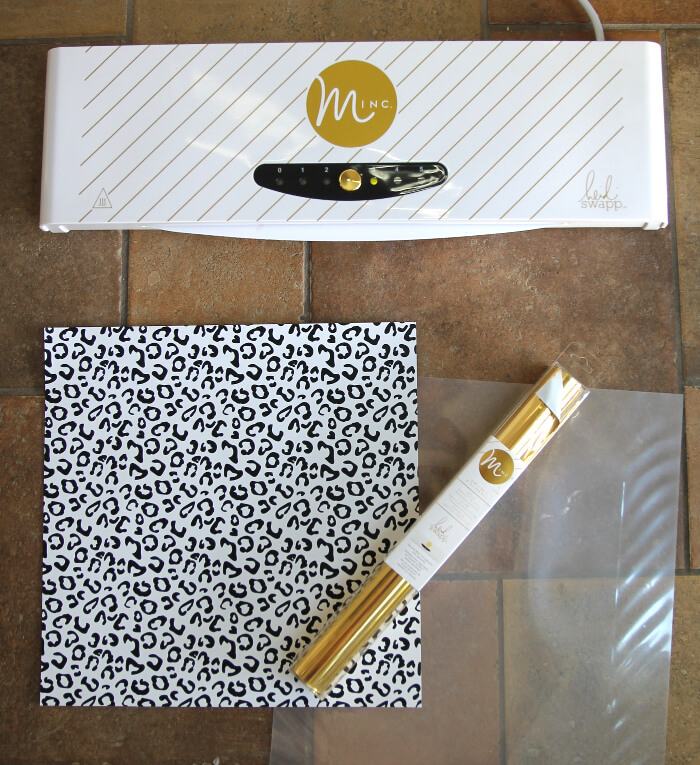
 First, let me tell you a bit about this cool machine. The Minc is kind of like a laminator, except unlike most laminators it can evenly distribute heat and pressure across a 12″ wide space, which means the foil can get applied evenly across your entire project, and the adjustable heat setting makes it possible for you to apply foil to everything from delicate materials like vellum up to thicker chipboard.
There are lots of super cool Minc accessories available – cards, tags, paper – BUT you can also add foil to anything that has been printed with a laser printer. Oh the possibilities!
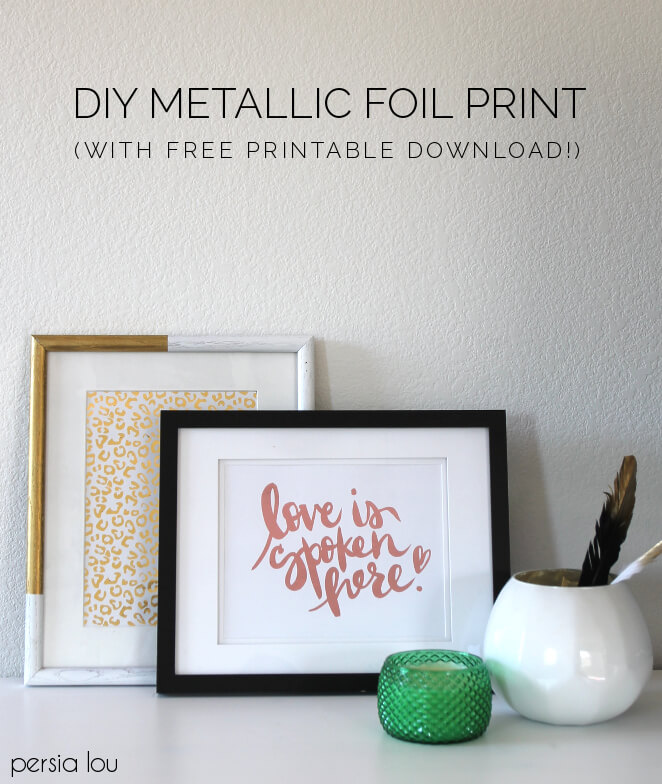
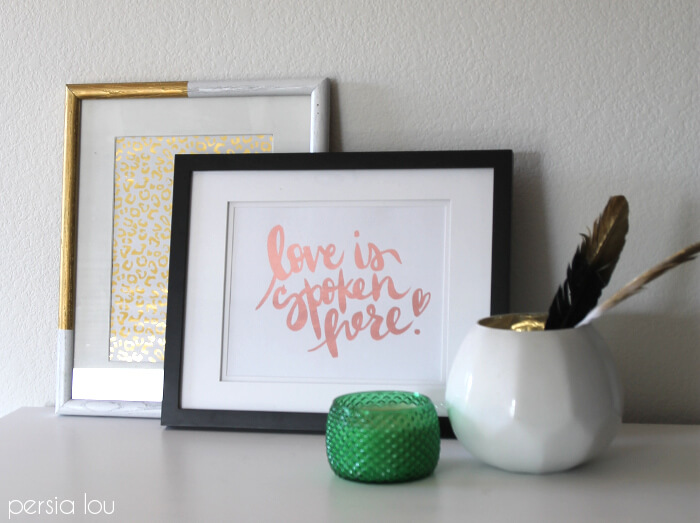
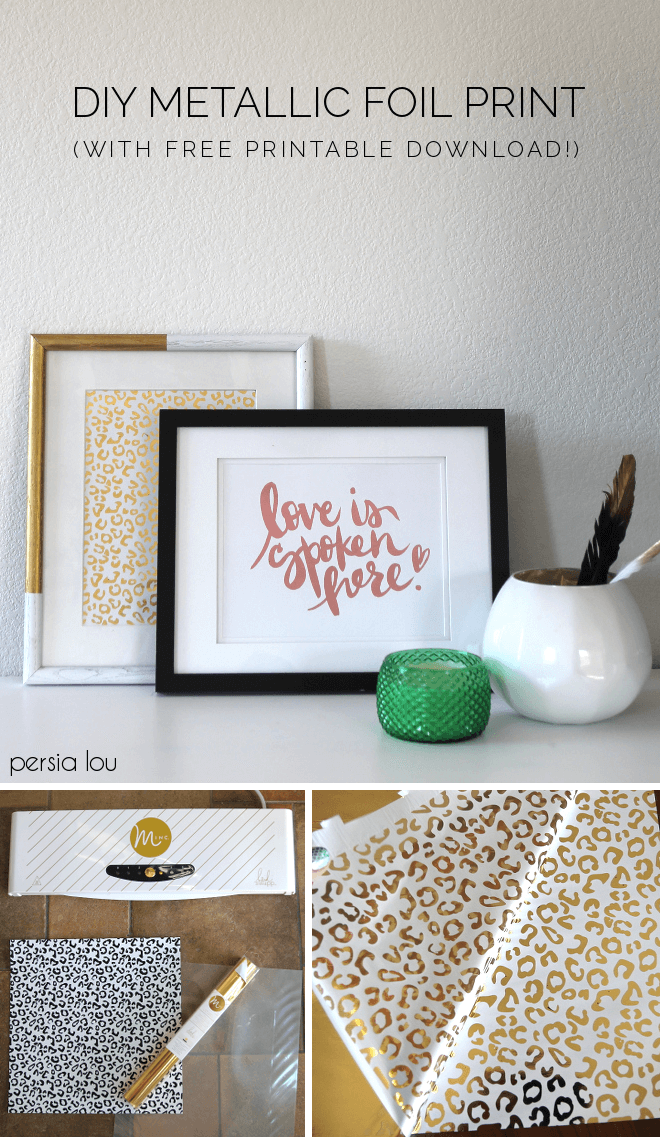
Luckily, we happen to have a laser printer at home, which meant it was easy for me to make a custom print. I lettered a little phrase I wanted to put up in our home (“Love is spoken here”), scanned it into the computer, and printed it out. Then I was ready to make my pretty metallic print! (If you want to make your own, you can download the printable HERE. This print is free for personal use only. Please do not redistribute the printable in any form.)
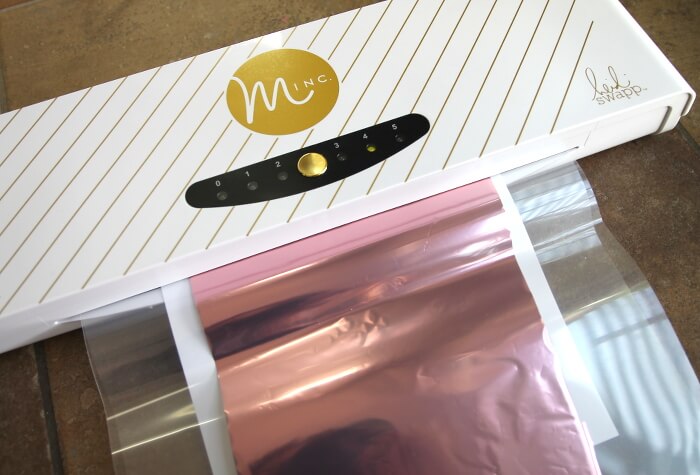
 The foil comes in a whole bunch of pretty colors in rolls 12 inches long and 10 feet long and sells for about 10 bucks. I went with the light pink foil for my project because it was just so pretty. I just cut a piece of foil large enough to cover the print and placed it on top of the paper color side up inside the transfer folder.
With the machine set to level 3, I inserted the folder closed side first into the machine and let the rollers pull it through.
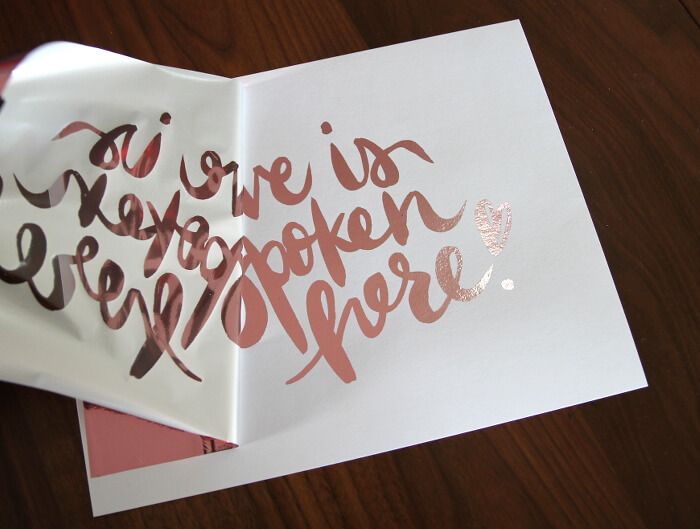
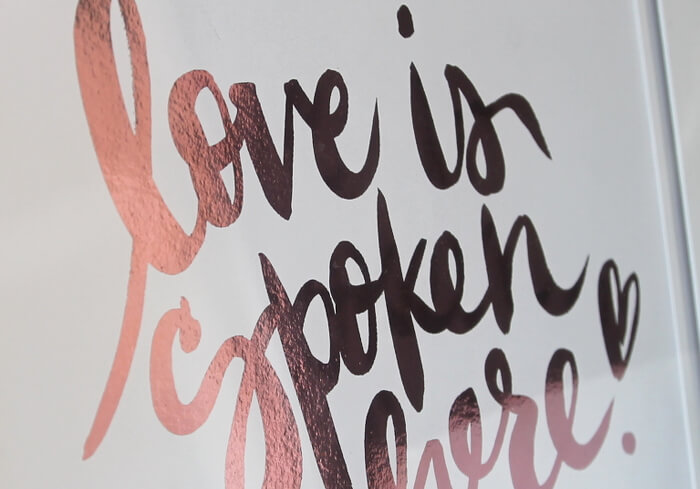
 When it came out the other side, I opened the folder and peeled the foil off to reveal this:
 Ah! It’s so fun! I’m pretty much ready to foil all the things. I also added gold foil to a leopard print paper available in one of the Minc paper packs.
 I framed it up and placed it behind the pink print. I really like the way they look together.
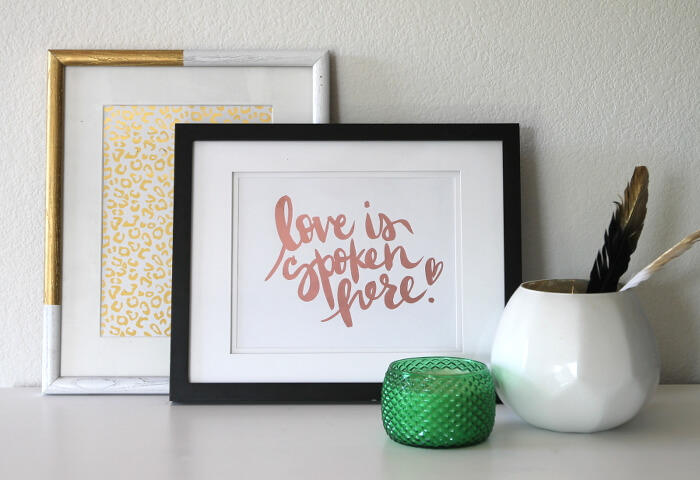
I like having this pretty reminder up in our home. We have been working on always speaking in kindness and love, and several times since I’ve put this up in our dining room I have seen it and resolved to do better.
If you are interested in getting your own Minc, you can find it at Jo-Ann, Hobby Lobby, as well as other shops. The Minc Foil Applicator and Starter Kit’s MSRP is $149.00, but it’s on sale over on Amazon right now! If you have any questions about it, leave them in the comments, and I will do my best to answer!


Comments + Project Love
Chelsie says
What kind of font did you use? I love the handwriting print.
persialou says
Hi Chelsie!
I lettered it by hand. I’m glad you like it. 🙂
RObyn says
Thanks for sharing! I have a Minc coming in the mail!
persialou says
Oh yay! You are going to love it!
Sheila says
Thank you so much for the free printable! My minc should be arriving soon. I can’t wait!
persialou says
Oh yay! Have fun with it!
Jessika says
I really appгeciate this pօst. I have been lookoing all over for tҺis!
Thank goodness I found it oon Bing. You’ve made my day!
Thank yoս again!
Annie says
I am just wondering what printer you have? I have read a heap of reviews and some people have had trouble when it came to actually making and printing their own designs – but yours turned out beautifully!!
persialou says
Hi Annie! Thanks! My printer does seem to work well with the machine. I really haven’t had any problems, a few little black spots here and there, but they don’t bother me. We have the Lexmark MX310 (http://amzn.to/1Tpizse – that’s an affiliate link). The Minc FAQs recommend the HP LaserJet Pro P1102w, which is really affordable (http://amzn.to/1D4vEOf – that’s an affiliate link too). Hope that helps! 🙂
Destini says
I recently bought the Heidi Swapp Minc Foil Applicator, however I noticed it only reacts with the paper product she sells. Is there a way to get it to work with my own cardstock and print??
persialou says
Yes! The foil will adhere to anything printed with a laser printer. It reacts to toner not ink, so if you are using an inkjet printer that is your problem. If you do not have a laser printer, you can take your images to a copy center and have them print them for you and they should work. If you want to purchase a laser printer, American Crafts recommends this one that is not too expensive – http://amzn.to/1FzLQID (that’s an affiliate link). Good luck!
Leslie says
Hi! Thank you so much for sharing this. I am planning on printing wedding invitations on super thick paper through thickit.com. They don’t offer gold foil print so I thought this would be a cost effective solution for me. I was wondering if you can tell me if the minc can take a 5×7 postcard with an illustration board type of thickness?
Alexis says
Hi Leslie! The size should be fine. It can do chipboard thickness, so I think that would probably work. Good luck!
sherrie says
hi
I was wondering if you can use TODO foil with the minc as I have been given some
thanks for great post
Alexis says
Hi Sherrie! I am not 100% sure because I have never used that brand of foil myself, but from a little bit of internet research it looks to me like it should work. Good luck!
Lali says
Hi! How can I apply foil to the letters only when using a background image? thanks!
Alexis says
Hi Lali! Are you trying to foil letters on top of an image you have printed? If you are printing the background image with a laser printer, you just need to run it through the Minc (without foil) first. Once the ink has been activated by the heat it, the foil won’t stick to it. So, print just the background image, run it through the Minc without foil, then print the text over the image, and run it through the Minc again with foil. I hope that helps! This post might also be helpful for you: http://persialou.com/2015/05/how-to-make-multi-colored-metallic-foil-prints.html
Amy says
I got the MINC for Christmas and I’m having trouble getting even foiling. I’m printing my designs on a laser printer, using the recommended heat settings, and using Heidi Swapp foil. Every time, there are tiny black dots left that don’t get foiled. Any suggestions??
Alexis says
Oh boo. That is frustrating! I will definitely get some black dots here and there in my foiled projects. A few little dots don’t bother me, but bigger spots can be frustrating. I’m not sure if it will work for your project, but I will say that if you print your design on black or darker paper, I find the spots to be much less noticeable, so that’s one thing you can try. Another thing you can try is to up the heat setting on the minc. I think 3 is the recommended setting for cardstock, but lately I’ve been using a 4 and I think it works a bit better. I have also heard that some printers just work better with the foil than others. It could also be that your toner might be running a little low? I hope some of that is useful to you. Good luck!!
Rebekah says
Hi there…
I have just purchased a Mink Mini and loving it! However can I ask how is it that the foil is only sticking to the letters? When I have tried to do the letters it’s sticking to the letter but also the background too… and sometimes missing parts of the wording ? Any tips please?
Thank would be wonderful! Thanks so much!!
Alexis says
Hi Rebekah! Thanks for stopping by. Are you printing your images yourself at home? Or are you using preprinted materials? Some toners work better than others, so it could be a problem with the printer? If you can, maybe try another printer or copier. It is normal to get a few little black spots where the foil doesn’t completely grab to the toner, but I haven’t seen it stick to the background as well. I’m sorry I’m not sure how much help that is. Good luck!
Rebekah says
Helllllo….
Thank you so much for your reply ! So I am actually using a vinyl cutting machine… I do expect little black specks at times that’s fine I just don’t understand why the foil is sticking to the background. I actually tried to use an iron and it worked perfect so I think I’ll stick to that from now on. It never stuck to the backing and no black specks at all! 🙂