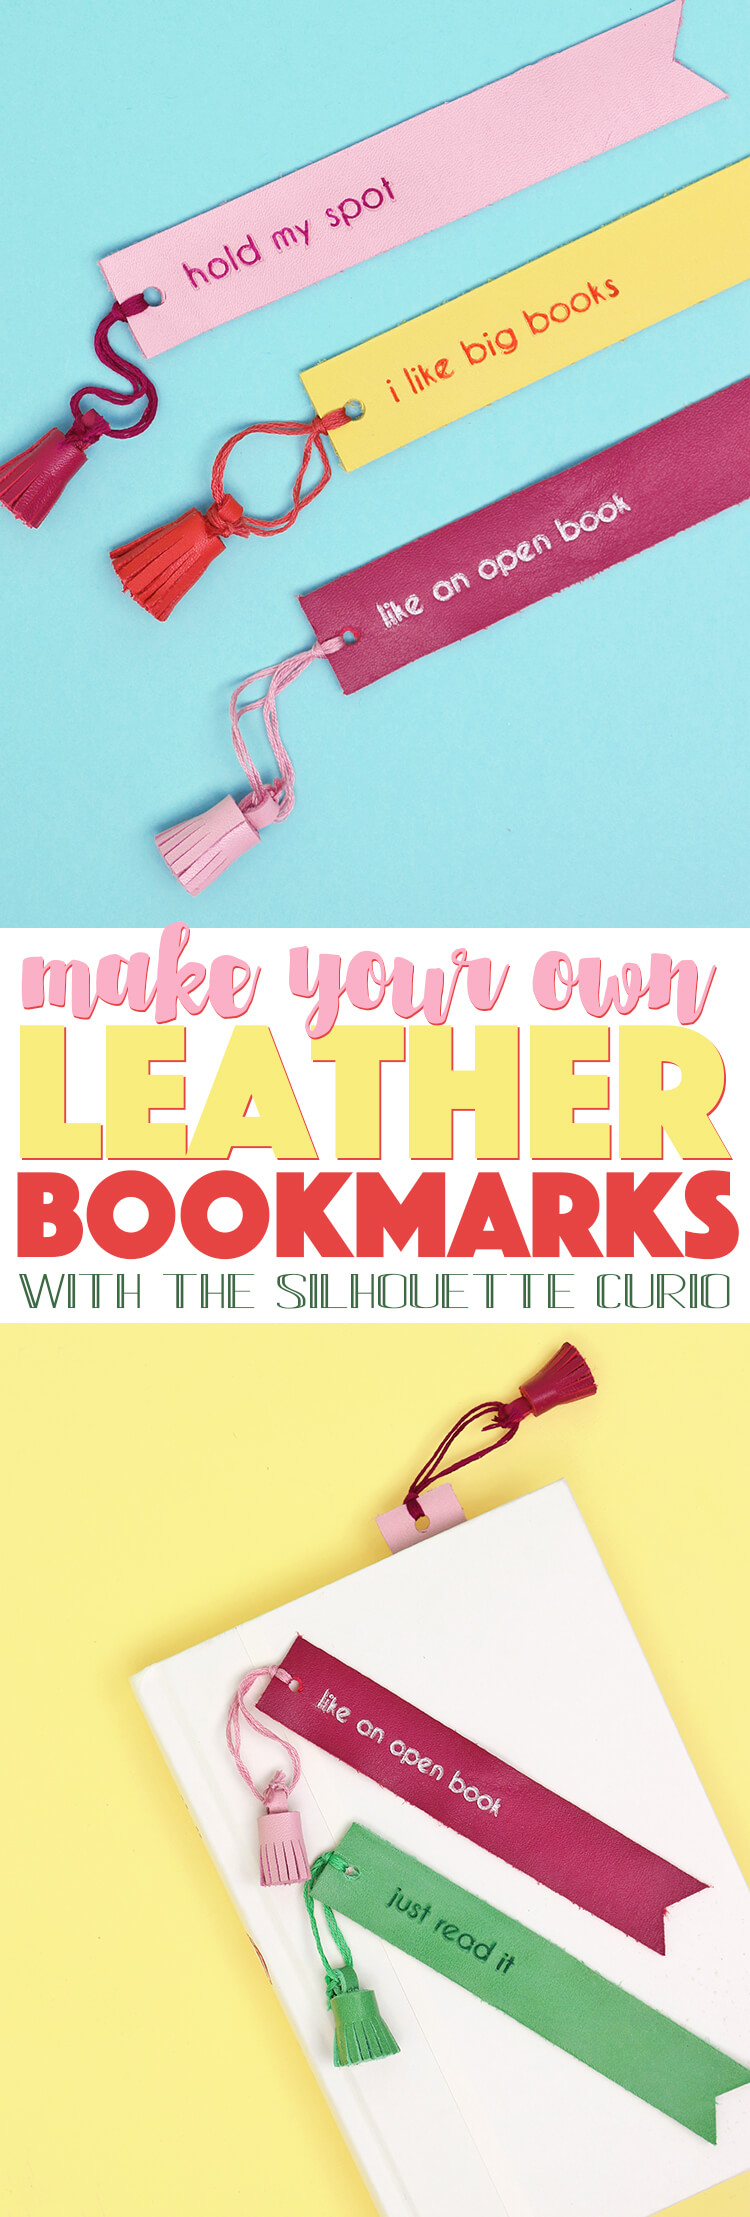
Learn how to emboss and cut leather with the Silhouette Curio and make your own DIY leather bookmarks! This cute leather craft is easy to personalize and makes the perfect gift for the bookworm in your life. This post was made in partnership with Silhouette and contains affiliate links, which help to support this site, but, as always, I only share products I personally use and love.

If you have been around here much, you probably know that I love my Silhouette machines and that I use them all the time. I love my Cameo and use it constantly – I even created a whole online course all about cutting vinyl with the Cameo – but last year my Cameo got a fun little buddy that I am still getting to know and quickly growing to love. That little buddy is the Silhouette Curio, and I am really excited to show off a couple of this machine’s unique features with you guys today as we make some cute DIY Leather Bookmarks!
I have had a few people ask me about the differences between the Cameo and the Curio, and I would say that the Curio is really a companion to the Cameo. It can cut like the Cameo, but what really sets it apart are it’s unique capability to emboss, stipple, etch, and work with thicker materials. When I first got my Curio, I knew that it’s embossing tip and deep cut blade would make it perfect for working with leather, and this project was just the thing to test that theory.
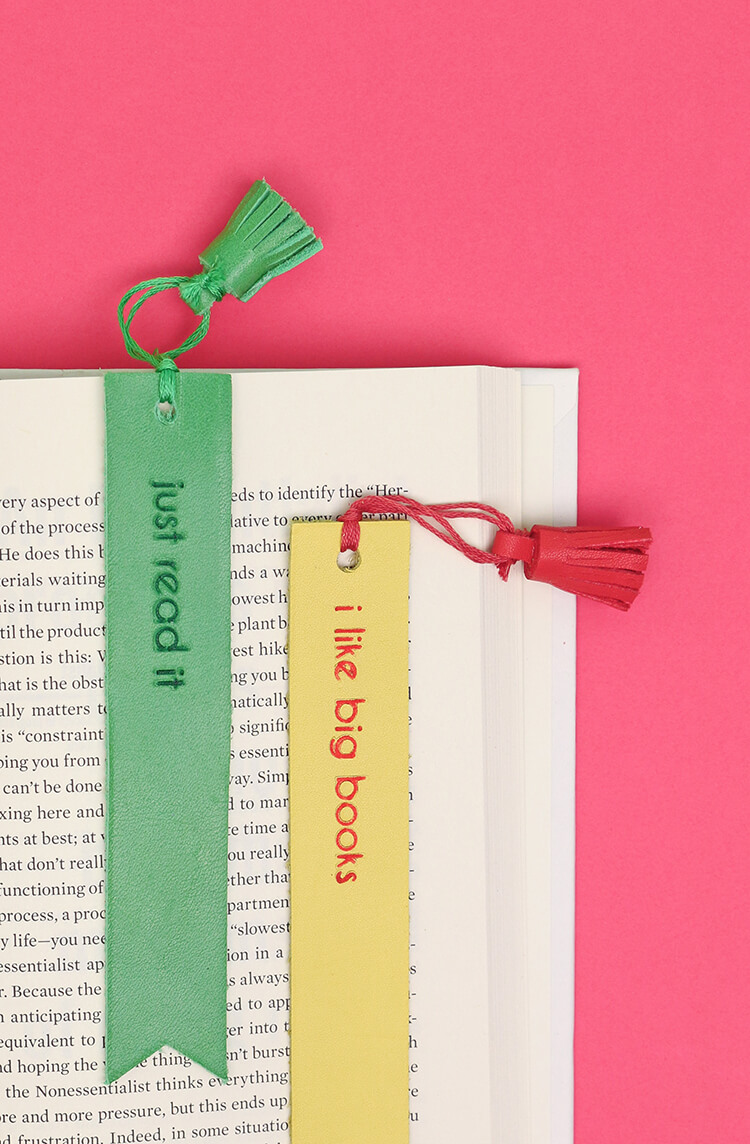
Recently, I saw some cute leather bookmarks on Anthropologie, and I decided to see if I could get the same look using my Curio. Good news, guys – it totally worked. I’m going to walk you through all the steps to emboss and cut leather with your Silhouette Curio, so you can make your own DIY leather bookmarks or whatever leather project you can dream up!
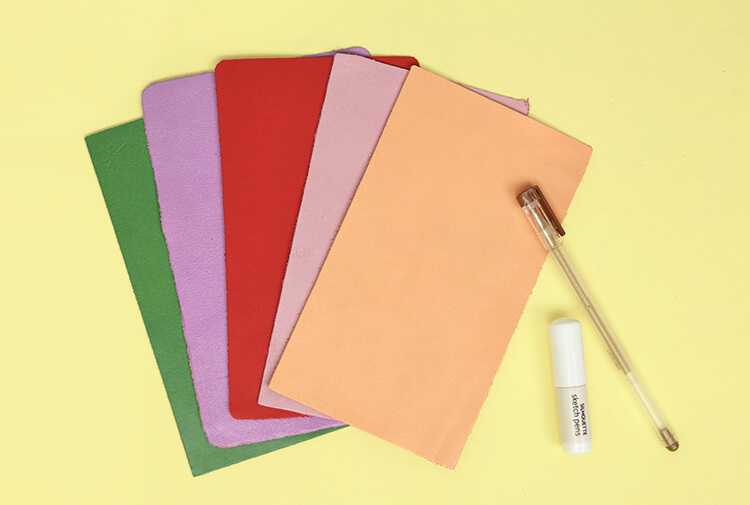
DIY Leather Bookmarks Supplies
- Silhouette Curio
- Silhouette Deep Cut Blade
- Silhouette Sketch Pens or Ultra Fine Point Permanent Markers
- Silhouette Pen Holder
- Colored Leather
- Masking Tape
- Spray Adhesive (optional)
- Coordinated Embroidery Floss or Cording
- Fabric Glue
- Bookmarks Studio3 file (Click to Download)
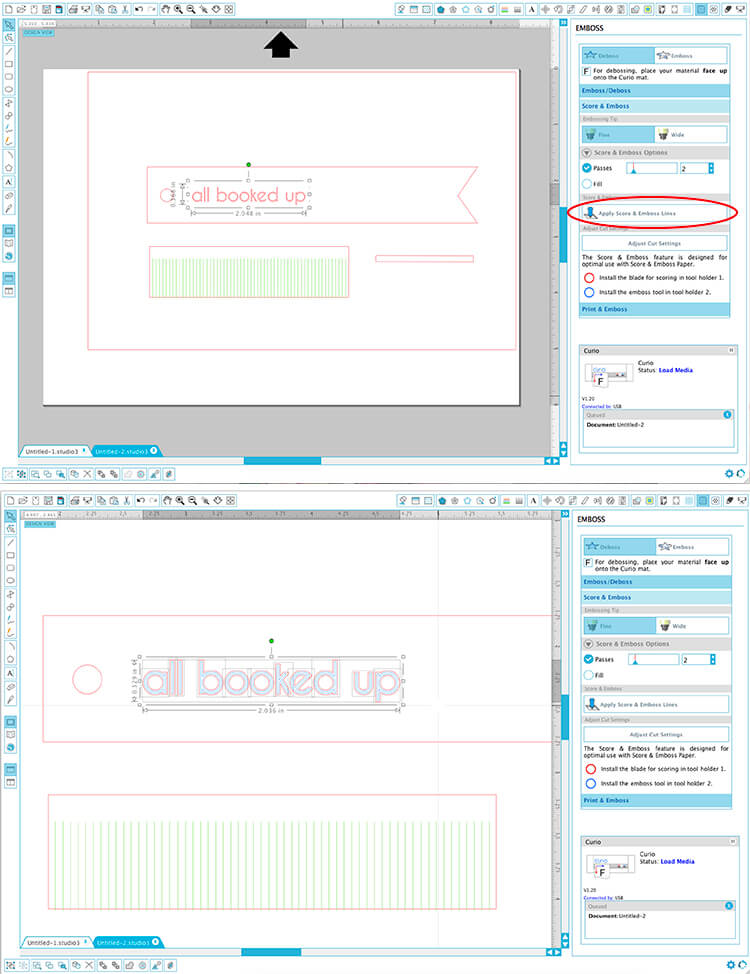
To get the embossed leather look, we will go through a few different steps. First, we will score and emboss the text. Next, we will sketch the text. And, finally, we will cut out the bookmark and tassel. Start by opening up the bookmarks file in your Silhouette Studio software (the file is included in the supply list above). You can use one of the phrases included in the file or create your own. To score and emboss the text, click on the text to select it, then open the emboss menu, make sure deboss is selected, click on score & emboss options, and then click on apply score & emboss lines. The software will automatically create the score lines on the outside of the text (in red) and the emboss lines inside the text (in blue).
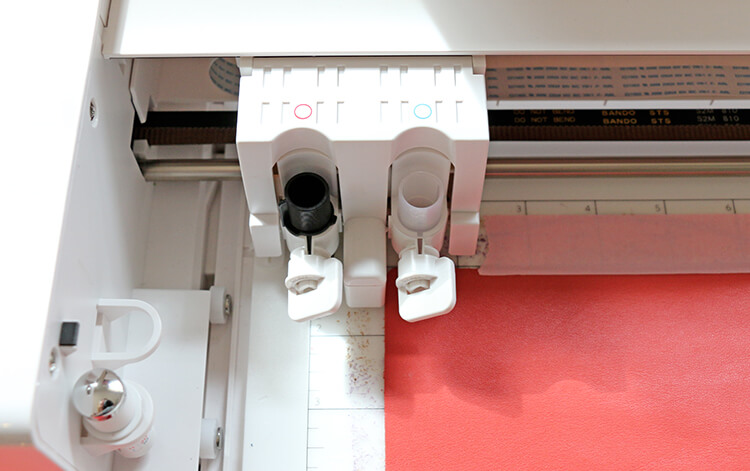
The Curio has a dual carriage, which means it can use two tools at once. The tool holders are clearly marked with red and blue circles to make it easy to see which is which. Put your blade set to a 1 in the red slot and your fine embossing tip in the blue slot.
Then, place your leather on your cutting mat with the platform set to 5. Aki over at Minted Strawberry had the brilliant suggestion to cover the back of the leather with masking tape and then use a bit of spray adhesive to attach securely to your cutting mat. I definitely recommend doing that to prevent your mat getting covered in all of those little leather hairs! I chose to emboss on the cutting mat rather than the embossing mat so I wouldn’t have to move the leather to a different mat after embossing, and it worked perfectly.
For this project, I really recommend using the Cut by Color feature in the Silhouette Studio software. This feature makes it really easy to only cut (or emboss or sketch or whatever) certain parts of your design at a time.
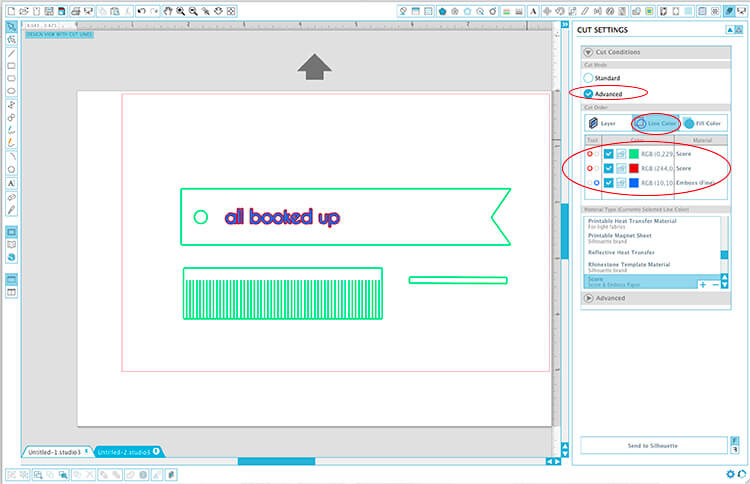
You can see that I have the cut lines in green, the score lines in red, and the emboss lines in blue in the image above. (To change the line color of an object, select the object by clicking on it, open the line color window, and then select a color.) When you are ready to send your project to the machine, open the Cut Settings menu, click on Advanced and then Line Color to open up the cut by color options. You want to uncheck any colors you do not want to send to the machine at that time. In this case, I would uncheck the green, so that only the red score lines and blue emboss lines will be cut/embossed right now.
When your leather is securely adhered to the mat, the right colors are selected in the cut by color menu, and the mat is loaded into the machine, go ahead and send it through to the Curio. Here’s what it will look like when it is done with the score and emboss:
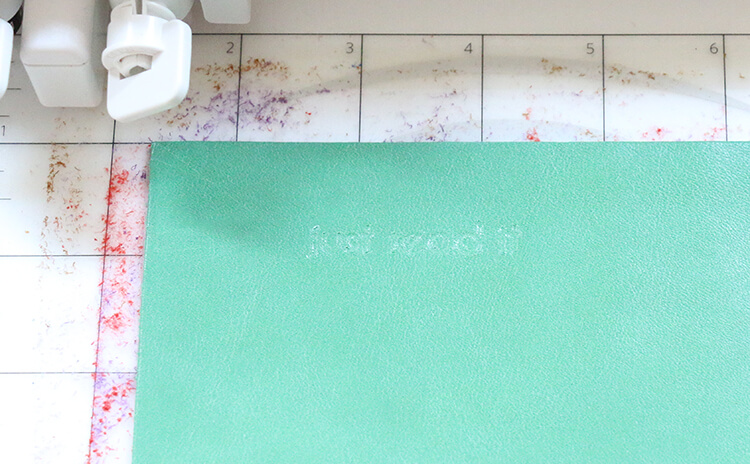
I know, not that impressive. Yet. But just you wait! Next, we are going to uncheck the score line from our cut by color menu, so just the emboss color is checked. We are going to send it back to emboss several more times to get really nice, crisp text. And before you send it back to the machine to emboss again, I have one more tip. Take a paint brush with a little bit of water and brush it over the part of the leather you are embossing. Use your fingers to gently work the water into the leather and then wipe away any excess. I found that this one step really gives you a much better result.

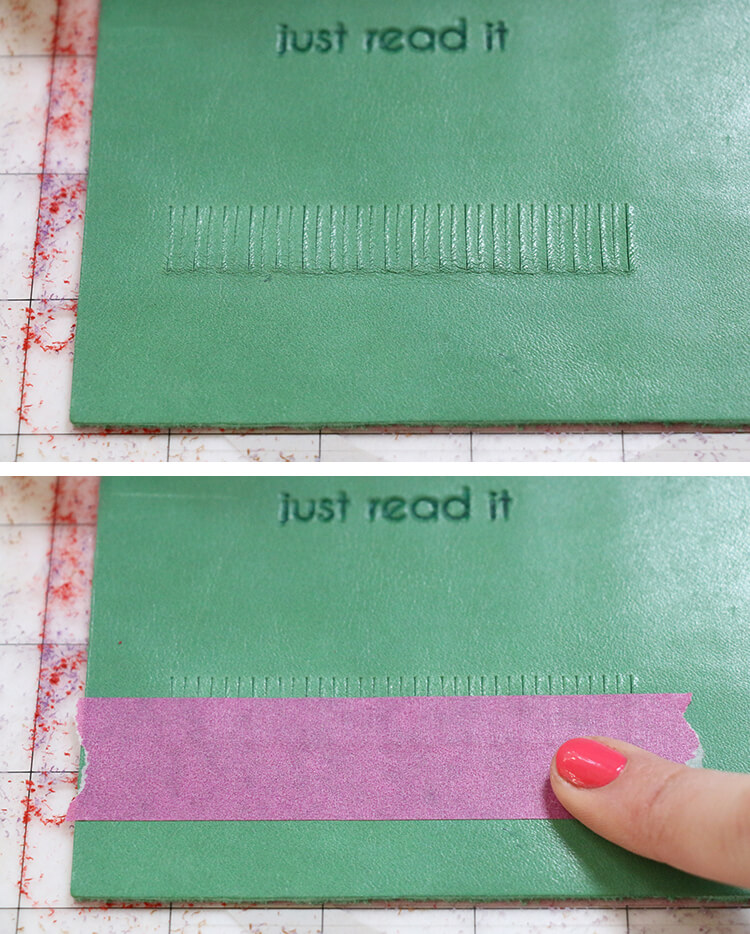
There. Doesn’t that look great! That is after about 10 more embossing passes. It might seem like a lot, but it really only takes a couple minutes. Make sure your embossing cut settings have the double cut box checked to cut down on the number of times you have to click send.
Okay – now we have our text beautifully embossed, and if you wanted, you could leave it just like that. I decided to give a little more emphasis to the text by adding some ink to the embossed text. Start by clicking on the text to select it, then select Offset from the Object menu. Select Internal Offset and adjust the distance until you see a thin outline inside of the letters (.018 worked well for me). Then change the color of your internal offset lines to a new color. Now, you can select that color from the cut by color menu, put your pen in the correct tool spot, and sketch inside your embossed letters! So cool, right?

I used both the Silhouette sketch pens and ultra fine point permanent markers. You can use most pens or markers with the Silhouette pen holder, you just have to make sure the tip is narrow enough to fit inside your text.
Now that your text is scored, embossed, and sketched, you are ready to cut! One of my very favorite features of the Curio is it’s ability to cut thicker materials. Using the deep cut blade, you can cut materials up to 2mm thick, which means it cuts most leather beautifully. However, because leather varies quite a bit in thickness and stiffness from piece to piece, I definitely recommend doing test cuts with each new piece. I recommend using a blade setting between 15-20 (depending on thickness of the leather), a speed of 1, a thickness of 25-33 (again depending on thickness), and double cut checked.
I found that with this design it worked best to cut the vertical cuts in the tassel piece first before cutting the outside rectangle. By changing the color of the vertical cut lines I was able to easily cut just this portion of the design first. Once those lines were cut, I found it helpful to cover the bottom half (where they would be cut next) with a piece of masking tape to keep them from moving around during the next cuts.
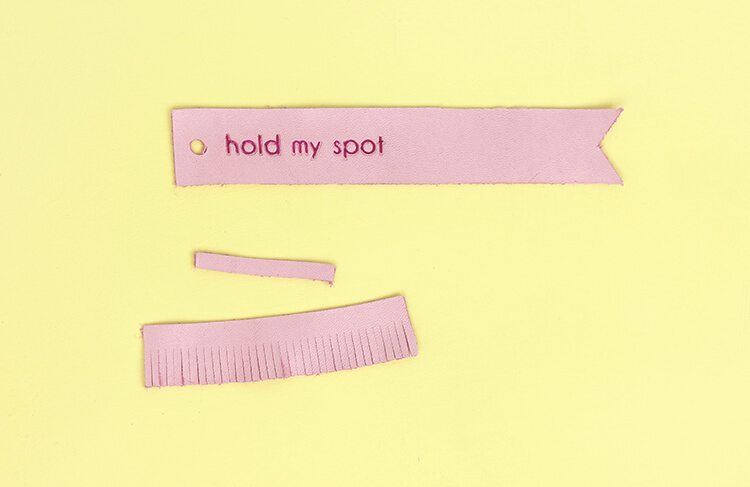
Finally, we are ready for our last cuts, send the remaining cut lines to the machine, and carefully remove your cut pieces from the cutting mat. You should now have three pieces for each bookmark – the bookmark itself, the tassel, and the tassel loop:
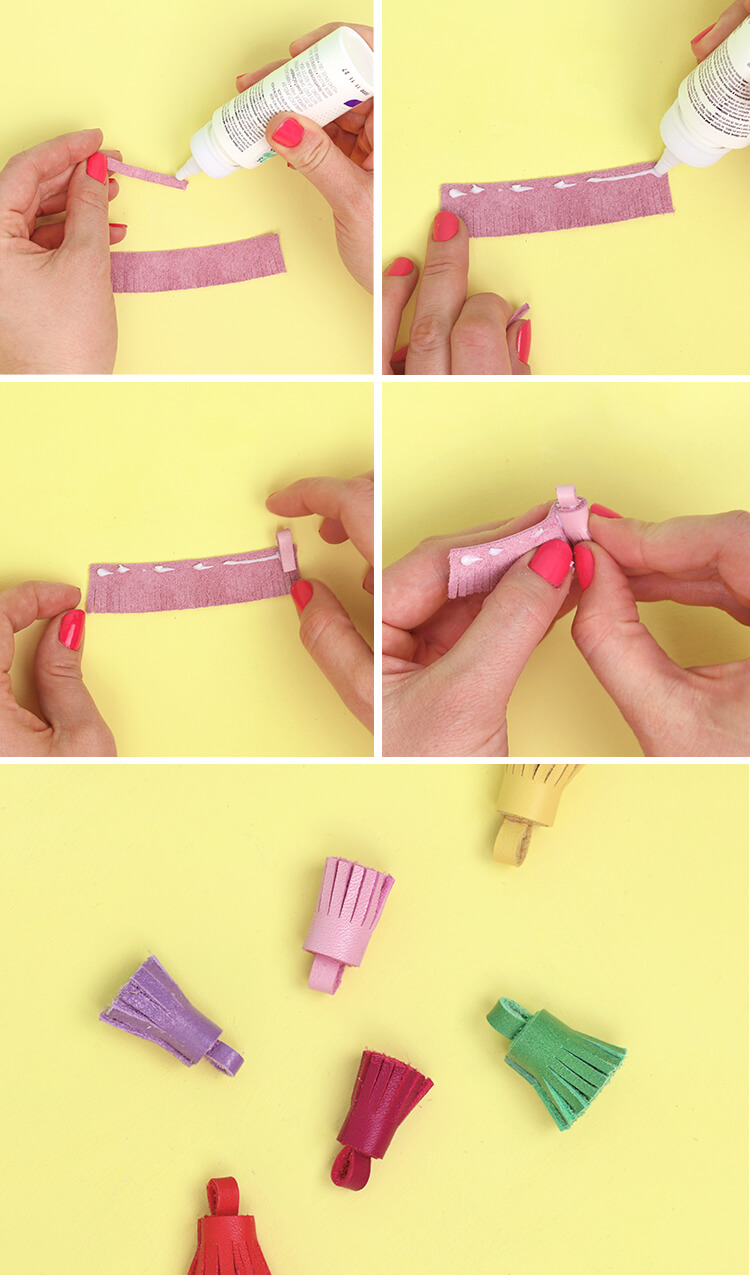
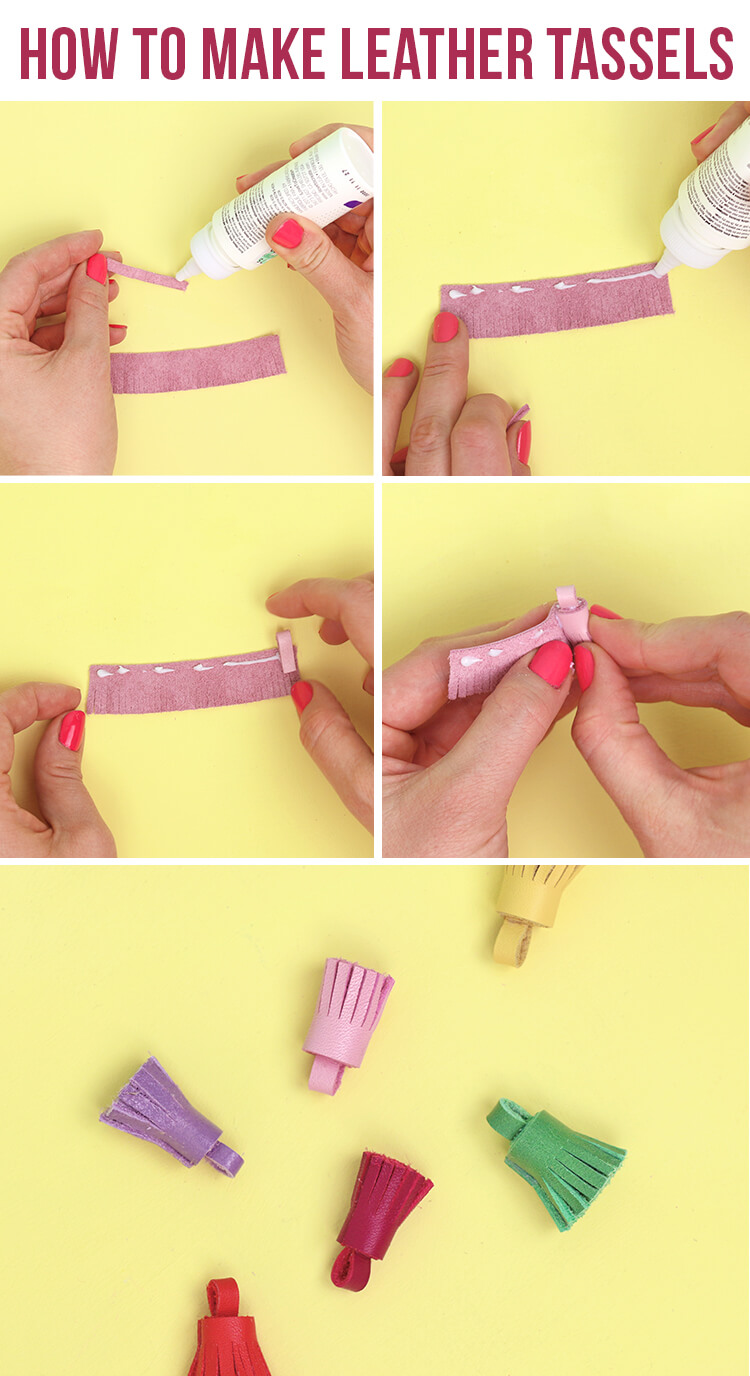
If your leather is a bit soft and flexible, you can brush some water onto the back of the leather and set it aside to dry. This will stiffen it up a bit. Once that is done, we are ready to make our tassels and assemble our bookmarks. To make your tassels:
- Fold the loop piece in half and glue into a loop.
- Squeeze a thin line of fabric glue along the top edge of wrong side of the tassel.
- Place the loop on one edge of the tassel and tightly roll up. Hold for a few minutes to allow the glue to set.
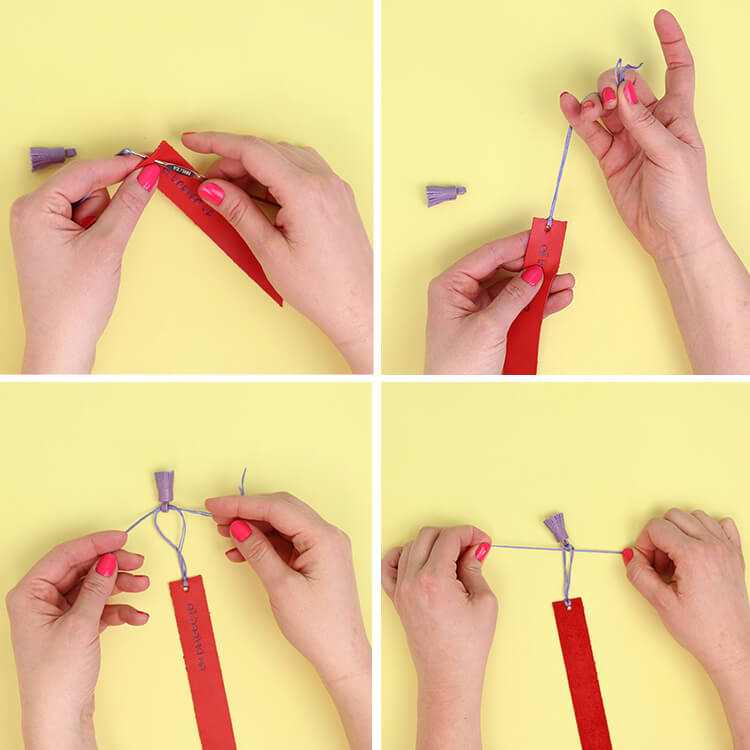
When all of your tassels are ready, it’s time to tie them onto our DIY leather bookmarks. You can keep the tassels and bookmarks matching or shake things up. Choosing coordinating colors of embroidery floss or cording to attach your tassels to your bookmarks.

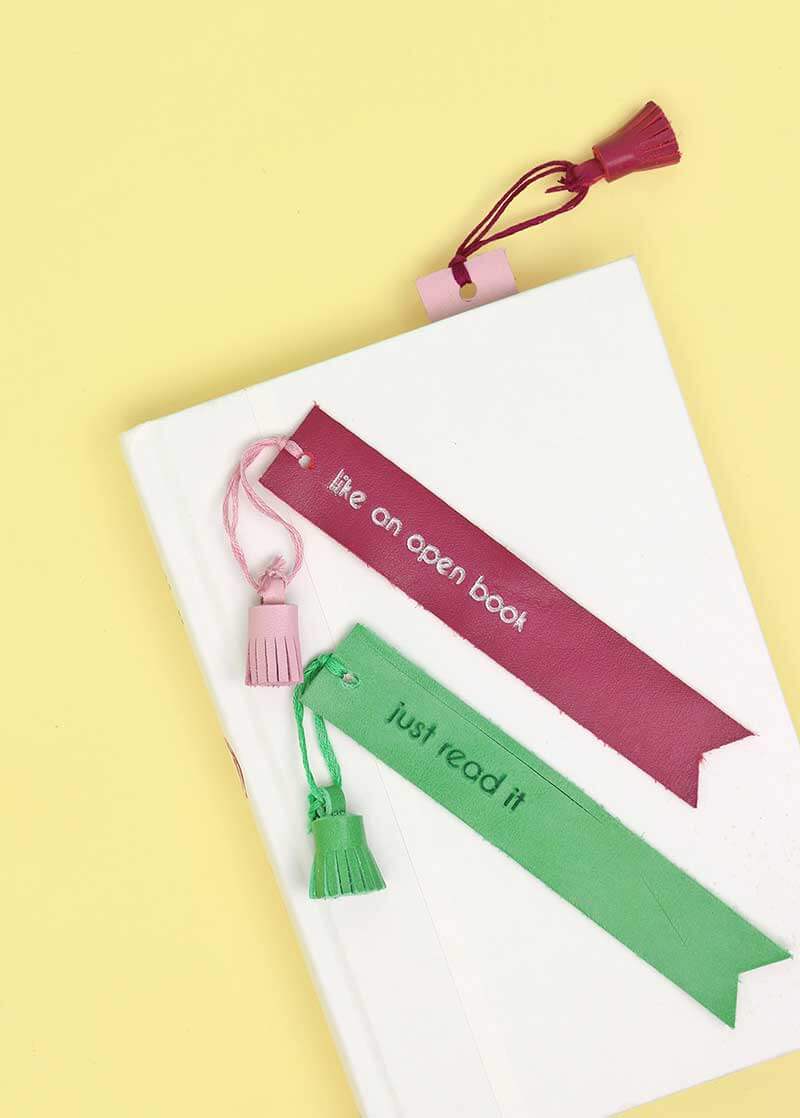
Finally just tie the tassels onto bookmarks. I found a small crochet hook was helpful to pull the thread through the holes.
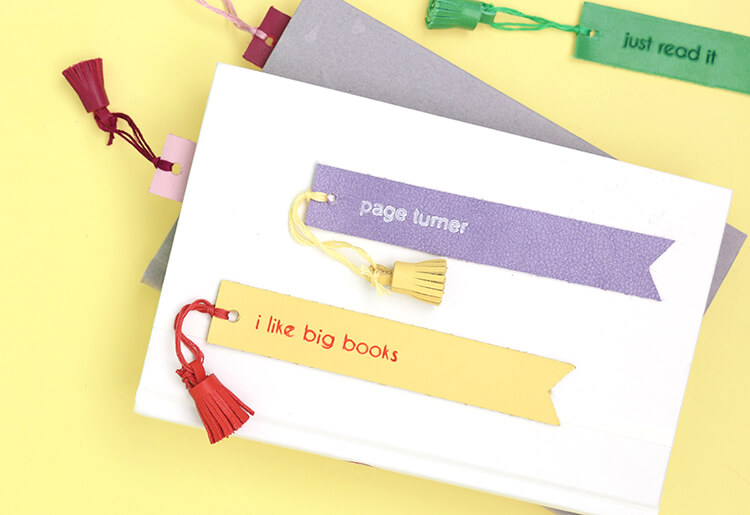
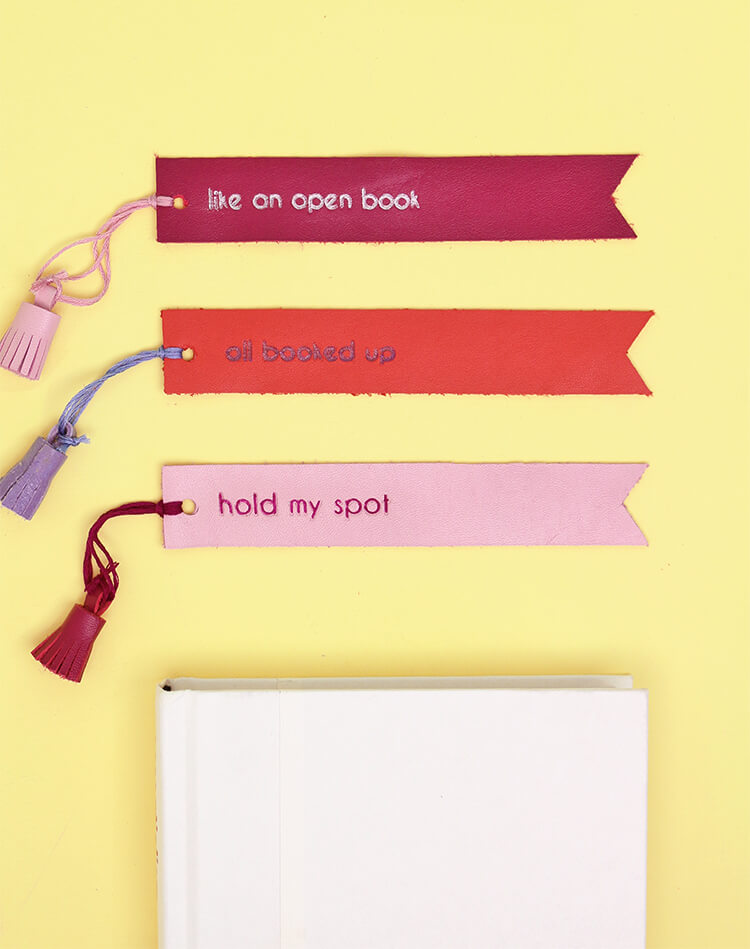
And that’s it! Our DIY leather bookmarks are all done! Gift them to all your reader friends, or keep them all to yourself!


I like them all, but I really think “i like big books” is my favorite. I cannot lie. 😉
So what do you guys think about this whole leather embossing thing? Would you give it a try? My next project is going to be to make some custom leather tags for my crochet projects. I am so excited about that!
If you have a Curio, what have you used it for? And do you have any questions about using it or any features or techniques you want to learn? Tell me all about it in the comments. 🙂
And if you make your own DIY Leather Bookmarks, of course I want to see them! Just share your photos to my facebook page or tag me on instagram or twitter (@persialou), and don’t forget to use the hashtag #persialou for a chance to be featured.
Happy Reading and Happy Making!

Check out some of my other Silhouette Projects:

Letterpress Look Notecards with the Silhouette Curio
How to Fill in Fonts with the Silhouette Curio


Comments + Project Love
Maritza | Maritza Lisa says
So, so brilliant, Alexis!
Alexis says
Thanks so much! <3
Victoria says
I love this! Thanks for the clear directions. It’s still a little scary but I’m getting closer to giving it a try. I would love to see a leather bracelet project!
Alexis says
Hi Victoria! I love the idea of a leather bracelet! I will see what I can come up with. 🙂
Siev Senghou says
Silhouette Curio machine is an oldie but goodie. 🙂 I’m still loving it and not yet want to upgrade to Silhouette CAMEO 3.
Christie Shelton says
Hi, did you ever get a chance to try some custom leather tags for your crochet? I am playing around with the idea and wanted to see if you had any luck.
Thanks
Christie
Nermine Ghazal says
What are the settings for embissing leather
Thickness
Speed
Maartje says
Hi Alexis,
I have a Cameo 2 and a Curio. I am starting to know my Curio and I found your article about leather bookmarks. I am trying to make covers for passports out of leather, of course embossed with a picture and name. However, I think I am doing something wrong, muy leather has to go through the machine multiple times, and I mean at least two days….
I have leather that is about 1mm thick, so is that the problem? Or maybe it is in the settings, can you share your settings with me?
Love your site and facebook page!
Kind regards,
Maartje
Netherlands