Create your own DIY Geometric Accent Wall easily with vinyl! I will show you how to get a custom geo design on your walls without taping and painting. A big thanks to Expressions Vinyl for sponsoring this project. This post contains affiliate links, which help to support this blog. Thank you!

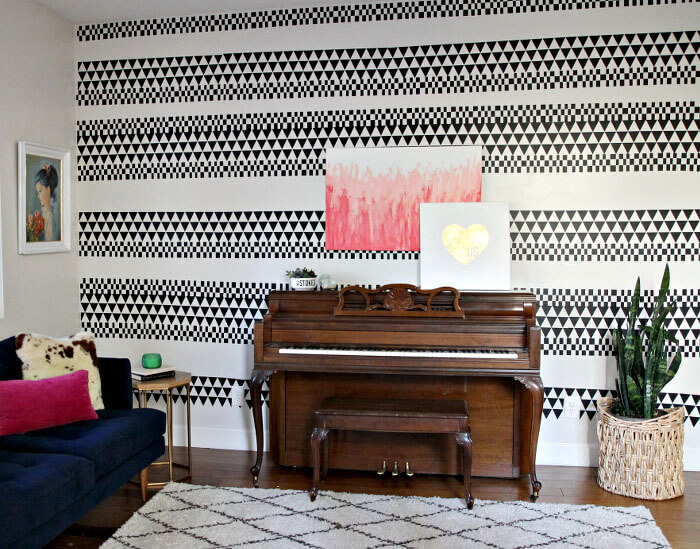
Guys! I’m so excited about today’s project. This month’s Expressions Vinyl theme is Geometric (yay!), and I decided that for my project I wanted to do some kind of geometric pattern on a wall in my home. As I was thinking about what kind of design I wanted to do I remembered this amazing black and white tribal patterned wall treatment I had pinned years ago that had always kind of been in the back of my mind.

I’m so excited to see it out of my head and onto our living room wall. So fun! This is the biggest vinyl project I have ever completed, but while it did take some time to complete, it was not at all difficult to do. Here’s how it went down:
Supplies:
- 12 x 10 yd Black Removable Indoor Vinyl (I used about one and a half rolls to cover a 9’x12′ wall
- Transfer Tape
- Weeding Tool
- Vinyl Application Tool
- Silhouette Cameo or other electronic cutter
- My Design Download (STUDIO or SVG)
First things first, we need to cut out all that vinyl! If you have never cut long pieces of vinyl before, I have a few important tips to help you get perfect cuts and not waste any of that precious vinyl.
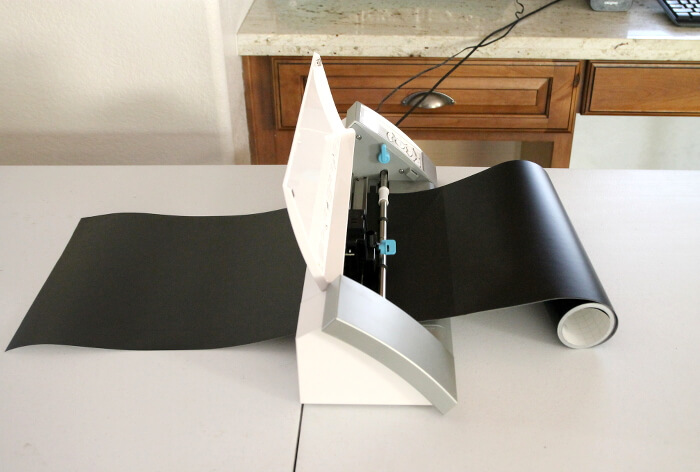
First, be sure to give your machine space to work. I placed my silhouette in the middle of a folding table near my computer. This gave me a couple feet both in front of and behind the machine to ensure it had space to roll and unroll the vinyl as it worked.
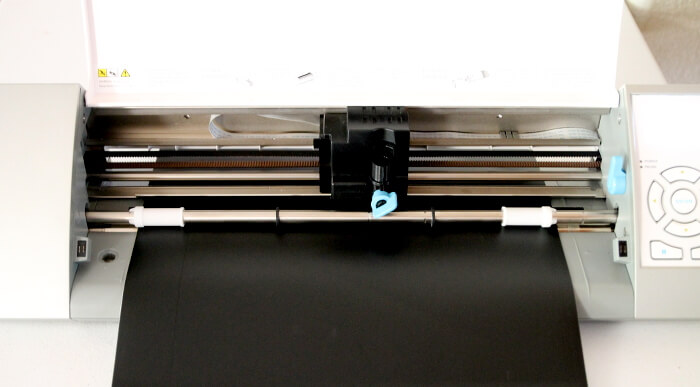
Next, it is really important that the vinyl gets loaded into the cutting machine as straight as possible. If it goes in just a little bit crooked, it could be VERY crooked by the time it has moved twenty inches down. If those little wheels on either side of the vinyl ever go completely off the vinyl, the cuts will not be placed correctly and you will likely end up wasting a big piece of vinyl and being very sad. Friends, don’t be sad. Load that vinyl straight!
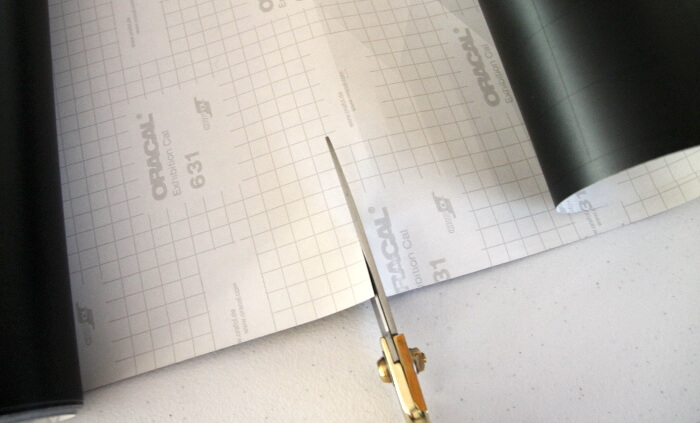
One way to help you get your vinyl loaded straight is to cut the end being fed into the machine perfectly square. Use the guides on the back of the vinyl to help you get a perfect cut.
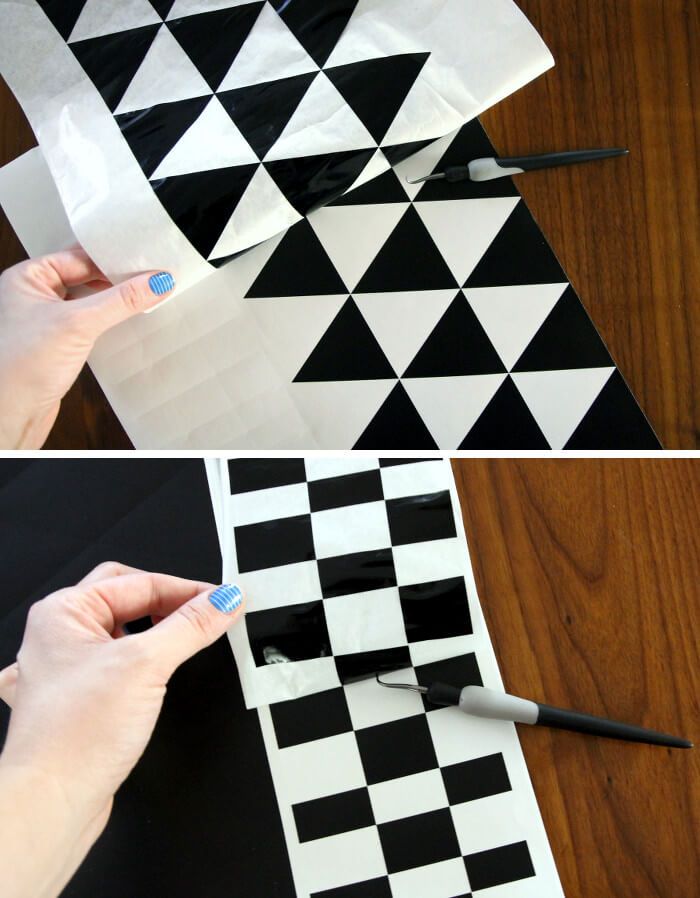
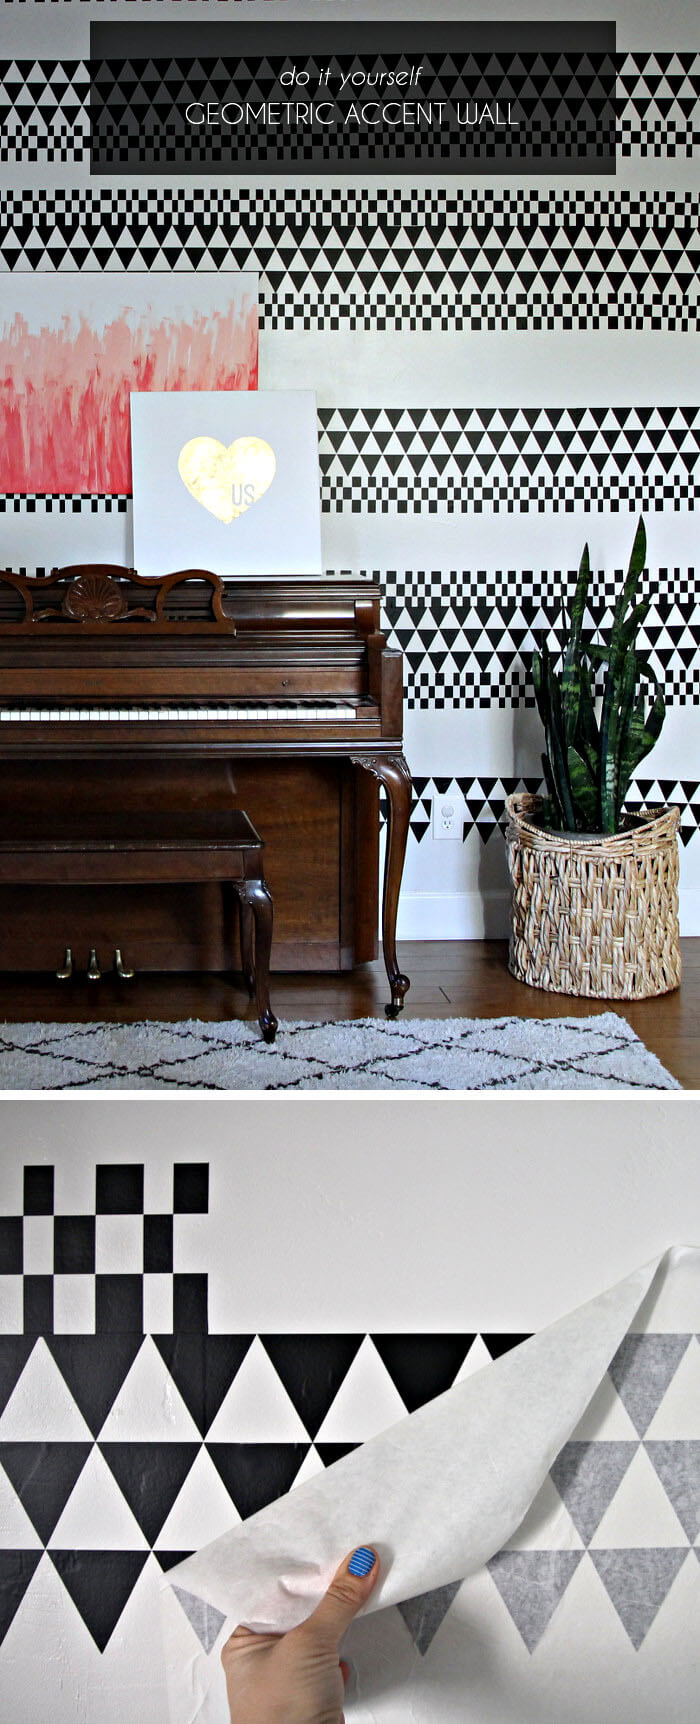
When you have your vinyl all cut, it’s time to pick up the design using transfer tape. I designed the pattern in 12″x20″ sections, and each section was designed with one triangle row and one rectangle row. To keep vinyl waste to a minimum, I figured out a method of picking up only half of the design and then coming back to get the rest. That meant my 20″ piece would really cover 40″ of wall.
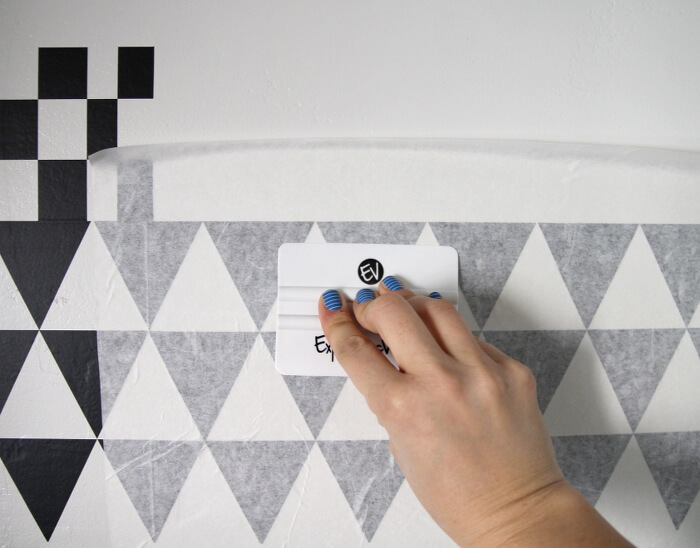
This is the trickiest step of this whole process, but it really isn’t too difficult. Start by placing a piece of transfer tape over either the triangle section or the rectangle section. Then gently pull up the vinyl and use the weeding tool to peel up only every other piece as you move down the strip.
When you have your first section ready on the transfer tape, carefully place it on the wall. (I chose not to use a level or measurement to get perfectly straight rows because I liked the more handmade look that came from a bit of imperfection. However, if you want perfectly straight lines, you will want to start off by measuring and marking off guidelines.)
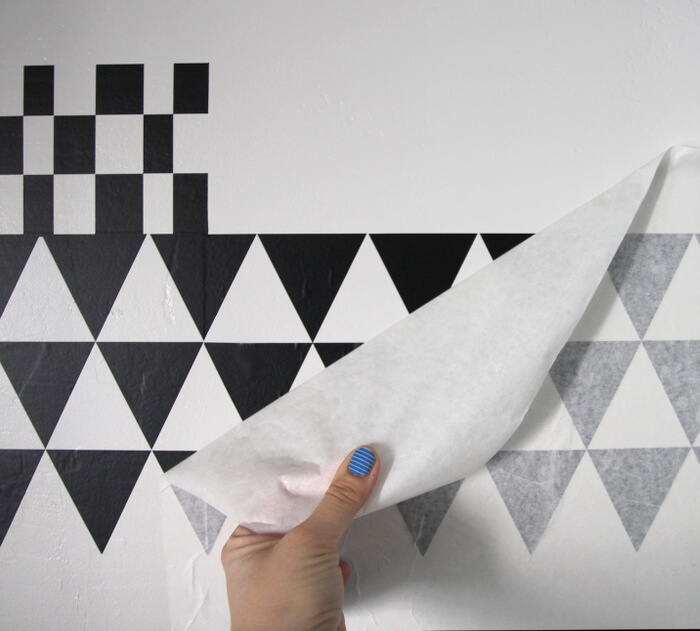
Once the transfer tape and vinyl have been carefully positioned, use the application tool to rub the vinyl onto the wall, and then peel off the transfer tape! Then go back and pick up the second half using transfer tape (you can reuse the same piece several times, which is so nice.)
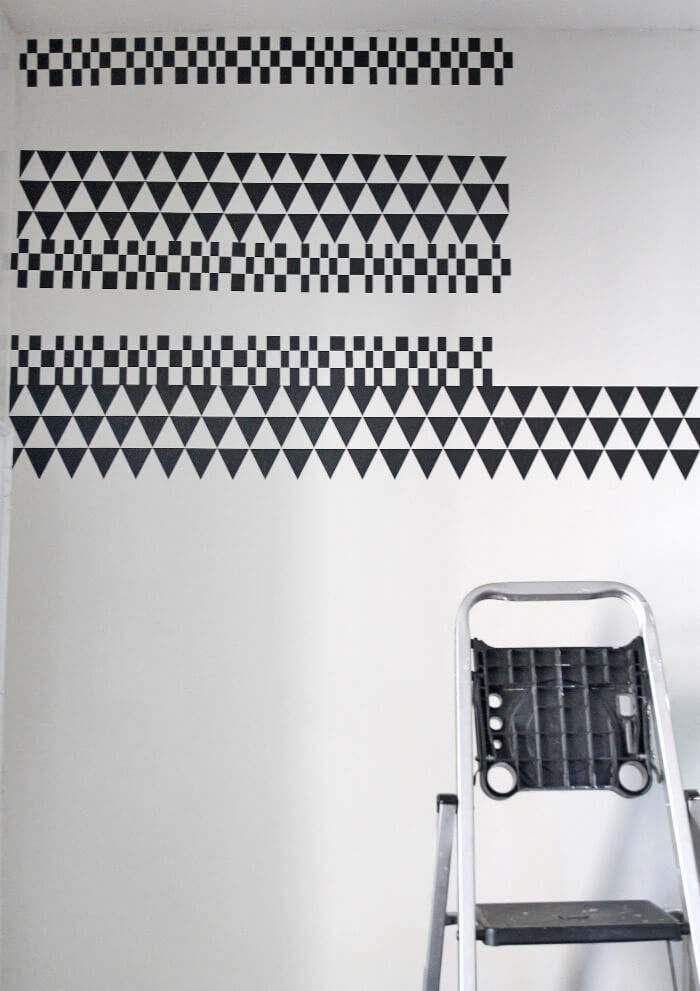
And just keep going alternating rows of triangles and rectangles. This was a good weekend project for me working by myself, but if you can trick some friends into helping you, you could knock it out even more quickly. 🙂
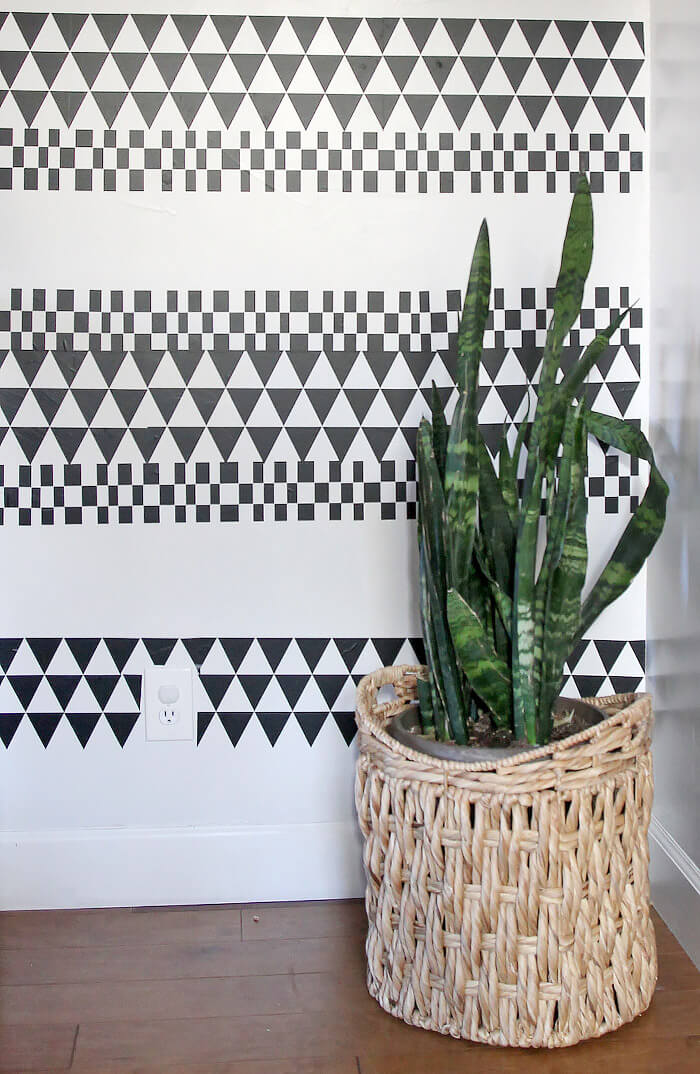
I just really love the way this wall turned out! It is graphic and punchy and just generally super awesome. What do you think?
Happy Making!


Comments + Project Love
Amy W says
Holy smokes lady! That is a seriously stunning wall. I love that you took your inspiration pin and made it happen!!
persialou says
Thanks, Amy!
kimbowest says
lady. for reals. I mean. seriously. no words.
persialou says
Hahaha – Thank you!!
Amy @ Homey Oh My! says
Woooaaahh this is SO impressive, Alexis. Turned out beautiful!!
persialou says
Thank you, Amy! I love it!
Megan says
Wow!!! You’ve got some patience for all the weeding, but the effect is totally worth it!
persialou says
Haha… Thank you! It actually wasn’t too bad once I got the technique down. 😉
Haeley @ Design Improvised says
Now THAT is an impressive use of vinyl! That is one heck of a statement wall. So cool!
persialou says
Thank you SO much, Haeley!
Krista @ the happy housie says
Seriously?! Wow!! I turned out so amazing Alexis!!
persialou says
Thanks so much, Krista!
Jess @ Make and Do Crew says
Ha–before I even clicked on your pin, I knew what wall you were talking about. I’ve pinned (and drooled over) that wall too! I LOVE how you translated it into your own execution.
persialou says
Haha! That’s awesome! I love that you recognized the inspiration pin. 🙂 I am so happy with the way it turned out.