This project was originally created by me for Darice, and contains affiliate links. Thanks for supporting Persia Lou!

About the beginning of the year I read a Home Decor Trend report that listed all of the trends that would be on their way out in the new year. One of those listed in the “Not” column of this hot or not list was typography and word art.
I just – No. I will not give up my words and letters and pretty typography. I may be the lamest, but I will continue with my lettering and word art (like this, this, and this).
This project was a new word art technique for me. There are lots of wire words and yarn-wrapped wire word projects out there, and this is my spin on it. I decided to crochet around the wire, and I really like the look it created.
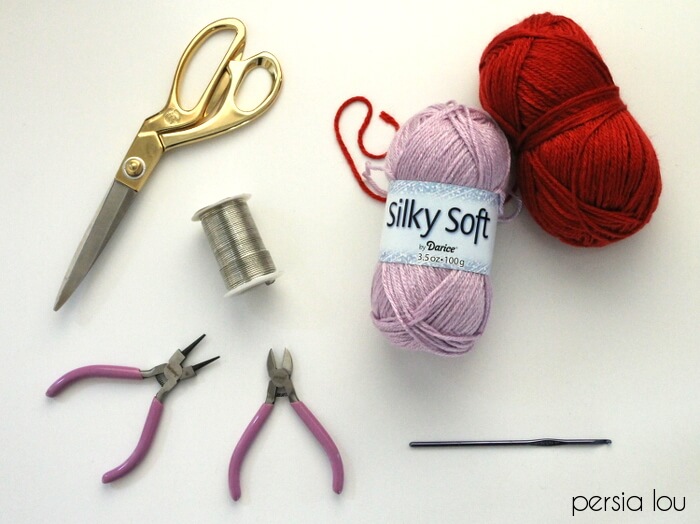
- Yarn – use whatever colors and fibers you like or have on hand
- Wire – I used 16 gauge craft wire
- Size F Crochet Hook
- Round Nose Pliers
- Wire Cutters
- Hot Glue Gun
 (not pictured)
 - Scissors (My Gold Nate Berkus Scissors are my fave!)
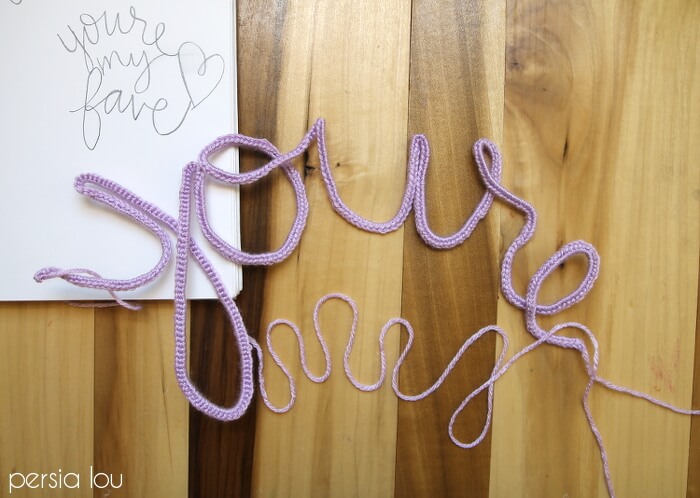
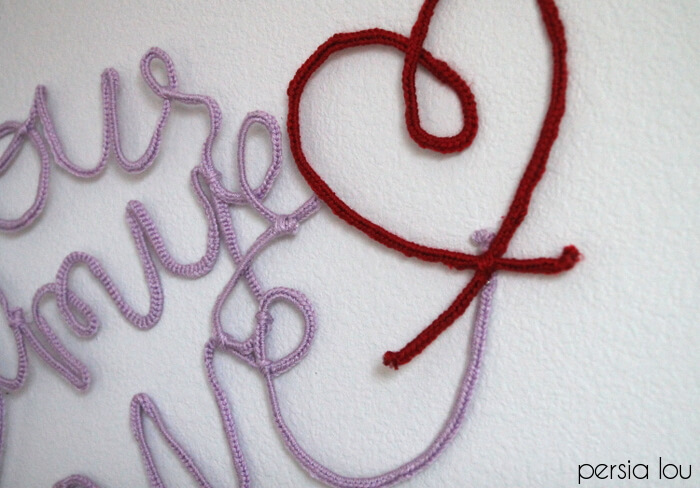
I started off by sketching out my design. Since I was doing more than one word, I planned out how the words would relate to each other and where they would touch. I needed four pieces of wire (one for each word plus one for the heart). To determine how long each piece of wire should be, I wrote out the word using a piece of yarn and then measured out a piece of wire the same length.
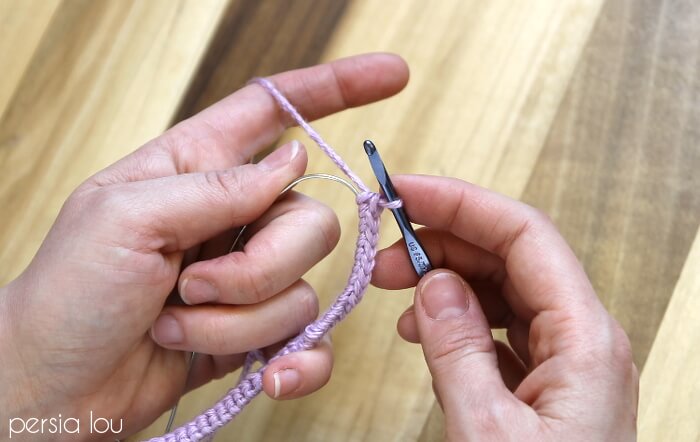
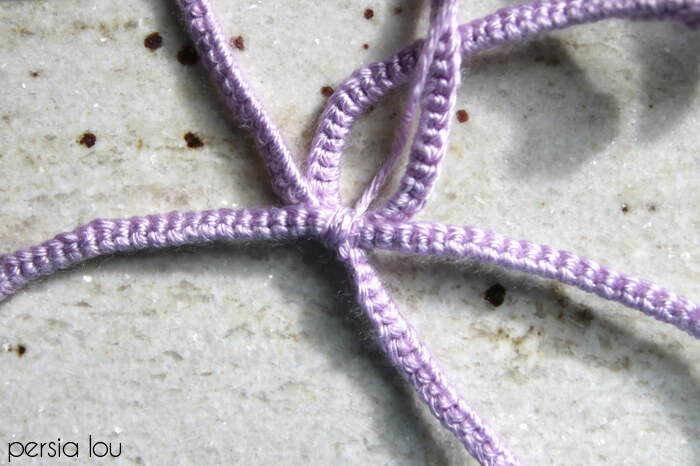
Once I had my pieces of wire cut, it was time to crochet over the wire. I worked a single crochet over the wire as shown in the image below.
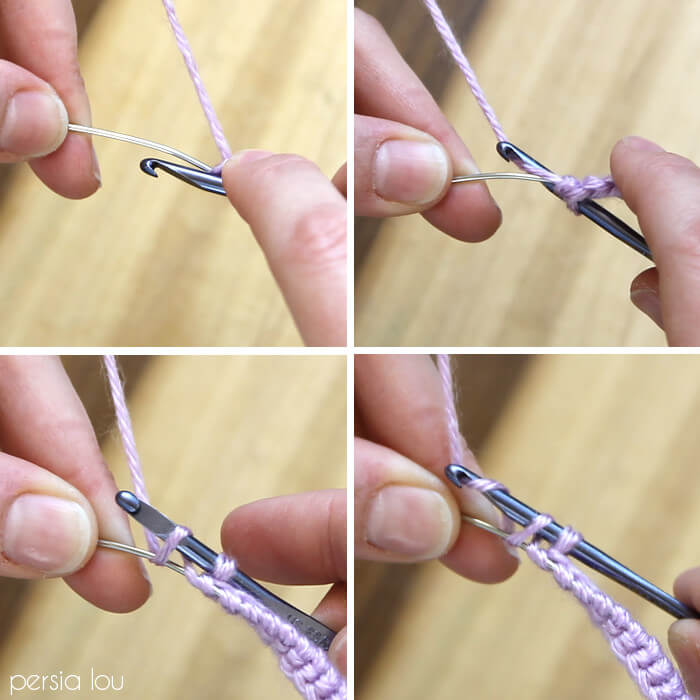
I found it was a little easier to bend the wire as I crocheted over it. When you shape your letters, you can bend it back into shape.
Use the round nose pliers bend the ends of your wire so the yarn doesn’t slip off.
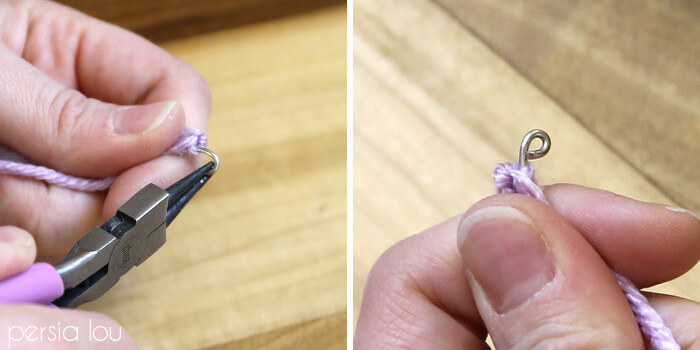
To finish off the yarn, I wrapped it around the end, and use a little dot of hot glue to finish it off.
When I had my wires covered in crochet, I shaped the wired crochet letters into my words. I mostly just used my hands to shape the crochet letters, but the pliers can be useful too. I referred back to my sketch constantly as I shaped the letters.

I used a small piece of yarn to secure the spots where the wire crosses and where the words connect to each other. I tied the yarn around the connection, then wrapped the yarn several times over the knot, and secure with a little dot of hot glue.
Once the words were all connected together, it was all ready to hang up! I like that since it’s three-dimensional, it can also be placed on a mantel or shelf.

And that’s it! For another simple yarn craft decor idea, check out my god’s eye craft tutorial here.
Until next time, Happy Making!


Comments + Project Love
Havalah Turner says
I love it, and who cares what's trending : ).
Jessica P. says
This is awesome! So perfectly done. I think I read that same "trends" report and thought there is no way that "words and lettering" are on the way out!
Miss Kitty says
REALLY cute!!! I can only do easy crochet stitches so this is a perfect project for me. Also it looks like it could be actually completed (unlike large crochet projects like blankets that I have started and never finished). Thanks for sharing this…I saw your blog post over at the Link Party Palooza.