Learn how to make your own beautiful crochet Christmas stocking with this free pattern! This pattern makes an heirloom quality stocking that can be treasured for years to come. I have a written pattern with photos to help PLUS a video tutorial to help you through. This post contains affiliate links that help to support this site at no extra cost to you when you make a purchase through one of our links.

I can’t believe we are already a whole week into December! How did that happen??
We are definitely moving quickly towards Christmas, but you still have time to crochet yourself or someone you love one of these pretty Christmas stockings, and I hope you will!
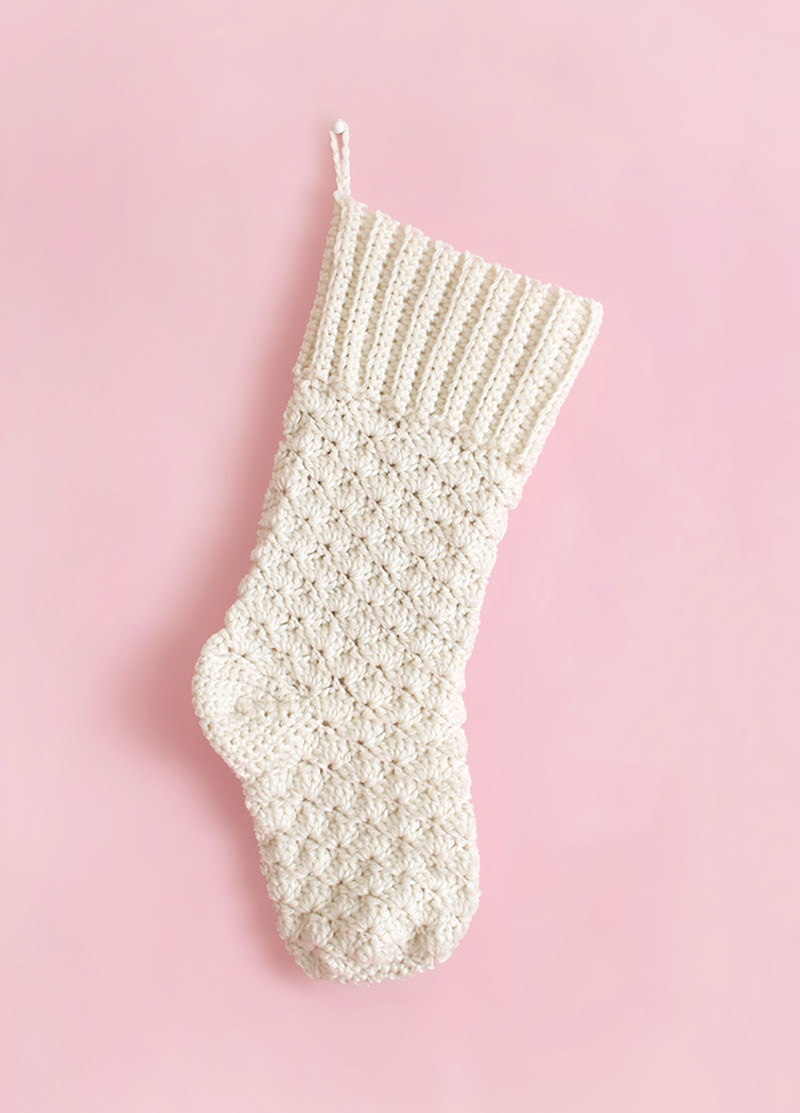
I love the way these pretty stockings turned out, and I know you will love them too.
I have been wanting to share this crochet stocking pattern with you all for what feels like ages now, but I wanted to get the video version of the pattern ready, and guys – videos are hard sometimes. 😂😭 BUT – I finished it, and I really hope it is helpful for you.
I would definitely say this pattern is a more intermediate level pattern with a few little tricky spots, so hopefully the video will help you work through those. (I will include the video after the pattern below.)
First though, let’s talk about this stocking for a second, ok? I know I’m biased, but I happen to think this thing pretty great.
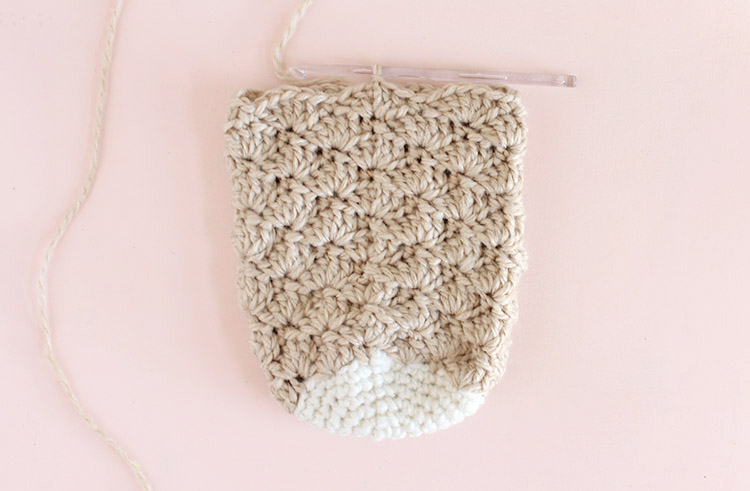
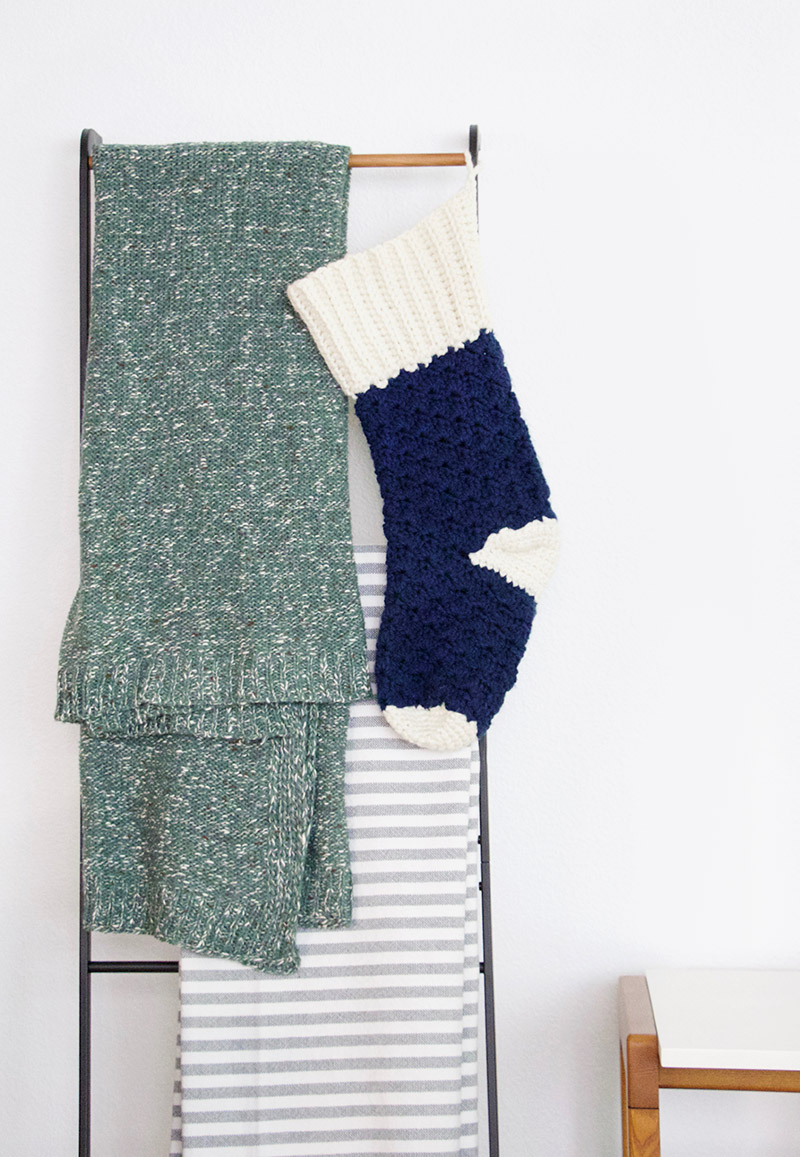
It is worked toe up, in the round, until you get to that ribbed cuff. I worked the body of the stocking in a shell stitch, which is probably my favorite stitch pattern. And then that ribbed cuff. I also love a good ribbed stitch.

You can work this stocking in a solid color or in two colors so the toe, heel, and cuff contrast with the body of the stocking. It’s up to you! They both look great. 🙂 Ready to get crocheting?
Make Your Own Crochet Christmas Stocking
First you will need to gather up a few supplies, but you don’t need anything fancy!
Crochet Christmas Stocking Supplies:
- 300 yards of a Bulky Number Five Weight Yarn (The yarn I used for my original stockings is no longer available, but good options include Lion Brand Hue + Me, Red Heart Hygge, or Loops & Threads Charisma.)
- Size K (6.50 mm) Crochet Hook
- Scissors
- Finishing Needle
Crochet Christmas Stocking Pattern
Please Note: This pattern is free for personal use only. Please do not redistribute or sell this pattern. If you would like to share the pattern with a friend, please share the link. Thank you!
This pattern uses American crochet terms.
Quick Note on Yarn and Sizing:
The finished white and tan stockings are about 21 inches long, while the navy stocking is about 23 inches long. This is because the navy yarn I used was a slightly heavier/thicker yarn. You can also make this pattern with a #4 worsted weight yarn and appropriate hook, but it will result in a smaller stocking.
Stitches and Abbreviations Used:
- Chain (ch)
- Stitch (st)
- Slip Stitch (sl st)
- Single Crochet (sc)
- Double Crochet (dc)
- Half Double Crochet (hdc)
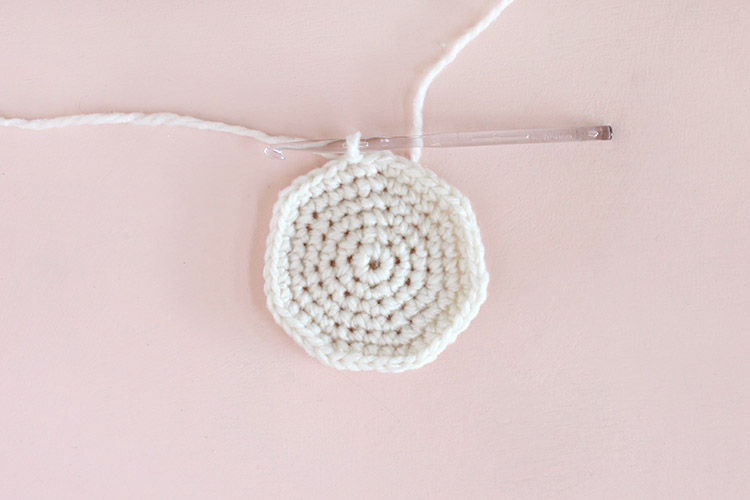
Crochet Stocking – Crochet the Toe
Rnd 1: Starting with Color A, and make a magic loop (learn how to make a magic loop here) and work 7 sc stitches into magic loop, pull to tighten, sl st to first sc to join (7 sc). (OR if you don’t like the magic circle, chain 2, work 7 sc into the 2nd ch from hook, and sl st to join.)
Rnd 2: Ch 1, 2 sc in same st, 2 sc in each st around, sl st to join (14 sc).
Rnd 3: Ch 1, sc in same st, 2 sc in next st, *sc, 2 sc in next st, repeat from * around, sl st to join (21 sc).
Rnd 4: Ch 1, sc in same st, sc, 2 sc in next st, *sc, sc, 2 sc in next st, repeat from * around, sl st to join (28 sc).
Rnd 5: Ch 1, sc in same st, sc, sc, 2 sc in next st, *sc, sc, sc, 2 sc in next st, repeat from * around, sl st to join (35 sc).
Rnd 6: Ch 1, sc in same st, sc, sc, sc, 2 sc in next st, *sc, sc, sc, sc, 2 sc in next st, repeat from * around, sl st to join (42 sc). For solid color stocking, continue with same yarn. For two-toned, finish off Color A and weave in ends.
Crochet Stocking – Crochet the Foot
Rnd 7: Join Color B where you finished off the last round. Ch 1, sc in same stitch, *skip 2 sts, 5 dc in next st, skip 2 sts, sc, repeat from * around leaving off last sc, sl st to first sc to join (7 5 dc shells).
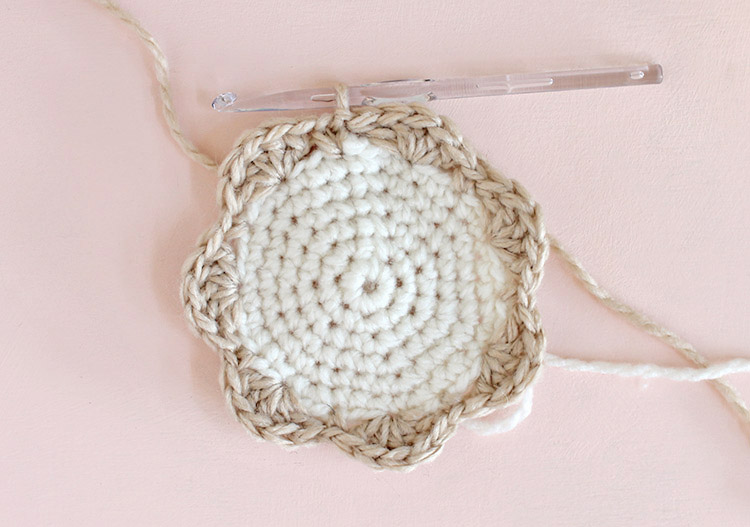
Round 8: Ch 3 (counts as dc), 2 dc in same st, sc in center dc of next shell, *5 dc in next sc, sc in center dc of next shell, repeat from * around, work 2 dc in same st as beg 3 dc, sl st to top ch of the beginning ch 3 to join (7 5 dc shells).
Round 9: Ch 1, sc in same st, *5 dc in next sc, sc in center dc of next shell, repeat from * around, sl st to beginning sc to join (7 5 dc shells).
Rounds 10 – 18: Repeat Rows 8 & 9. For solid color stocking, continue with same yarn. Finish off. Weave in ends.
Crochet Stocking – Crochet the Heel
The heel is definitely the trickiest part of this pattern. If you get stuck, please refer to the video below. 🙂
Row 1: Join Color A 9 stitches to the right of where you finished the previous round (see image below). Ch 1, sc in same st, sc in each of next 18 sts (19 sc). Turn.

Row 2: Ch 1, sc in same st, sc in next 17 stitches (do not sc in last stitch of previous row) (18 sc). Turn.
Row 3: Ch 1, sc in same st, sc in next 16 stitches(do not sc in last stitch of previous row) (17 sc). Turn.
Row 4: Ch 1, sc in same st, sc in next 15 stitches (do not sc in last stitch of previous row) (16 sc). Turn.
Row 5: Ch 1, sc in same st, sc in next 14 stitches (do not sc in last stitch of previous row) (15 sc). Turn.
Row 6: Ch 1, sc in same st, sc in next 13 stitches (do not sc in last stitch of previous row) (14 sc). Turn.
Row 7: Ch 1, sc in same st, sc in next 12 stitches (do not sc in last stitch of previous row) (13 sc). Turn.
Row 8: Ch 1, sc in same st, sc in next 12 stitches, sc in side of previous row, sc in st below, sl st to side of row below that (see image below – the work curves where you work stitches into the side of the previous rows) (15 sc). Turn.
Row 9: (Do not ch) Sc in next 15 sts, sc in side of previous row, sc in st below, sl st to side of row below that (17 sc). Turn.
Row 10: (Do not ch) sc in next 17 stitches, sc in side of previous row, sc in st below, sl st to side of row below that (19 sc). Turn.
Row 11: (Do not ch) sc in next 19 stitches, sc in side of previous row, sc in st below, sl st to side of row below that (21 sc). Turn.
Row 12: (Do not ch) sc in next 21 stitches, sc in side of previous row, sc in st below, sl st to side of row below that (23 sc). Turn.
Row 13: (Do not ch) sc in next 23 stitches, sc in side of previous row, sc in st below, sl st to side of row below that (25 sc). Finish off, weave in ends.
Crochet Stocking – Crochet the Leg
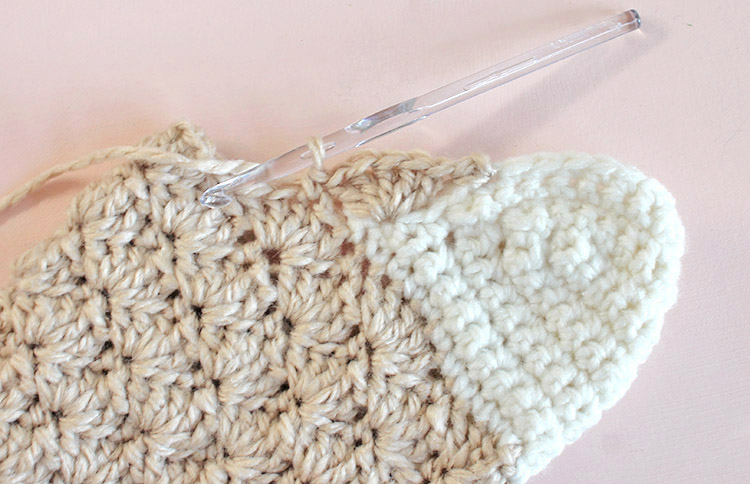
Round 1: Join Color B in the fourth stitch to the right of where the heel meets the foot of the stocking (see image above). Ch 1, sc in same stitch, skip 2 sts, 5 dc in next st (first sc on the heel portion), skip 2 dcs, sc in center dc of next 5 dc shell, *5 dc in next sc, sc in center dc of next 5 dc shell, repeat from * twice, 5 dc in first sc of heel, skip 2 sts, sc in next st, **skip 2 sts, 5 dc in next st, skip 2 sts, sc, repeat from ** twice, leaving out last sc stitch, sl st to beginning sc to join (8 5 dc shells).
Round 2: Ch 3 (counts as dc), 2 dc in same st, sc in center dc of next shell, *5 dc in next sc, sc in center dc of next shell, repeat from * around, work 2 dc in same st as beg 3 dc, sl st to top ch of the beginning ch 3 to join (8 5 dc shells).
Round 3: Ch 1, sc in same st, *5 dc in next sc, sc in center dc of next shell, repeat from * around, sl st to beginning sc to join (8 5 dc shells).
Rounds 4-15: Repeat Rows 2 & 3. Finish off, weave in ends.

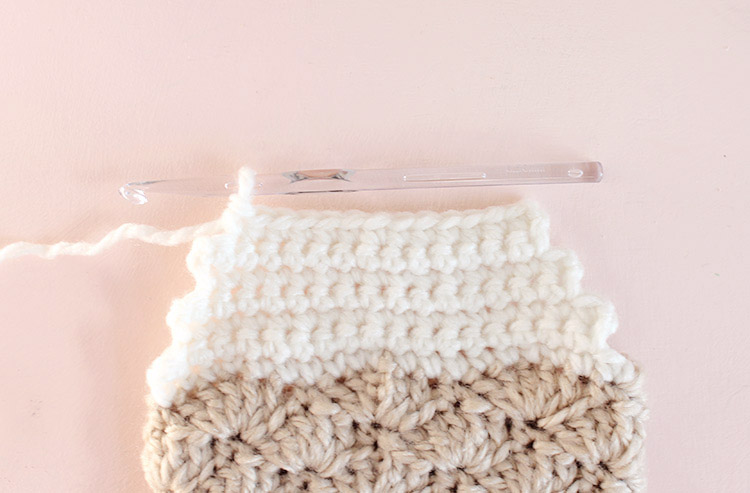
Crochet Stocking – Crochet the Cuff
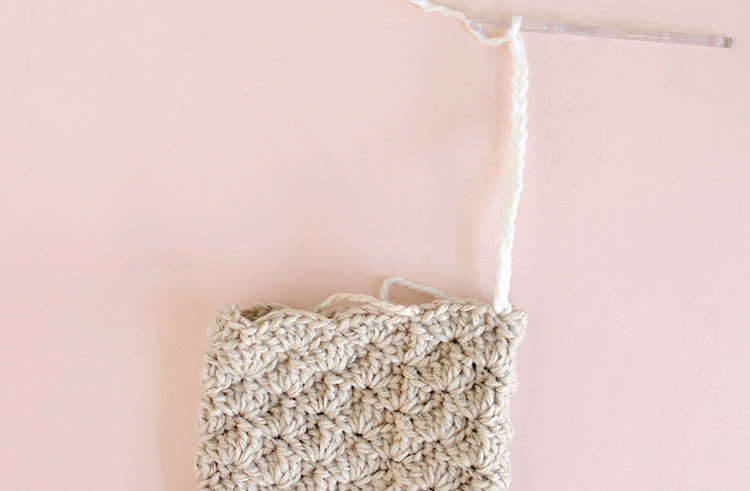
Row 1: Join Color A to any stitch along the back (heel) edge of leg. Ch 1, sc in same st, ch 18, hdc in 3rd ch from hook, hdc in each remaining ch (16 hdc), sl stitch in next two stitches along stocking edge. Turn.
Row 2: (Do not ch) Hdc in the back loops only of each hdc of previous row (16 hdc). Turn.
Row 3: Ch 2, working in back loops only, hdc in same st and each stitch across (16 hdc), sl stitch in next 3 sts in edge of stocking. Turn.
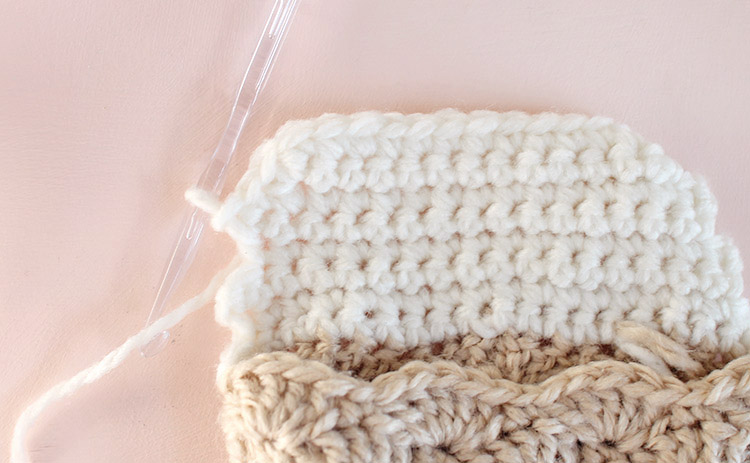
Continue working in this pattern, crocheting half double crochet stitches in the back loops only of the cuff portion and alternating two and three slip stitches when joining to the stocking edge, until you go all the way around the stocking edge. Then slip stitch through the last row of the cuff you worked and the chain of the beginning row to sew up the ribbed cuff.
Finally, finish off your stocking with a loop for hanging. Ch 1, sc in the cuff edge, ch 1, sl st through sc just formed. Finish off. Weave in ends.
Ta-DA! Your stocking is all done and ready for Santa to fill it with goodies.

Our new home doesn’t have a fireplace, so this year I have just hung some stockings on our blanket ladder. I’m kind of loving it.
Oh! I almost forgot the video! You can watch it below, and I would love it if you subscribed to my youtube channel.
If you crochet your own stocking, please share it with me! I love to see your projects. You can tag me on instagram or share it to my facebook page. 🙂
Merry Christmas and Happy Making!

Check out more of my free crochet patterns HERE.


Comments + Project Love
Liz says
These are beautiful! This is just the sort of stocking I wanted to make last year, but couldn’t find a pattern for. Are you okay with people making the stockings to sell? I wasn’t sure if by “please don’t sell the pattern” you meant the pattern itself or the stocking?
Alexis says
Hi Liz – Yes, you are welcome to sell items you make using any of my patterns. I just ask that you don’t sell the pattern itself. Thanks! 🙂
Jodi says
Love this pattern. I made 6 of them for our mantle. Would love to share the photo, but I’m not sure where to post it. The heel was tricky, I may have ripped it out quite a few times before finally figuring it out, but I’m glad I persevered. Thanks for sharing the pattern!
Alexis says
I love to hear that, Jodi! You can post it on my facebook page if you like here: https://www.facebook.com/persialou Or you can always email it to me at alexis(at)persialou(dot)com
Shannon box says
I can hardly wait to get started on these I have about 17 to 20 to make!
I pray I get them all done LOL ❣️ PRAY FOR ME LOL
THANK YOU SOOO VERY MUCH FOR THIS PATTERN ,I AM SO HAPPY TO HAVE FOUND YOUR WEBSITE.
THANK YOU SO MUCH FOR SHARING ,YOUR AWESOME❣️❣️❣️✝️✝️✝️
Sam says
I love this pattern, I am wanting to make quite a few smaller versions for nieces and nephews. Can you suggest a way to adjust the pattern to half the size. Would it be as simple as half the number of stitches ?
Beth says
I would just use a smaller yarn and hook, and make the pattern as written.
Tara says
Thank you so much for this pattern!! I have looked everywhere for something just like this. You’re video was so helpful and easy to follow! I made 10 of these in the last two months for our large family and our kids were so excited watching them come together! I chose a really bulky yarn and they are huge!! I think they are dreaming about all the goodies to fill them. 🙂 Thanks again!
Peg says
So dang cute❣️ Now I just need to learn to crochet. How did I not know you had a YouTube channel, headed there now.
Aida Hartmann says
These are so cool! Thanks for posting.
Wondering if you can help me? I’ve been looking for a slouchy sock pattern in crochet. We are making them for our local Cancer Care Center. The pattern needs to be easy as some of the women in our church charity handcraft group are beginners. Any suggestions? Can this one be adapted to serve my needs? If so, how?
Hannah Kristen Hoyer says
I’ve made 2 and love them! 🙂
Any suggestions on how to put names or letters on them?
Sara says
Do you have a PDF version of this pattern? I cant seem to print from this site and would love to make this patern
Danielle says
PSJBRZ
Made with worsted weight yarn and size I hook.
Sandysue says
I crochet shawls and scarves and afghans and jewelry and baby blankets and etc
Dena says
Love love love this pattern! So happy I came across it. Thanks so much! It’s beautiful and works up so easily/quickly!
Beth Rogers says
how big is it supposed to be… it looks huge! LOL. I have 5 bulky and using K
Mae says
The pattern is for an oversized stocking (check out her video for a visual). I tried making one using 5 bulky and found it was huge… my 2-year-old could fit inside it 😀 haha. We kept that one for a guest stocking/decoration. I tried again with 4 medium yarn and a 5.5mm (I-9) hook – we wanted larger (but not huge) stockings and these turned out a good size. I made one for each family member. They look great. I love this pattern!
Amanda Jacobsen says
Hi I found your tutorial last year and finally got around to making the stocking this year. I am having trouble with the cuff. I have way too much on top and im not sure where I went wrong or how I can fix it without cutting and starting over. Please help!
Kayla says
Please help I can’t figure it out
After the heel when I start the shells again no matter what I do I end up with 10 5 dc shellsnot 8
Jamie says
I made three of this pattern for my son, his wife, and their new baby…. I did a solid color for each of the parents and then a two toned using those colors for the baby… I made the body longer so I could turn the cuff down. Wish I could.post the photo. I am very proud of how they turned out!
This will be a tradition for our family as our kids grow up and establish their own and more grandbabies come along!
Thank you!
Miriam says
I am making this stocking and think it is beautiful. I just wish there was a break down of the amounts of yarn needed if someone wanted to make the two color version.
Thank you for your wonderful patterns.