This Colorful Modern Bedroom makeover gets bold graphic punch from thin striped walls and colorful artwork. It’s full of DIY projects and colorful details. A big thanks to Walls Need Love for sponsoring this post! This post also contains affiliate links, which help to support this blog. Thank you!
Hey guys! I am really excited to share our brand spanking new master bedroom with you all today! This is a project that I have been dreaming up and planning out for the past month or so, and I am so happy with the results. Walls Need Love, a great home decor company that specializes in amazing removable wallpaper, challenged me and a a couple of my blogging friends (Lemon Thistle and Pretty Providence – check out their new rooms at the bottom of this post!) to refresh a room in our home using some of their fun products with a focus on mixing patterns. How fun is that?! Challenge accepted!
I knew immediately what room I wanted to work on. We moved into our current home almost two years ago, and our master bedroom has been basically ignored since then. I’ve worked on other parts of the house, but for some reason the master always seems to be the last place to get some love, which is totally not the way it should be! Here’s where we started:
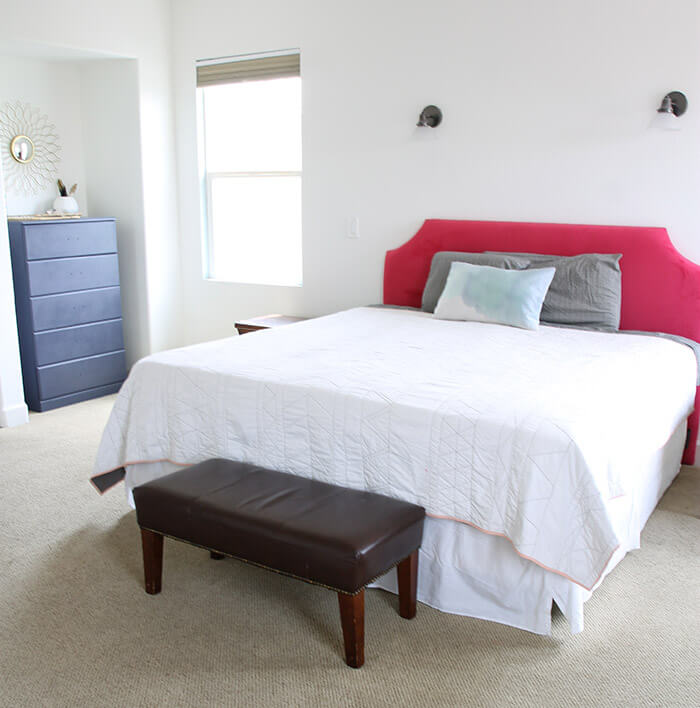
Basically, it was a blank canvas. I had done a few things up to this point – mostly dejunking, recovering our DIY headboard in some hot pink velvet, and painting our old dresser with some DIY chalk paint. That’s about it. It was just kind of sad and lacking personality. We would take care of that real quick!
I really wanted a colorful modern bedroom, and something with a bit of a desert feel. For me, that all meant graphic black and white patterns, big shots of color, and some foliage inspired prints. That was the goal.
And here’s where we ended up:

I love it! So much more personality than before, right? It took some planning and bit of DIY to get it here.
I started by figuring out what I wanted to put on my walls! I mean, our walls definitely needed some love right? Ha! Walls Need Love has a huge selection of amazing, on-trend wallpaper designs, decals, murals, etc., etc. It really made it hard to choose.
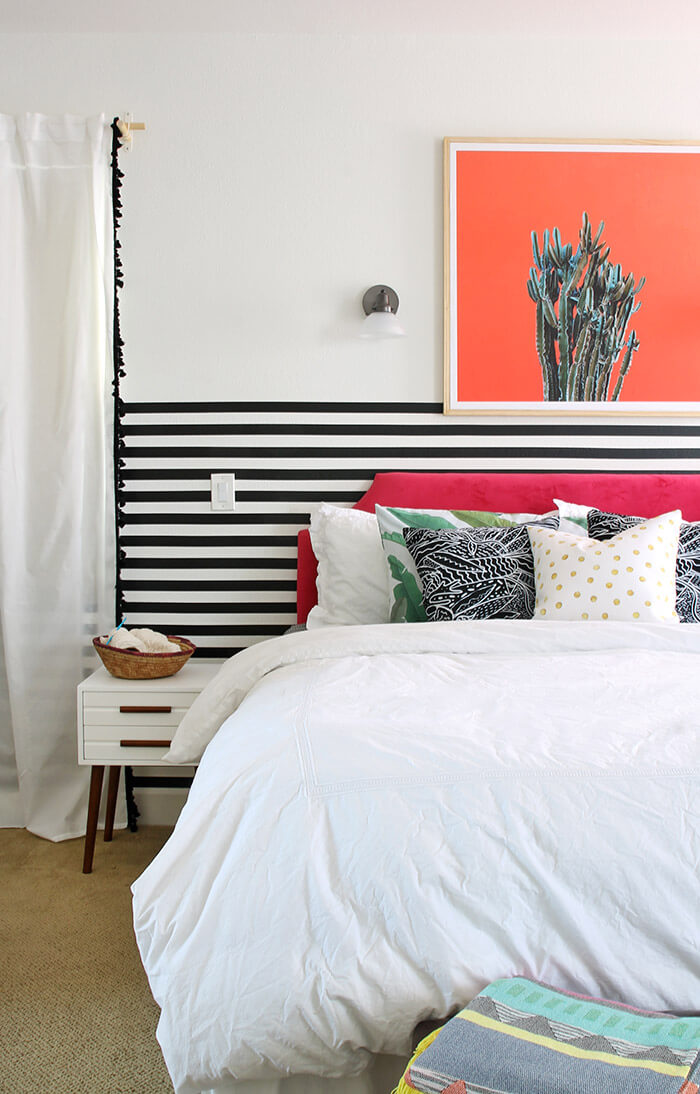
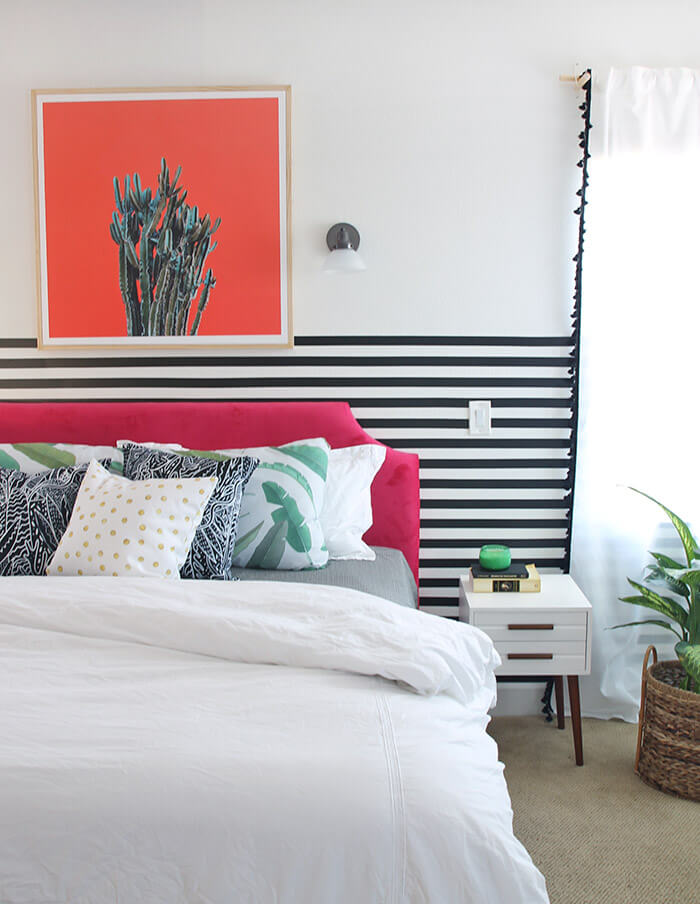
Ultimately, for the main wall behind the bed, I decided to go with Easy Stripe, and I love the way it turned out. Easy Stripe is self-adhesive striping – basically a big roll of vinyl stripe – that is SO easy to apply. It comes in lots of different colors and widths, but I decided to go with a 1.5″ black stripe. The thinner stripe felt a little different and fresh.
Guys. I have painted a stripe wall before. It took a whole weekend of chalk lines, taping, painting, peeling – such a messy headache. But this time around was so. much. better. This stripe wall just took us a few hours, went up easily without any mess, and can come down in minutes if we move or decide we want a new look. It’s good stuff.
If you want to try your own easy stripe wall, here’s the process we went through to get this look:
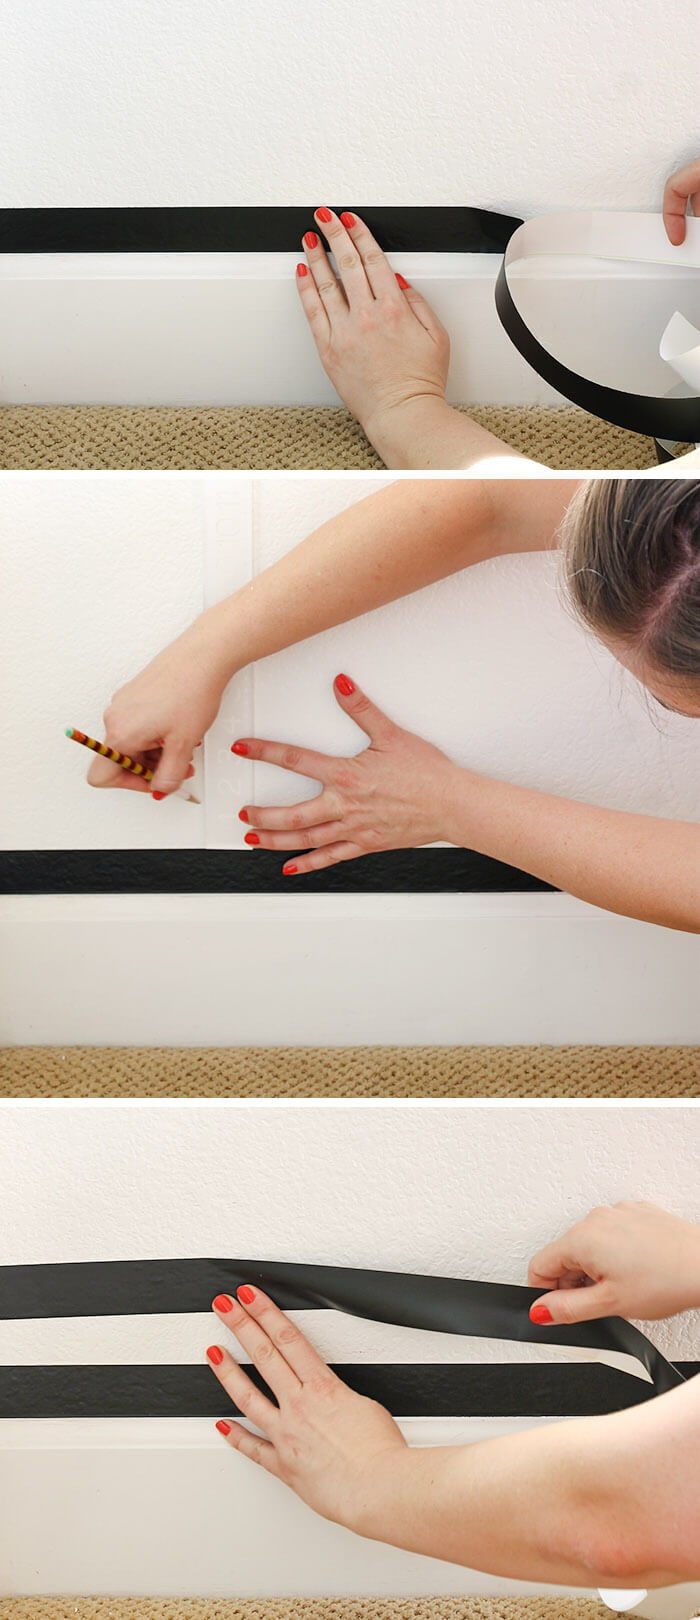
- I started by applying the first stripe flush with the baseboard. It is easiest to pull the backing off just a short piece at a time as you apply it to the wall. If it goes a bit crooked, just peel it off the wall and reapply – Easy Peasy! When I got to the end I trimmed off the easy stripe at the corner with my craft knife.
- Next, I grabbed my ruler and marked 1.5″ up from the top of the first stripe about once every foot down the wall. I actually marked a few rows at a time (every 3″ after the first mark to allow space for the next stripe) to make things go a bit quicker.
- Apply the next vinyl strip matching up the bottom edge of the stripe with my pencil marks.
- Repeat until your stripes go as high as you want them. I only wanted the stripes to go just above the headboard, which was a little more than halfway up the wall.
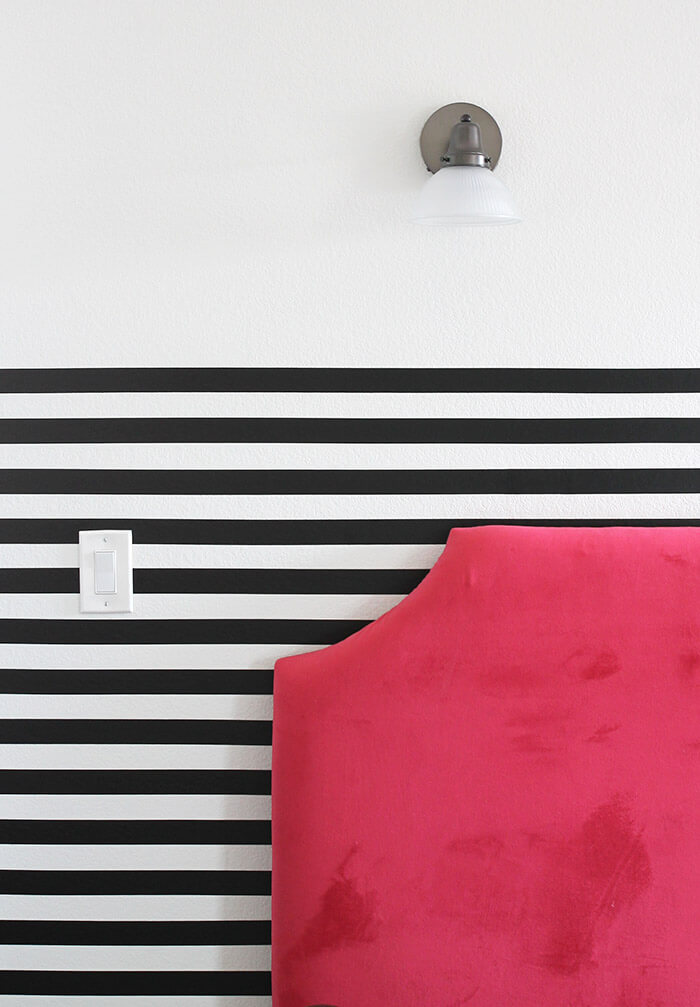
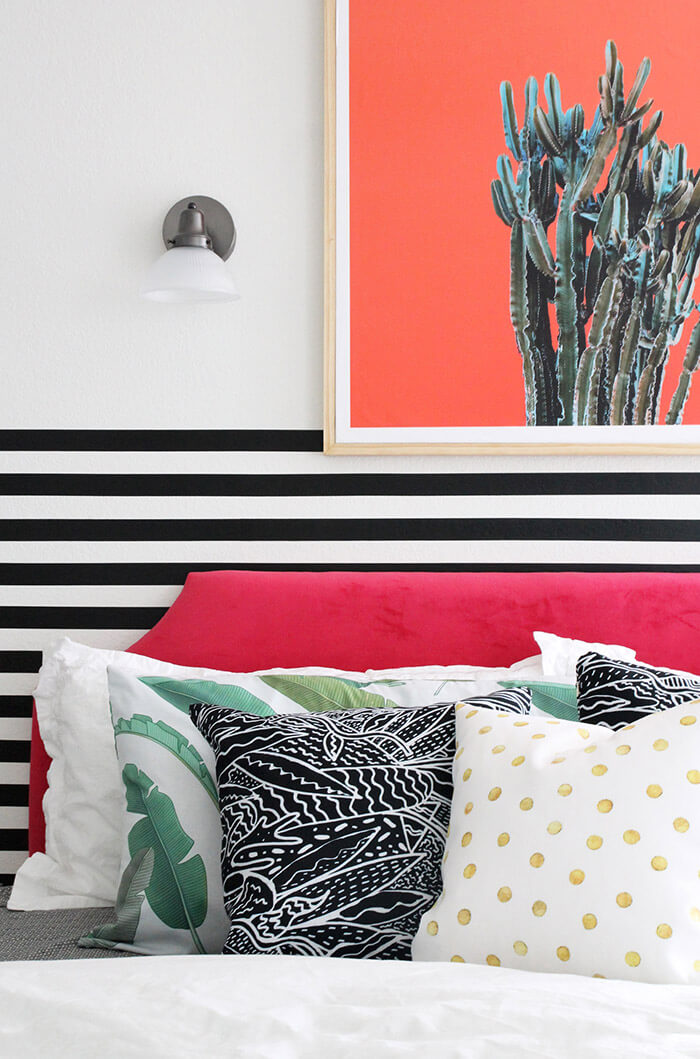
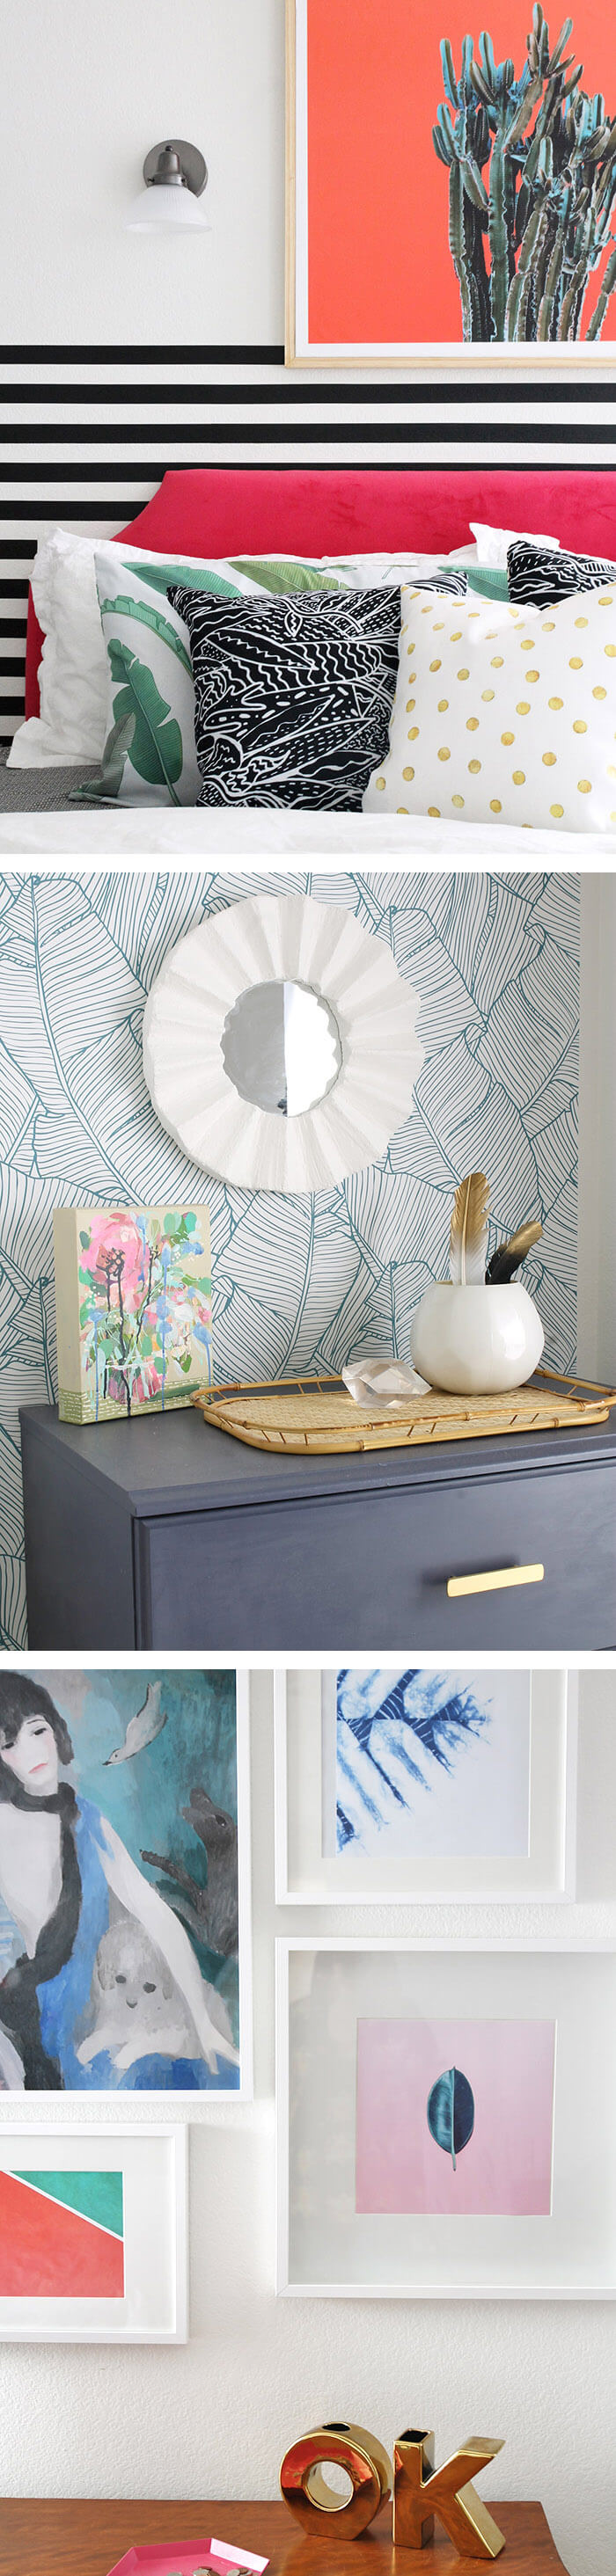
I love the way our hot pink headboard pops against those black and white stripes. Love it!
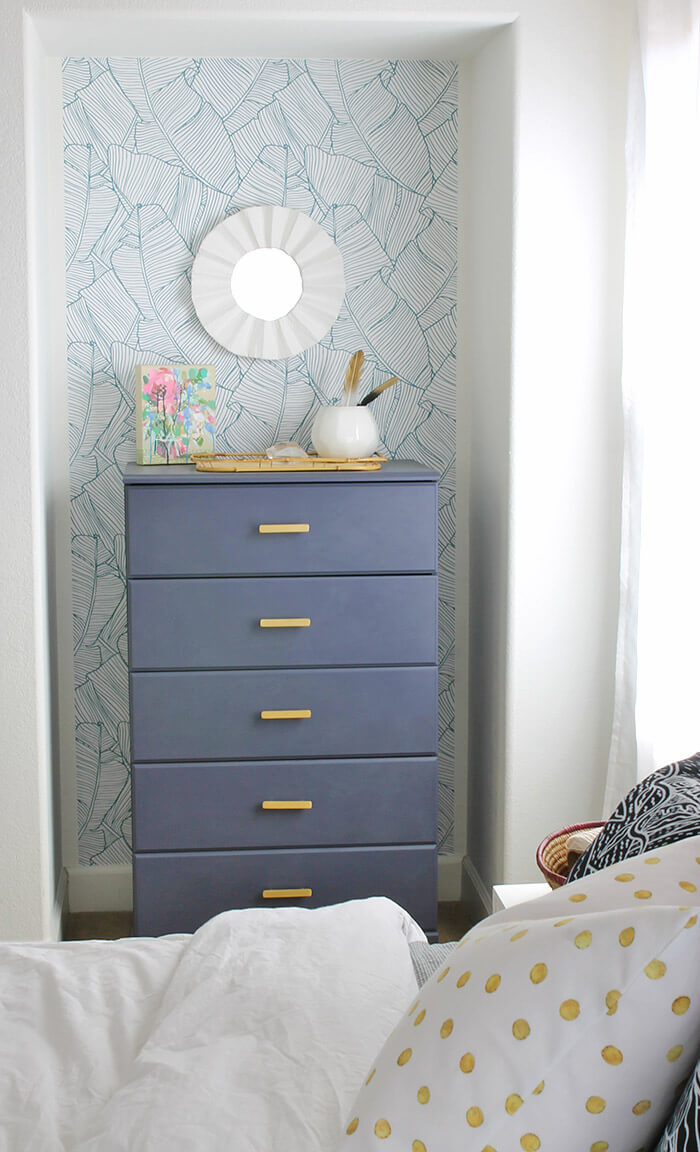
When we were done with the stripe wall, we added in some of the gorgeous Palms in White removable wallpaper to the little niche behind my tall dresser. I have always wanted to put a fun pattern in the back of that niche, and the removable wallpaper made it so easy to do!
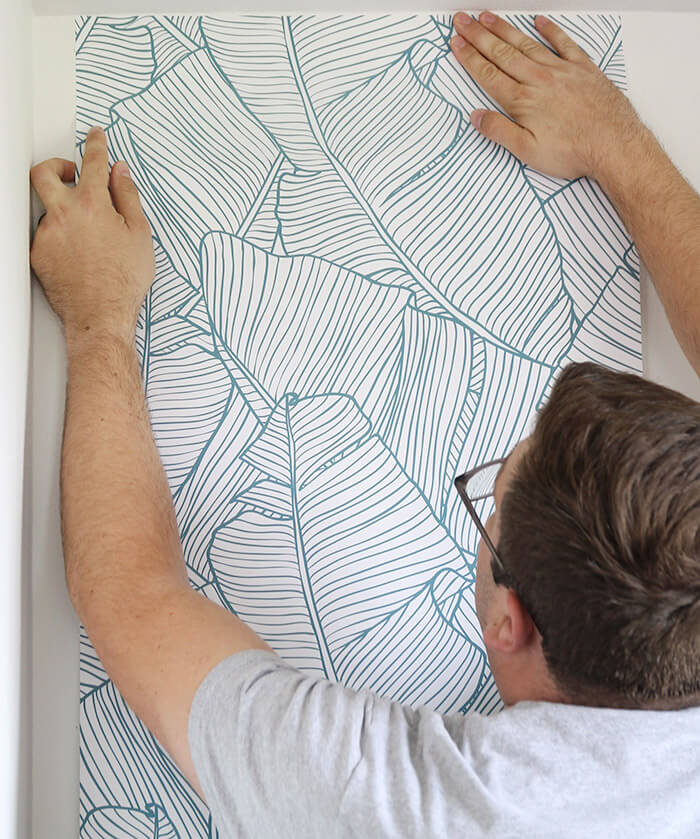
The only part that took a little bit of time was making sure the second panel perfectly matched the first, but it still took less than an hour to finish it up.
Once the walls were all done, I layered on more color, pattern, and texture with pillows, curtains, and some great new art prints.
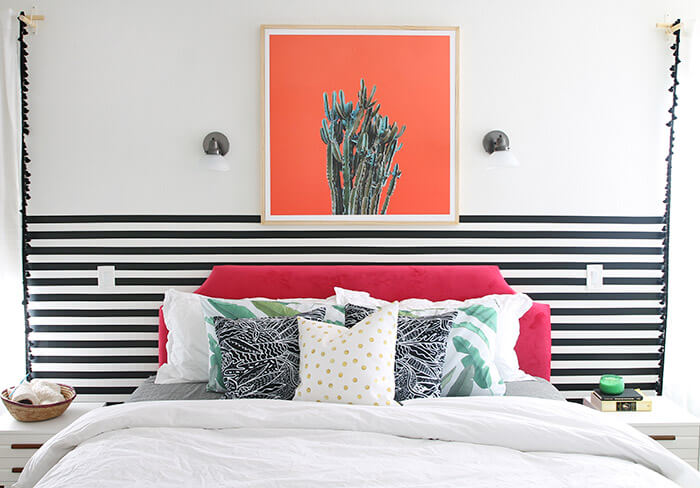
I piled up the bed with some great new pillows. I super love the Banana Leaf Body Pillow, which kind of goes perfectly with the Jardin Copia throw pillows (how great is that print?!), and the Goldidots pillow finishes it all off.
I wanted a big piece of art for over the bed, and the Cactus on Red print was exactly what I was looking for. I love it’s modern minimalist look, and I gave the print a more substantial feel by adding a simple DIY frame. Look for a full post on that project coming soon. 😉
I already liked how my dresser was styled in the niche, so all I changed there (besides the awesome new wallpaper) was to switch out the mirror for my DIY fluted wall mirror and to add some new gold drawer pulls to the dresser.
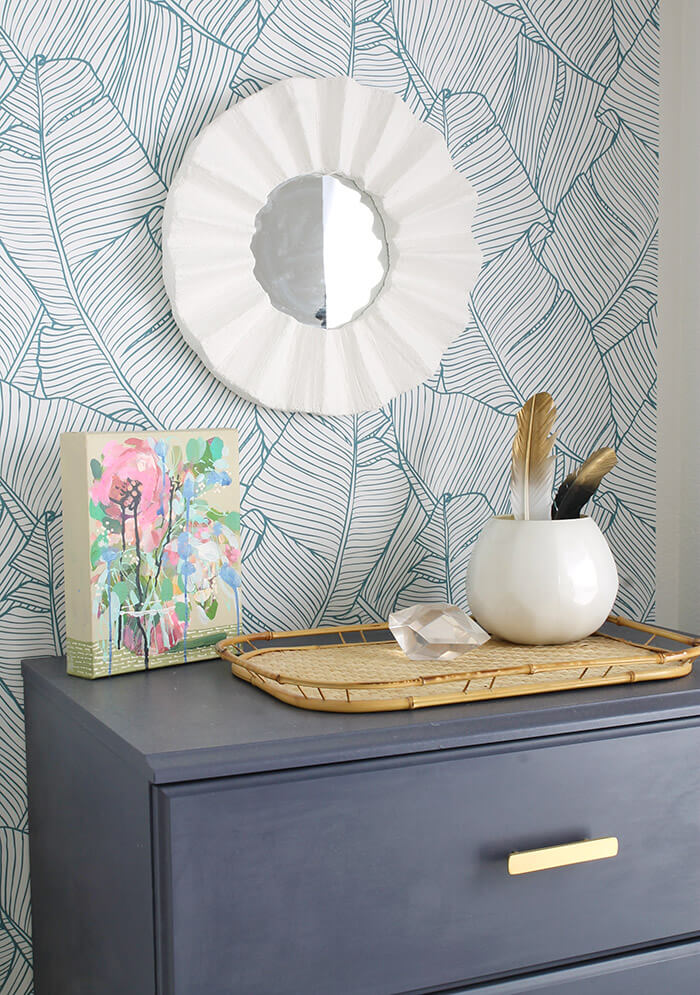
[P.S. That amazing piece of art is by Amanda Evanston (you might know her as Aunt Peaches), and I love it with all my heart. Check out her shop here.]
On the wall on the other side of the bed, I added a couple more prints to form a little gallery wall.


The large poster is a print of a favorite painting from our trip to Paris last year. The cool tie-dye looking print, the leaf on pink, and the orangey-red and green abstract (that perfectly picks up the colors from the giant cactus print) are all from Walls Need Love.
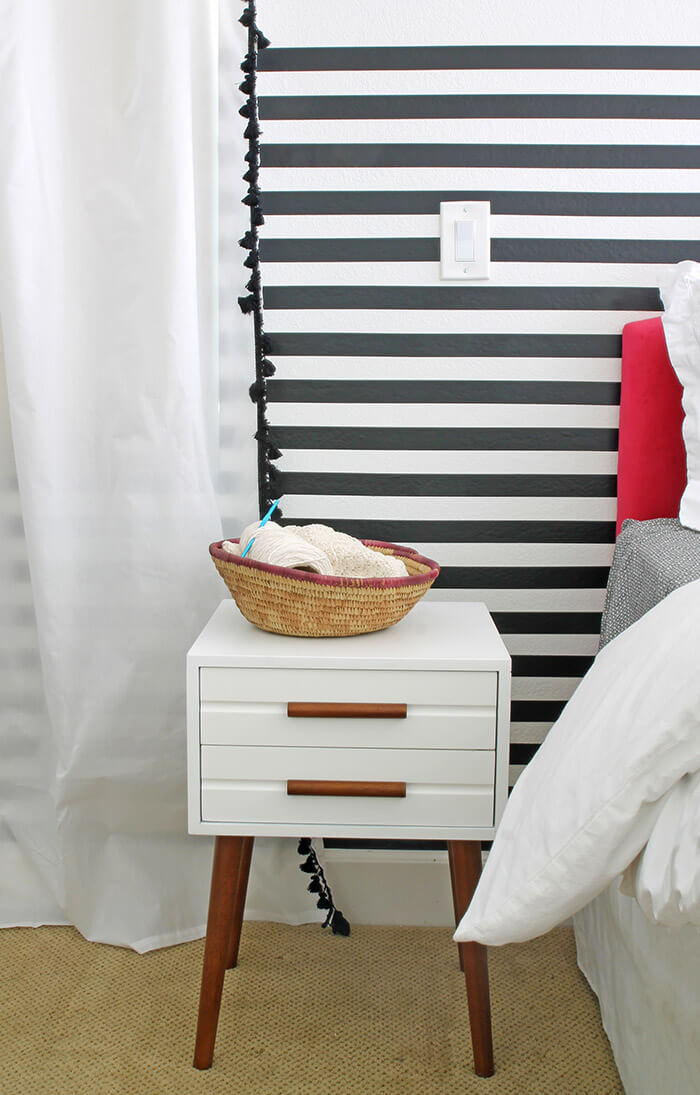
Finally, I spruced up the space with some new curtains, which had been on my to-do list forever. I just sewed some black tassel trim onto some inexpensive Ikea curtains, and I feel like they really kind of make the room. So easy. So cheap. Like $50 for all four panels cheap. Score!
So, what do you guys think? If you like the look, you can shop all of my picks from Walls Need Love right HERE. And be sure to stop by Pretty Providence and Lemon Thistle to check out their amazing rooms!
I am really happy with our new colorful modern bedroom, and I am wishing we had spent some time fixing it up much sooner! Do you have a space in your home that’s been on your list for a while too? Tell me all about it in the comments.
Happy Making!

If you like my Colorful Modern Bedroom, check out these other Home Decor Posts:

My Colorful, Functional Craft Room


Comments + Project Love
the cape on the corner says
this looks great. i love the wallpaper in that nook, and your gallery wall with your paris artwork.
b
Alexis says
Thank you so much! Those are a couple of my favorite details too. 🙂
Sarah @ Pretty Providence says
Alexis, I love how your room turned out!!! The stripes behind your headboard – GENIUS. I may have to do this in one of my bedrooms now. xo
Alexis says
Thanks so much, Sarah! I kind of love the way it turned out 😀
laurel/ A Bubbly Life says
Wow, I love it all! I love the black and white stripes mixed with the color!
Alexis says
Thanks so much Laurel!
Kristi says
LOOOOOOVE it! Such a fun and cheerful space!
Alexis says
Thanks, Kristi! It totally makes me happy. 🙂
Amy | Delineate Your Dwelling says
THIS IS AMAZING!!! It’s so you and so great. The stripes against your pink and the cacti wall art… just perfect!!
Alexis says
Thanks, Amy! It is pretty me… Haha.
Colleen says
This is BEYOND amazing… I’ve just gone and ordered that tie dye looking print it’s so lovely.
But also, the stripes- doing them halfway is genius!
Alexis says
Thanks, Colleen. And seriously, love that print! It would go great in your room too.
Haeley @ Design Improvised says
This is so unique and so fun! I love it so much!!
Alexis says
Thanks, Haeley! I really love it too. 🙂
sara | alice & lois says
What a bright and beautiful room! Love it!
Alexis says
Thanks so much, Sara!