These DIY Lapel Pins are easy to make with plastic shrink film and are a whole lot of fun to wear! Pick your favorite emoji to wear or give them as gifts with the free printable “flair” cards. This post contains affiliate links, which help to support this site. Thanks!
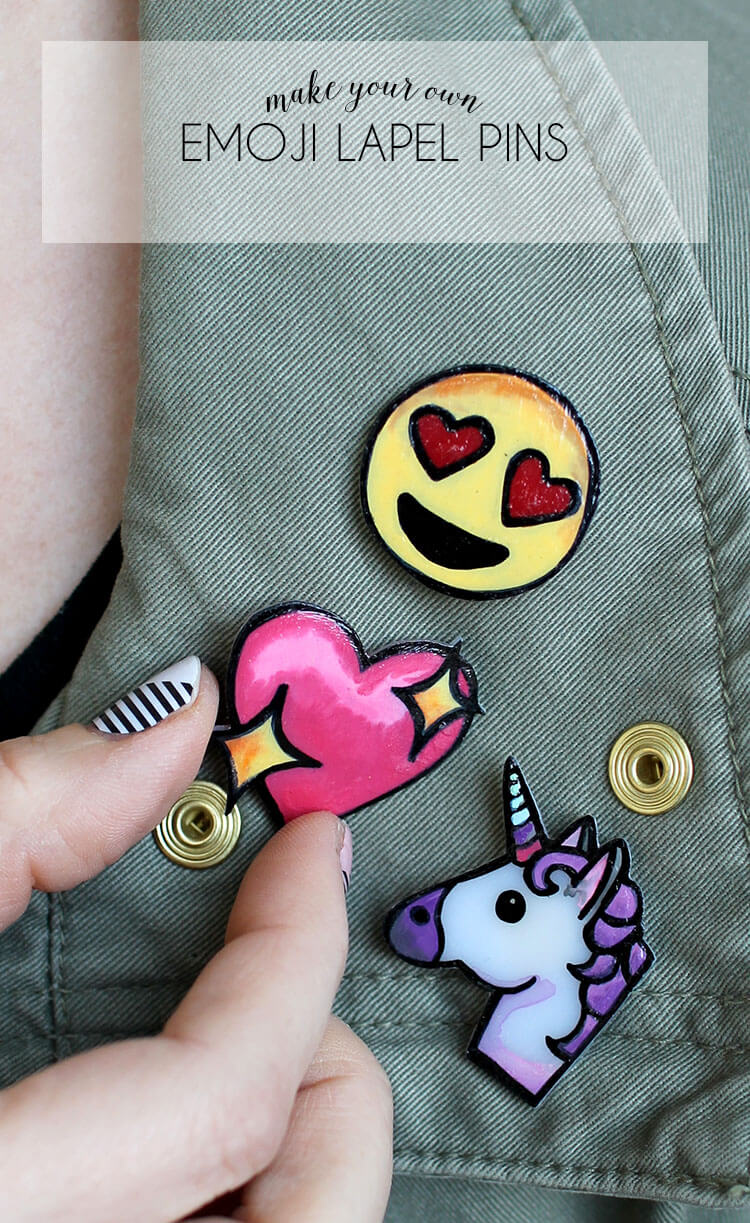
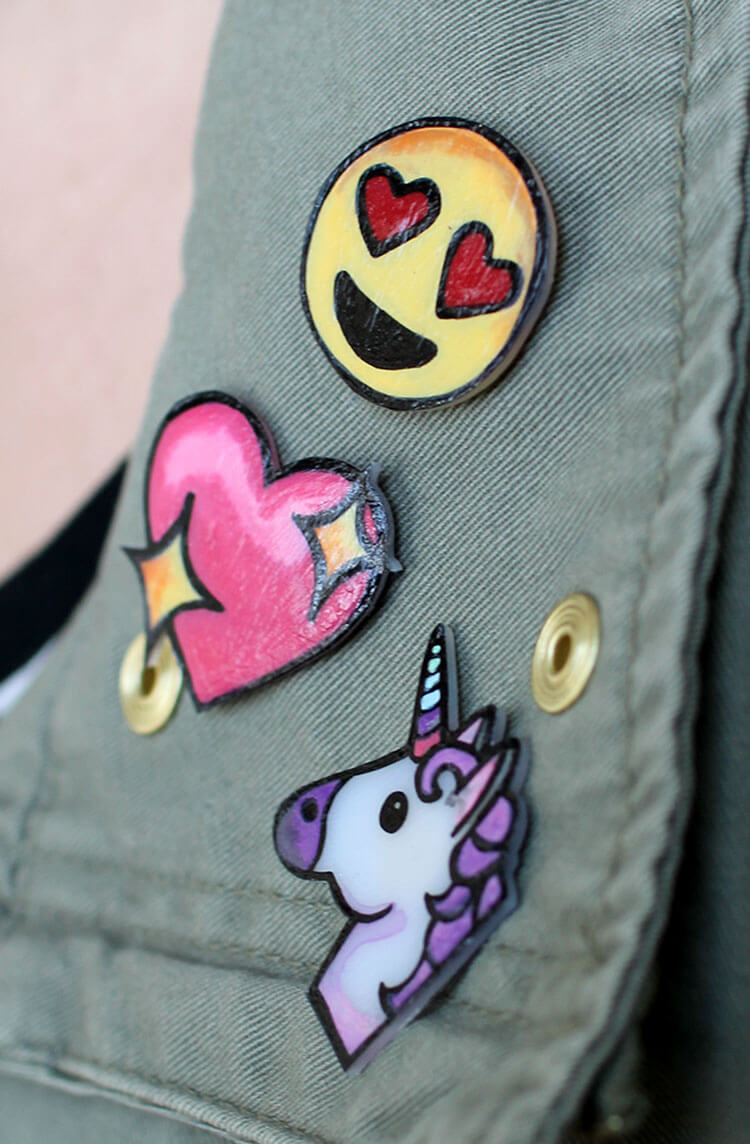
Are you guys into the flair trend? I’ve been building up my collection of enamel pins and patches lately – it’s so fun to add a little kitschy touch to your jacket or bag – so it was definitely time for a DIY pin project. I decided to go with emoji because they are fun and kind of ubiquitous and actually becoming part of our language (did you hear that Oxford picked an emoji for their 2015 word of the year? Crazy!).
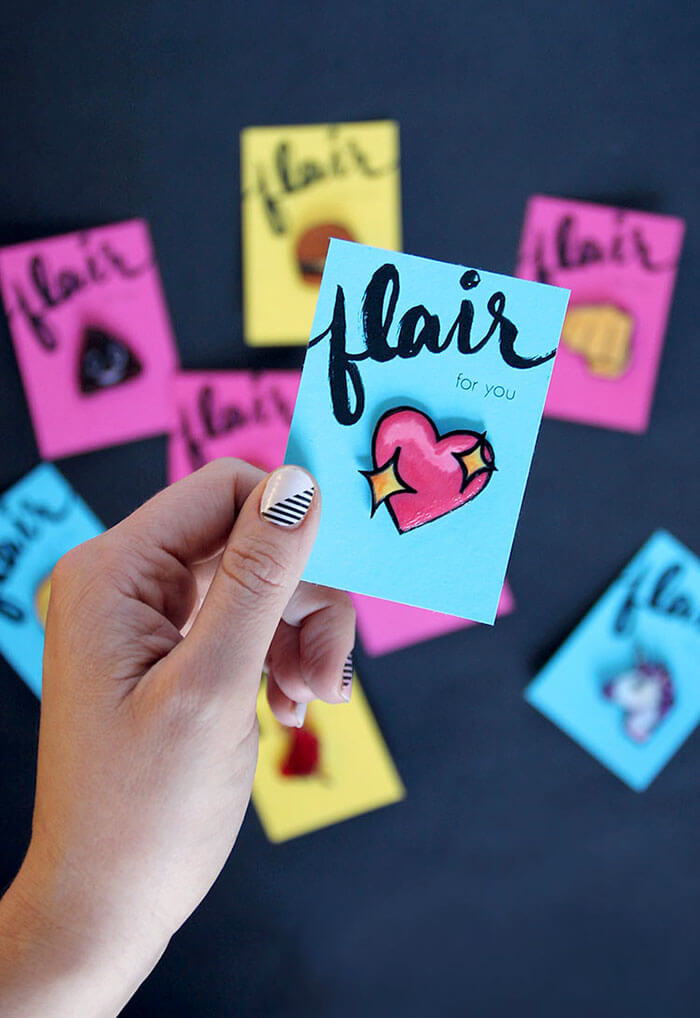
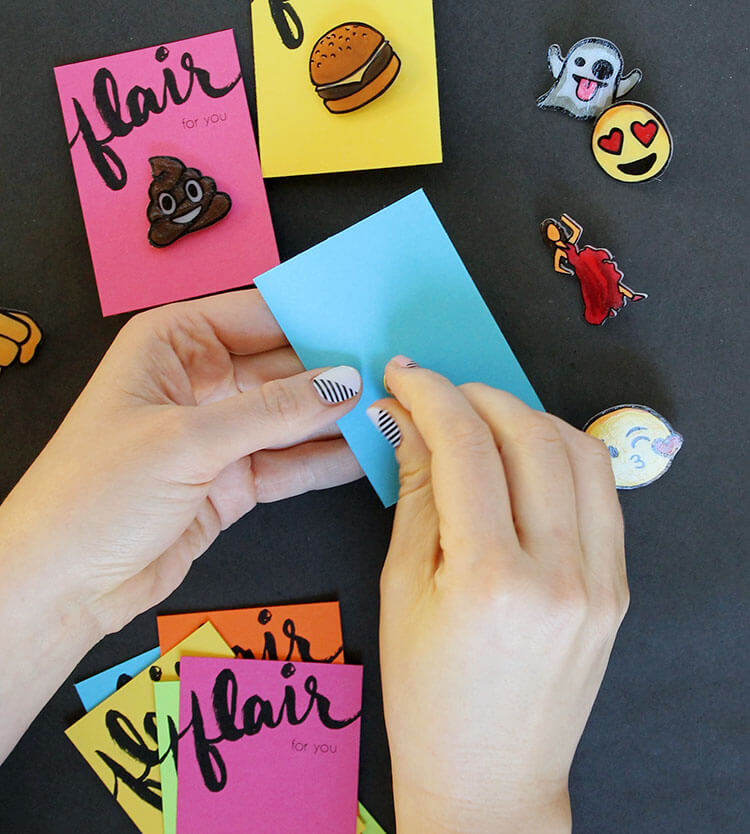
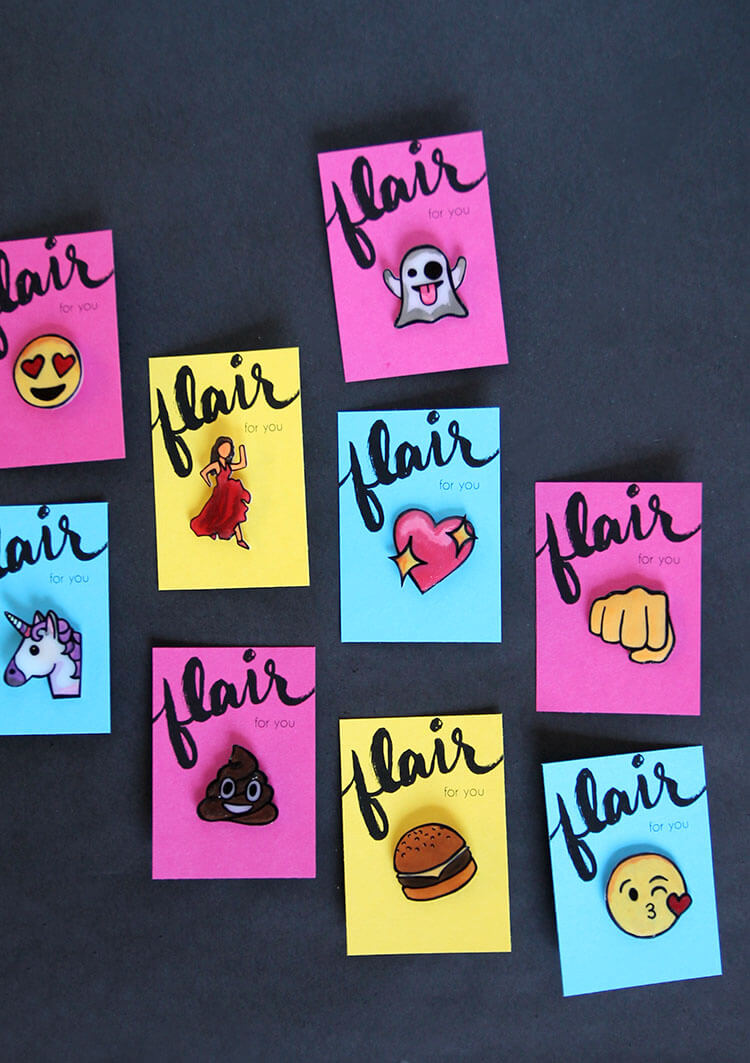
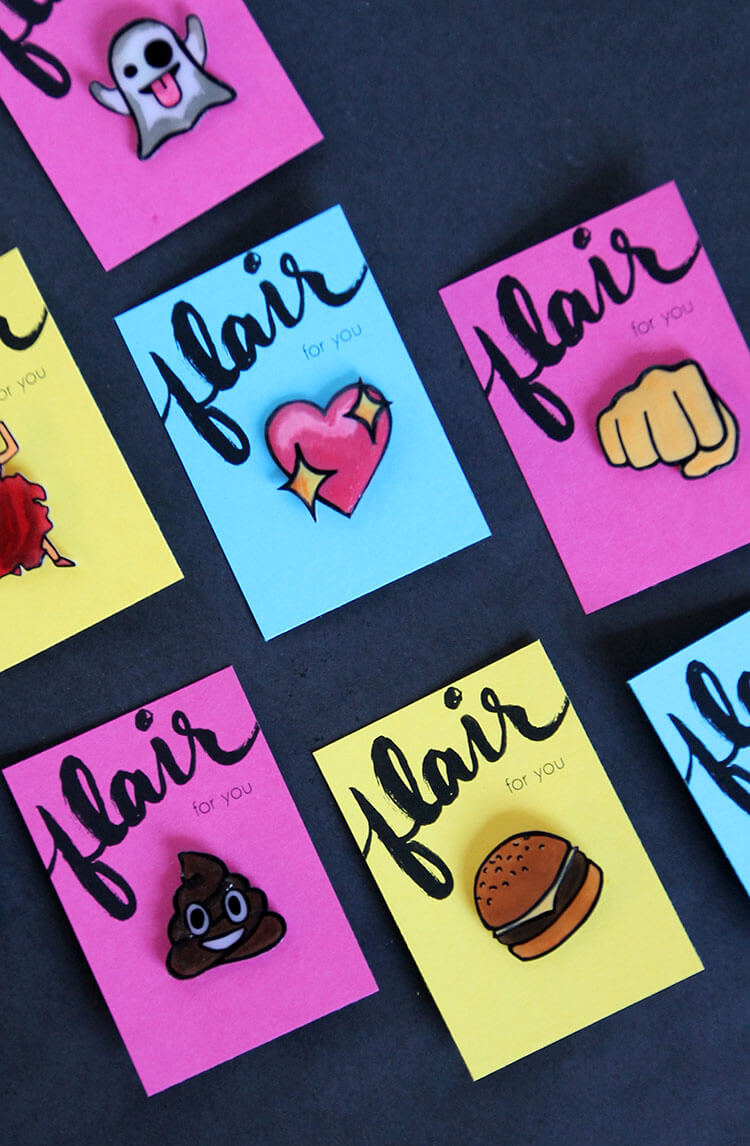
Plus, I’m thinking these pins make awesome sauce gifts for friends – just pick your bud’s favorite emoji and attach it to one of the printable flair cards I designed for you guys (Yay!). And how cute are these for funky stocking stuffers? Perfect, right?
Let’s make some!
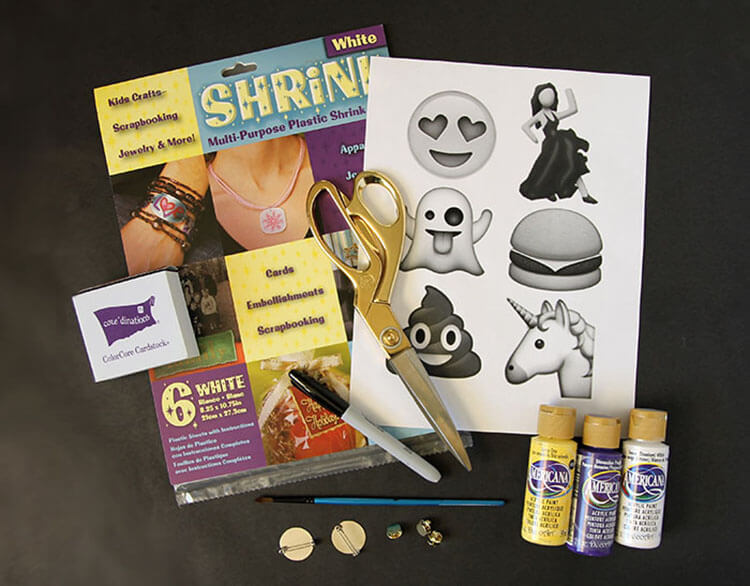
DIY Lapel Pin Supplies:
- White Plastic Shrink Film
- Black Permanent Marker
- Fine Grit Sand Paper
- Acrylic Craft Paint
- Darice Round Brush
- Water
- Gloss Decoupage or Clear Gloss Acrylic Sealer
- Tie Tacks with Clutch or Pin Backs
- Hot Glue Gun
- Printable Gift Tags (optional – download here)
- Colored Cardstock (optional)
Step One – Lightly Sand Shrink Film

Start by gently sanding the shrink film and wipe off any dust. Roughing up the surface helps the paint to adhere to the plastic. You can also get shrink film that is pre-sanded, which is great, but it is clear, so if you use it, you may want to paint the back of the piece after it is shrunk to avoid the pin showing through.
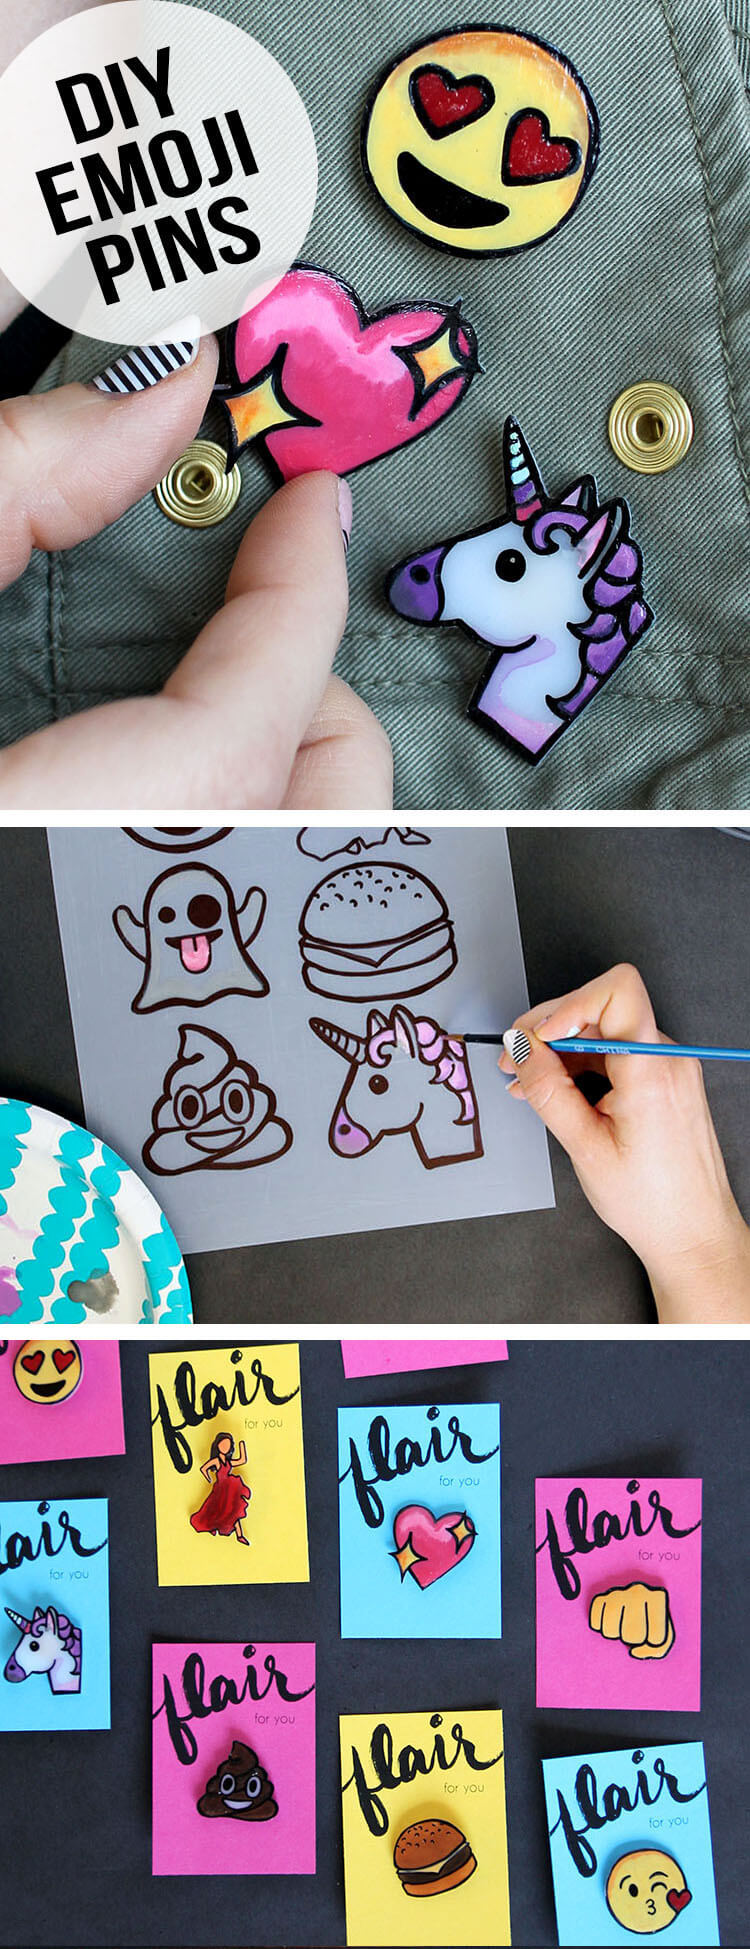
Step Two – Trace and Paint your Design
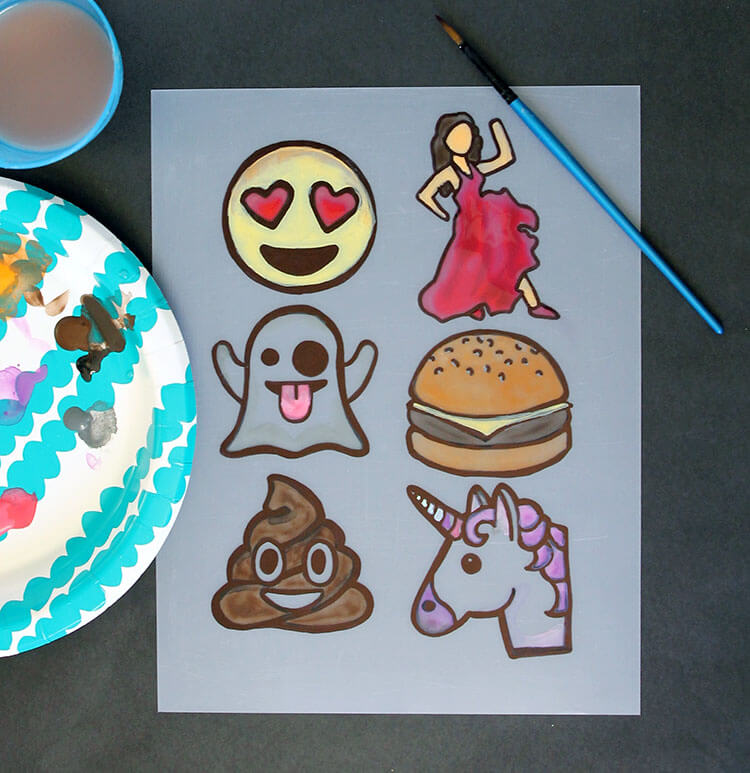
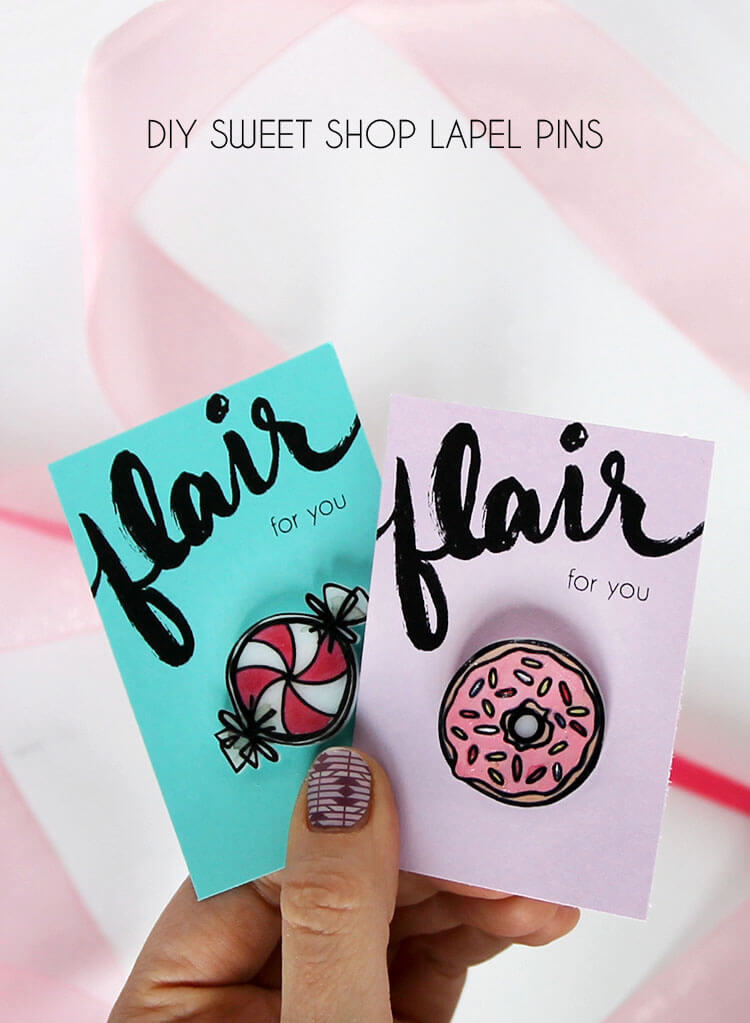
I chose some of my favorite emojis and used photo editing software to resize them to about 3″ wide. Then I printed them out on regular copy paper. (I have also made Sweet Shop Pins and Valentine’s Day Pins – check out those free designs too!) Place the shrink film on top of the emoji images and trace the outlines of each shape with the permanent marker.
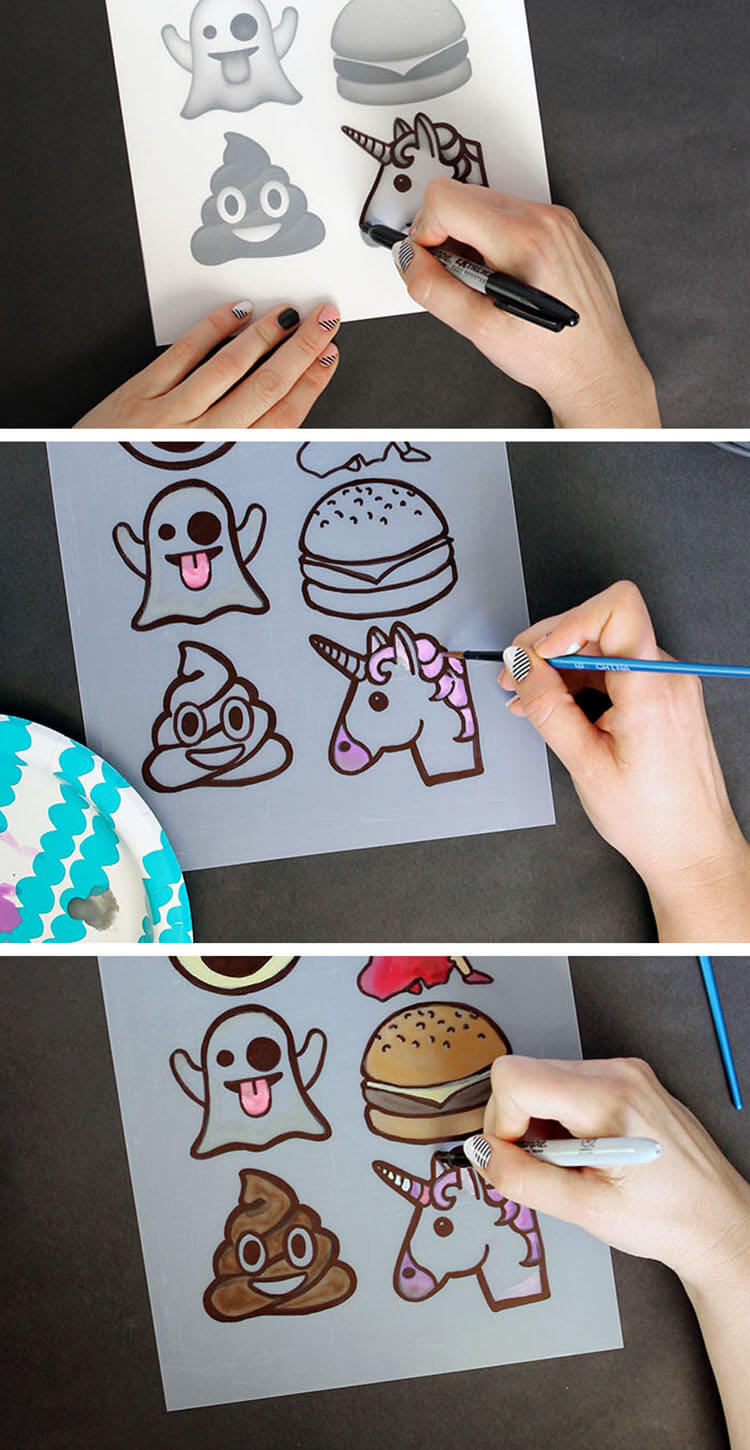
Once you have all the outlines traced, paint in the designs using thinned out acrylic paint. The paint needs to be pretty thin for this to work properly. If you get too much pigment on the plastic, it will kind of clump up and create a texture on top of the plastic after it shrinks, which isn’t the best. You can even get a kind of watercolor look with this technique, which is pretty fun. Also keep in mind that the colors will get a big darker and more saturated as the plastic shrinks.
After you are finished painting, you can go back over the black lines with your permanent marker if needed.
Step Three – Cut Out Your Shapes
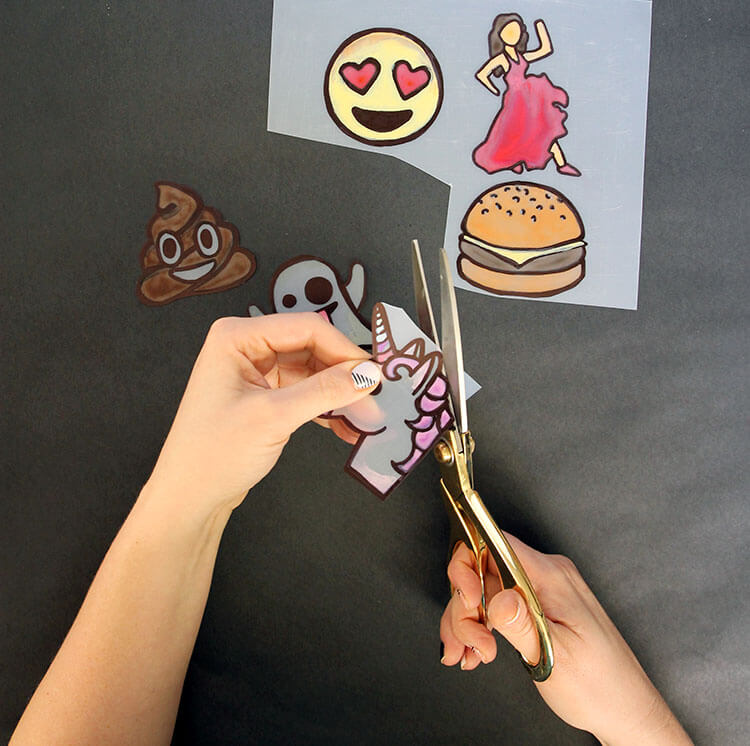
When you have your emojis all traced and painted, it’s time to cut them out. Cut right along the black line so there is no white space on the outside.
Step Four – Shrink!

Place your cut out shapes onto a parchment lined baking sheet and place in a 250˚ F oven. It will take about five minutes for your shapes to shrink completely. As they shrink they will curl up, but when they are completely shrunk they will be flat again.
Step Five – Add Clear Gloss Top Coat
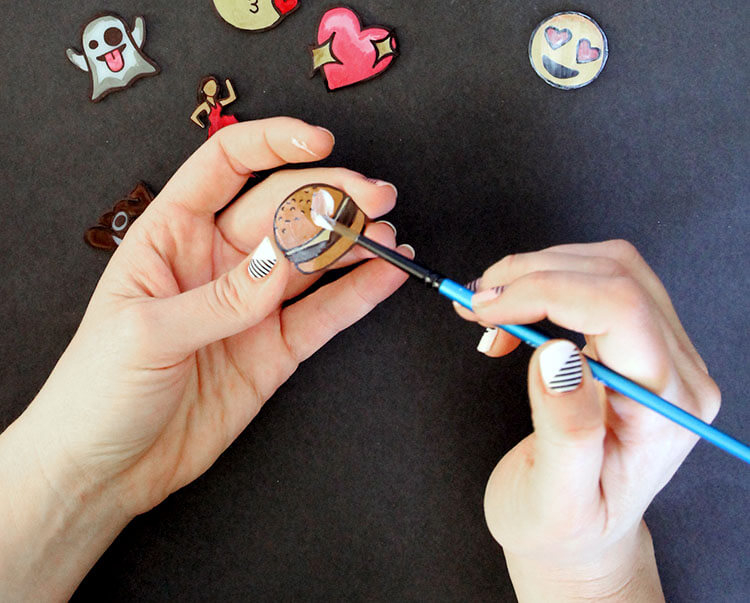
After your emojis have cooled completely, you can add a clear topcoat to make them nice and shiny. I used brush on gloss decoupage, but I think a spray on sealer might work even better because I didn’t love that you could see the brush strokes on the finished pins.
Step Six – Attach Pin Backs
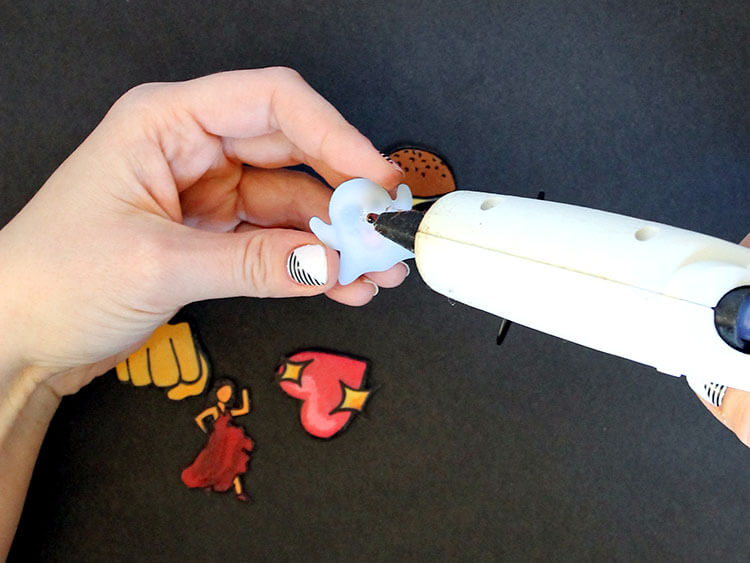
Finally, after the top coat has dried, use a hot glue gun to attach pin backs to the emoji shapes.
Here’s a little sped-up video of the process. It’s pretty fun to see them shrink in the oven. 🙂
And that’s it! Your new emoji flair is all ready to wear.

I thought these DIY Lapel Pins would make really fun little gifts and stocking stuffers. If you are gifting the pins you make, you may want to print off some of the gift cards I designed to go with them. Download the “flair for you” cards right HERE.
Just poke the pins through the cardstock and attach the pin back to hold it in place.

I think the unicorn and ghost are my faves. Which emoji pin do you need to make? Tell me in the comments. 🙂
If you make your own DIY Lapel Pins, I would love to see them! Share your photos to my facebook page or tag me on instagram or twitter (@persialou), and don’t forget to use the hashtag #persialou for a chance to be featured.
Happy Making!

Check out these other crafty projects:

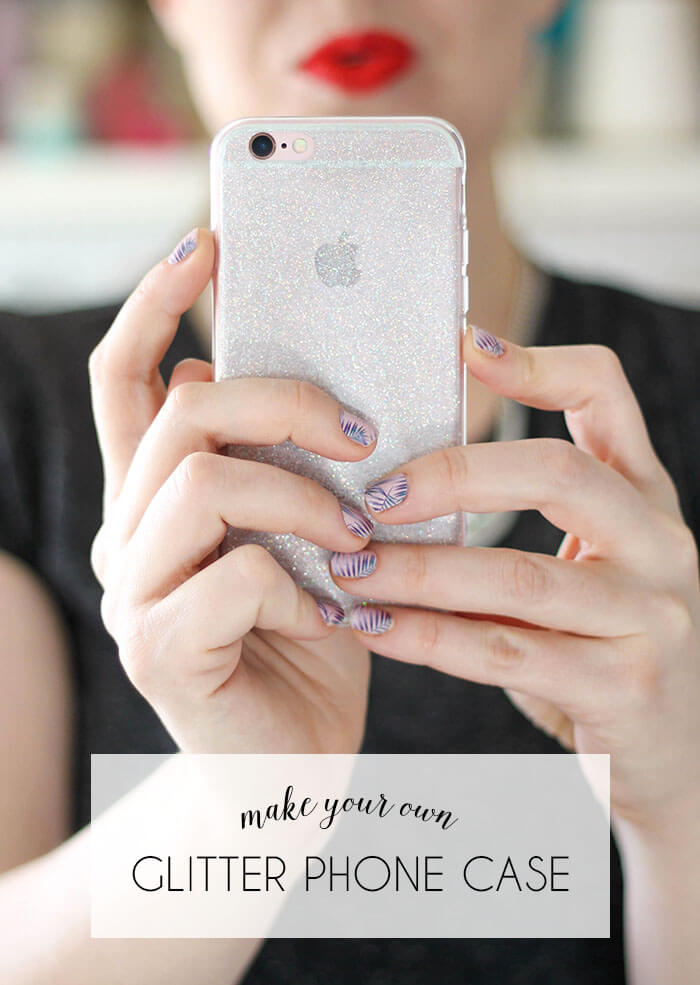
Super Simple Glitter Phone Case


Comments + Project Love
Stephanie R says
These are the cutest!! I should make some of these for my teens stockings, she would LOVE these!
persialou says
Yes! I think they are perfect for stockings!
Lillian says
Lol ??? are my fav
Laurel (@abubblylife says
These are SO awesome! Unicorn & pink heart are my favs (shocking, right? 😉
persialou says
Hahaha… I love those too!
Krista says
Cute!! These are so fun – my oldest would love making these!
persialou says
Yes! My kids made some of their own too and just loved them!
Amy | Delineate Your Dwelling says
I love shrinky dinks!! These emoji’s are too fun.
Sami Davis says
I NEED to make the little poo pin! I get a kick out of that one every time. Seriously love this DIY! It’s so nostalgic to see anything related to Shrinky Dinks..
Have an amazing holiday!
xx
Sami
http://www.theunexpectedtype.com
Brandy says
Do you have a download for the emoji’s? Last minute mom here, trying to get some stuff together for a birthday party
Alexis says
I’m sorry, I don’t! But just do a quick image google search for whichever ones you want. Good luck!
Isabella says
wait how many centimeters is 3” ?
Alexis says
About 7.5 cm. 🙂 1 inch is about 2.5 cm (sorry I usually try to include metric measurements, but sometimes I forget!)
Marta says
Wow I love it they are very beautiful
Rachel says
Since lapel pins seem to be making a comeback, this looks like a great way to dive into the trend! I love the brightness and creativity of these. Thanks for sharing!
Becka says
These are adorable! (Love your Jams in all the pictures, too! ?)
Alexis says
Thank you so much! Love my jams! 🙂
Melody Rich says
OH MY GOD THIS IS AMAZING. I can’t wait to do this! You’re a genius.
Alexis says
You are too nice! Thanks, Melody! If you make some, I would love to see them! 🙂
Deebi27 says
Ohmegee, this is fabulous! Fun to make and even better to give to others! The shrink paper is on the list to get! Thanks SOOO much!
Alyson says
Hi! Just wondering what you did to thin the paint (did you add any thinning agent to it or just use a thin layer)? So excited to make these, thanks!
Alexis says
Hi Alyson! I mixed in a little bit of water to thin it out. 🙂 Good luck!
Charlie Ranger says
These are so cool! I will definitely be making some to add as little gifts with my webshop orders. Thank you!!
Regards,
Charlie Ranger
@LittleaholicbyCSD
Cécile P. says
Oh j’adore ton DIY il est vraiment trop cool!
Bravo à toi!
Gros bisous♥♥♥
Cécile.
Alexis says
Merci! 🙂
BRITNEY says
Do you have a print-out of the emoji’s to trace, like in your one picture. I don’t have the software to enlarge the emoji’s like you did and i really want to do this as a craft for my daughter’s 8th emoji themed birthday party.
Alexis says
Hi Britney! I don’t have a printable, but you can use Canva.com to size the photos – it’s free online photo editing software. Good luck!
Kelly says
Could you use sharpies rather than paint?
Alexis says
Yes you absolutely can, but it will have a bit of a different look. I find that sharpies get quite a bit darker when you bake them. Colored pencils work great too. Maybe try some different options on a scrap of your plastic shrink film to see what you like. Good luck! 🙂
Jaël says
Hello! Thanks for this DIY, I will try it today! But I don’t know what is a “shrink film” in French :/ Do you gave any translation for that term?
Thanks a lot !!
Alexis says
Hello! It is a thin plastic sheet that gets smaller and thicker when it is heated up. One brand is called “Shrinky Dinks.” I see it on amazon.fr. I hope that helps! Good luck!
Bea says
Omg! Thank you so much for this post. The pins are so cuute! Pins are now a thing so I searched for them in the internet and they’re all so pricey. I’m so glad I found your blog, such a helpful post. Thank you! 🙂
Ida Pahus says
What a great DIY post! You did a great job with it!
http://livelifefullyalive.com/
Dazzo Azzo says
I love this but, instead of emojis im doing My Hero Academia themed. Love this tho, helped alot on how to do it!! ❤️✌️♥️
Morgan says
Tried these out myself! Didn’t make emojis, made my own cute ones! The only thing is that the baking process wasn’t great, they curled up and stayed curled, even after I put them in longer. The instructions said on my shrink paper to do 350* but I did 250* like you did. Ended up having to shrink them myself over a candle and flatten them haha. Do you know any other solution to this? Still a fun idea and they turned out alright, just maybe a little more effort went into it.
Alexis says
Hi Morgan! So sorry you had problems with the baking! I know that can be frustrating! I was probably using a different brand of shrink paper than you were so I would definitely recommend following the instructions that come with the product you have. I’m glad you were able to figure it out. 🙂 Thanks for stopping by!
Denise says
What do I do if they curl way more than they did in the pictures and don’t flatten?
Denise says
Never mind, I think I solved the problem. Sorry, I’m not sure how to delete the comment. Thanks for the great post!
Da Boz says
What a neat guide, I had wanted to have a lapel pin custom made…but I can only find places that do them in bulk and they’re way too expensive. This is a great alternative and I can just do them myself! Thank you!
Silvia says
Can you use a different color sharpie to outline the images? Curious to see if you have tried it or not 🙂
Alexis says
You absolutely can! I have not tried it to specifically outline these designs, but I have used different colored sharpies on shrinky dinks, and they work great. Just like the paints, they do get much darker after shrinking – just something to be aware of. 🙂
Julie says
I love making things with shrink plastic but I’ve always found it shrinks a little more in one direction that the other, so a square becomes a rectangle. You don’t seem to have had that issue so I’m thinking I need to try a different brand of plastic. these are so cute, I’d love to give them a try.
Alexis says
Hi Julie! I have not had that problem, so yeah, maybe try a different brand? And definitely be sure to follow the baking instructions that come with it. I have found different instructions for different brands. Good luck!
Carly says
I was at multipule stores, and all were sold out! When I ask why they all said people were making these!
Alexis says
Haha! That’s so funny. Well, I’m sorry you couldn’t find any! Hope you can get your hands on some soon to try it out. 🙂
Svea says
I was wondering could you also color in the pins with sharpie before baking it or does it have to be a specific paint?
Alexis says
Yep! You can color in with sharpie, but the colors will be a lot darker.
Joni Giarratano says
You are going to get a kick out of this !!!
45 years ago, I was teachingTri-Chem Home Art /classes…
. and we were selling shrink plastic…
….Like some of the people “above” found… ,,,,We ran out of the product….
so guess what we did….?
We started experimenting with ” LIVER LIDS “…
that’s what we called them….
the lids that grocery stores put on liver, and potato salad , /etc !!
They were round and made such cute little pieces !!!
Of course we could just get so many “Liver L ids”, and so we
actually went to a wholesale grocer and bought a case of a thousand lids !!!
Cocomelon Nursery Rhymes says
Hi! Just wondering what you did to thin the paint (did you add any thinning agent to it or just use a thin layer)? So excited to make these, thanks!
Lorae says
Hello! The lapel pins are THE cutest! Where can I find the download for the emoji pins? The hamburger, smiley face, etc? Thanks!