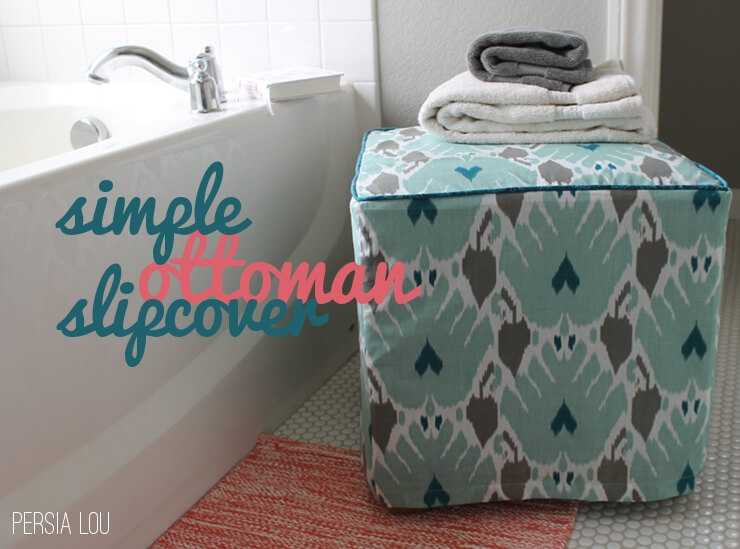
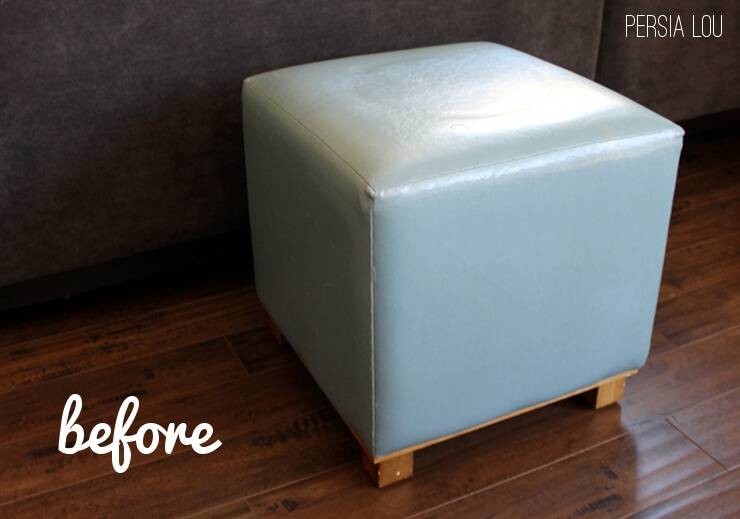
Our Master Bath project is wrapping up, and I am working on a few DIY projects to bring some color into the room. We have had this old ottoman floating around the house for a while now, and I thought with a quick slipcover it could find a new home in the bathroom.
I still had about half of a shower curtain leftover from my hutch refinishing project, and I thought the pattern would look great in the bathroom. Plus, I still had the bottom hem of the shower curtain, which meant I wouldn’t have to hem my slipcover. Score!
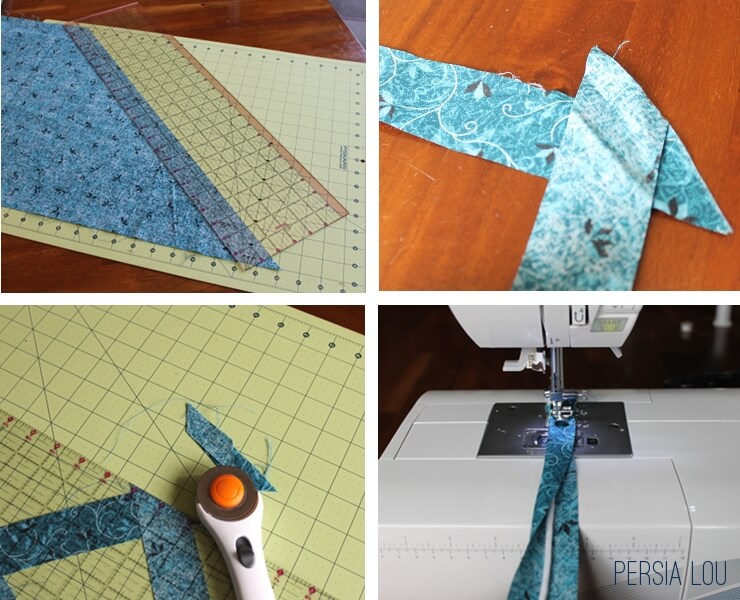
I recently made my own piping, and it was so simple I wanted to do it again to add a little contrast and interest to the slipcover. If you have never made piping before, don’t be intimidated! You can absolutely do it! I followed the tutorial over at Craftiness is not Optional, and basically you just make some bias tape and use your zipper foot to sew the cording into the bias tape. Simple. I promise.
When your piping is all ready to go, cut out your the pieces for your slipcover. You will need four sides and one top. Just measure each side of your ottoman and add a half inch to the measurement for seam allowances.
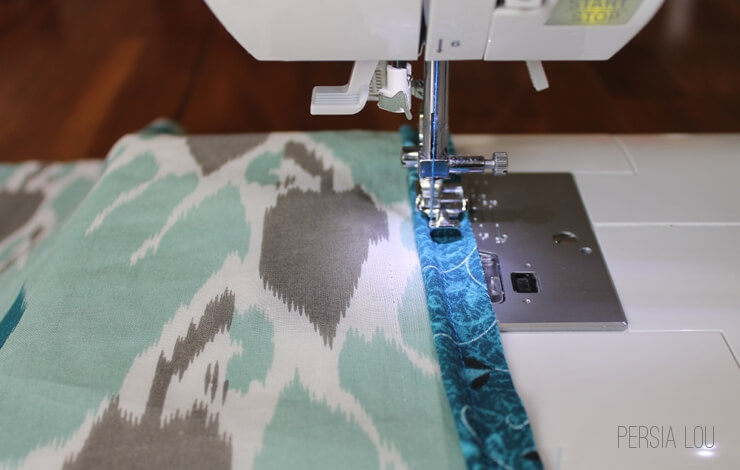
Next, I sewed my piping to the right side of the top panel a quarter inch from the edge of the fabric using a zipper foot and a long, basting stitch.
When the piping is attached to the top panel, sew the four side panels together, right sides facing, to create a little tube or box. The next step is the trickiest part, but it’s not too bad. Pin the top panel (with the piping basted on) to the side panels, right sides facing. Start each side by pinning the corners and then pull the fabric to stretch, if necessary.
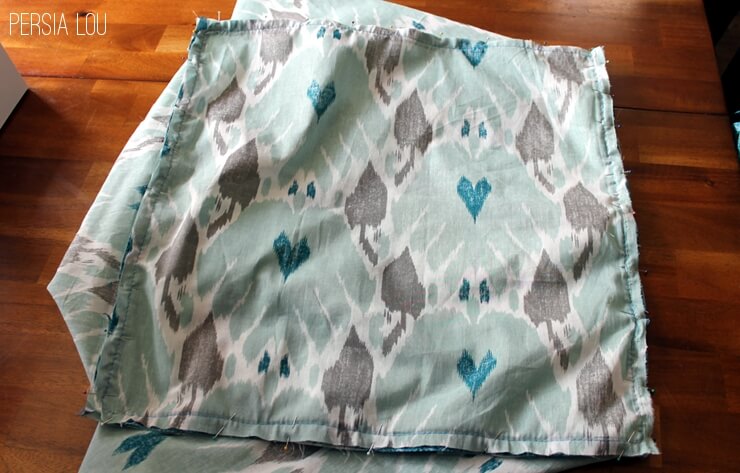
Sew the top panel to the side panels using the zipper foot pressed against your piping. Then just flip your cover right side out and slip it onto the ottoman. Woot! All done.
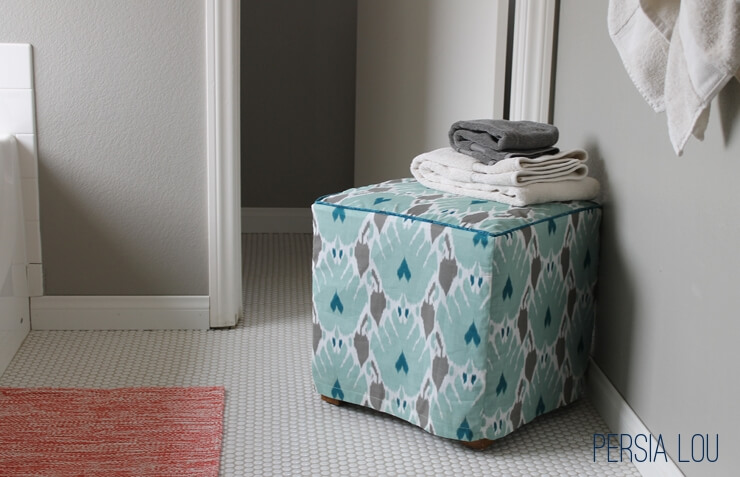
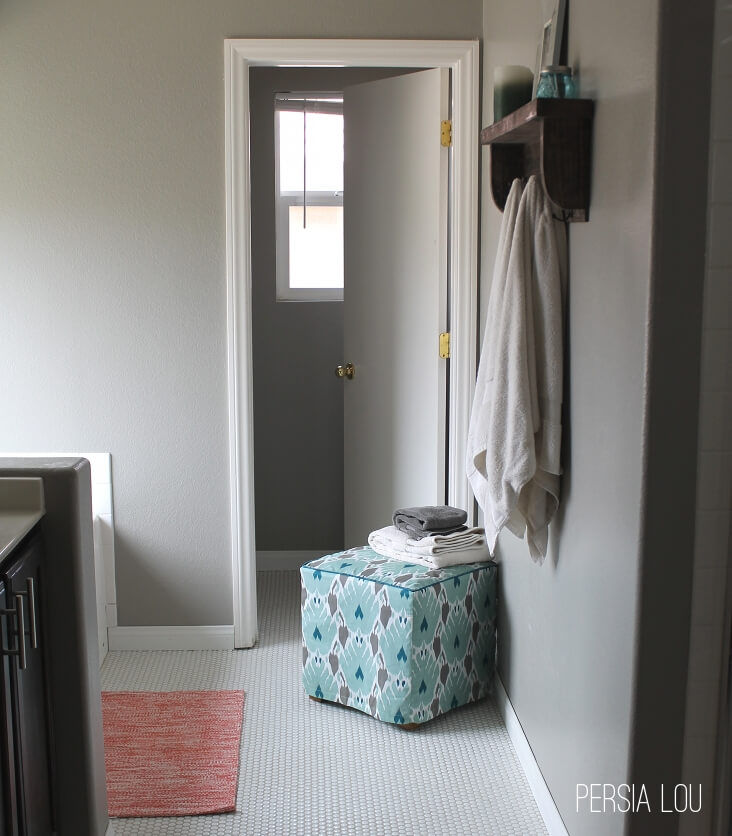
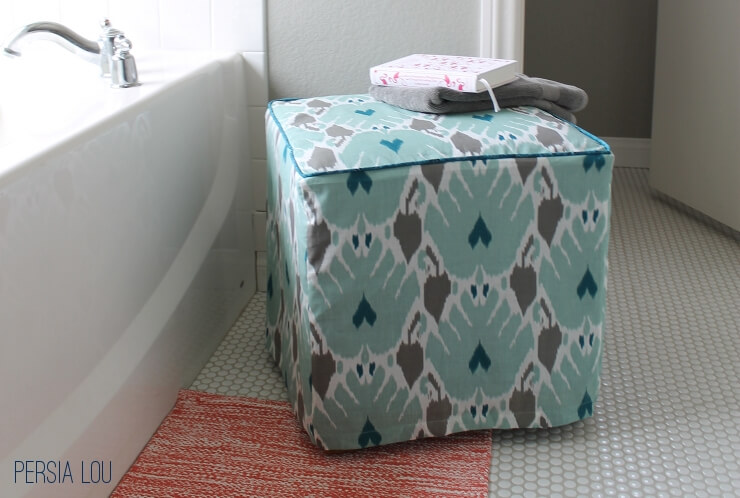
What do you all think? I’m liking the color it’s bringing into the room.
Linking up at some of my favorite parties.


Comments + Project Love
megan {homemade ginger} says
first off, i love that fabric!! secondly, i have a little ottoman the same size that i've been eanting to cover. this is so cute!<br />I would be honored if you share this at my link party, <a href="http://www.homemadeginger.com/2013/06/ginger-jamboree.html" rel="nofollow">Ginger Jamboree!</a>
Alexis Middleton says
Thanks so much, Megan! I just stopped by your cute blog and linked up to the party. Thanks for inviting me!
Heather SettingforFour says
Thanks for linking up at Project INspired! Love love love your DIY Ottoman and the fabric you chose! So pretty!! Pinned!
Alexis Middleton says
Thanks, Heather!
the cape on the corner says
ooh ooh ooh-make me one, lol! I love this!
Alexis Middleton says
Haha… Thanks!
Lyndsay Collins says
Great idea! I love the pop of color. It would be great to put a few of these together as a coffee table as well.
Alexis Middleton says
A pair would work well as a coffee table. And extra seating when needed. Thanks!
Heidi Amber says
This is gorgeous!! I have a boring brown one in my living room that needs a facelift. This is perfect! Pinning!! Oh and following on Bloglovin' too!<br />Heidi @ handmadefrenzy.blogspot.com
Alexis Middleton says
Thanks, Heidi! It was a simple project with a lot of impact. The best kind. 🙂 Thanks for following! I just stopped by your blog, and I'm following along there too.
Heather SettingforFour says
I adore this! Great makeover and I love the pattern! Thanks for sharing at Project Inspire{d}! Pinned! Hope you can share more of your creativity at tonight's party – 8 pm EST http://www.settingforfour.com
Alexis Middleton says
Thanks so much, Heather!
megan {homemade ginger} says
I featured you on my blog today! Feel free to grab a featured button on the right hand sidebar if you wish. Thanks again for linking up!
Alexis Middleton says
Thanks, Megan! That's awesome!
Petra says
It's gorgeous. I love the look of your bathroom too! Mostly, I love the look of your blog! I'm following! 🙂
Ann McLeod says
Great choice of fabric!!! <br /><br />Ann – The Rustic REdhead
Mandy Hank says
Alexis I love the fabric choice. What a great option for when our minds want a quick change. Thank you so much for linking up to our Get Your DIY On Challenge this week. next week is Fall Themed Wreaths, I hope you'll make it back and share with us! Have a great week!<br /><br />Mandy @ The Hankful House Blog
bumbu pecel bali says
<a href="http://bantalsilikon01.blogspot.com/2014/10/perumahan-baru-di-tangerang-graha-raya.html" rel="nofollow">http://bantalsilikon01.blogspot.com</a><br /><a href="http://marinirseo.blogspot.com/2014/10/perumahan-baru-di-tangerang-graha-raya.html" rel="nofollow">a</a><a href="http://kopiluwakliar01.blogspot.com/2014/10/perumahan-baru-di-tangerang-graha-raya.html" rel="nofollow">a</a><a href="