• Skip to primary navigation
  • Skip to main content
  • Skip to primary sidebar
  • Skip to footer
  • Craft & DIY
    • DIY Art Projects
    • DIY Home Decor
    • Free Printables
    • Kids Crafts
    • Paper Crafts
    • Silhouette Crafts
    • Vinyl Crafts
      • Vinyl 101
    • Friday Craft Club!
  • Celebration
    • Party
    • Gift Ideas
    • Halloween
    • Thanksgiving
    • Christmas
    • Valentine’s Day
    • St. Patrick’s Day
    • Easter
    • Fourth of July
  • Crochet
    • Crochet Patterns
      • Crochet Accessories
      • Crochet for the Home
      • Crochet for Kids
    • Crochet Stitches
  • Silhouette
    • Silhouette Studio
    • Silhouette Mint
    • Silhouette Curio
    • Silhouette Alta 3D Printer
    • Silhouette Deals
  • SVG Cut Files
  • SHOP
  • Nav Widget Area

    • Facebook
    • Instagram
    • Pinterest
    • YouTube

Persia Lou

Creative. Crafty. Fun.


No-Piece Geometric Quilting Tutorial Part Two

*This post contains affiliate links. If you click through and make a purchase, I may make a small commission.
Hey! Psst! Don’t forget to check out part one of this quilt tutorial here. 
Let’s get ready to biiiiiii-aiiind!! Doodoodoodoodoodoooo-duh Doodoodoodoodoodoooo-duh Doodoodoodoodoodoooo-duh Y’all ready for this?
Guys. Quilting is way more exciting with Jock Jams. Seriously. Try it out.
Because, here’s the thing, if you are anything like me, the thought of binding a quilt may make you feel a bit nervous, and Jock Jams can help you with that. For reals. The first time I did this binding technique was on my herringbone quilts, and this time around I was feeling much more confident. It is really not a difficult technique to master, but it makes a totally profesh looking binding.
First though, let’s just remind you what makes this quilt super awesome: no-piecing! NONE. Zip. Zilch. The quilt top and backing are solid pieces of fabric, but the quilting pattern still gives it loads of texture and pattern.
I kind of love it. Anyway, at the end of part one of this tutorial our quilting was all finished and it was time to finish off that baby with contrasting binding.
Step one is to trim off the edges of the quilt to give it a nice even edge and square corners.

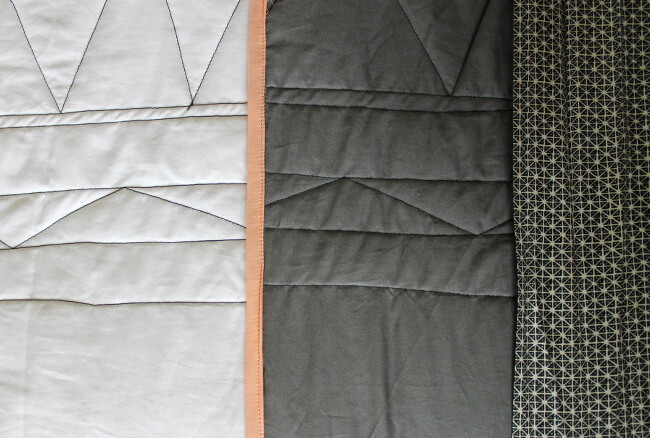
Next, it is time to make the binding. I used about a yard of cotton fabric in a light peach color. To start off, you will need to cut the fabric perpendicular to the selvedge edge into strips 2 1/4 inches wide. Most cotton quilting fabric is 42″ wide, so each strip will give you about 40 usable inches. To determine how many strips you need for your binding, divide the perimeter of the quilt by 40. For my quilt, I needed 10 strips.

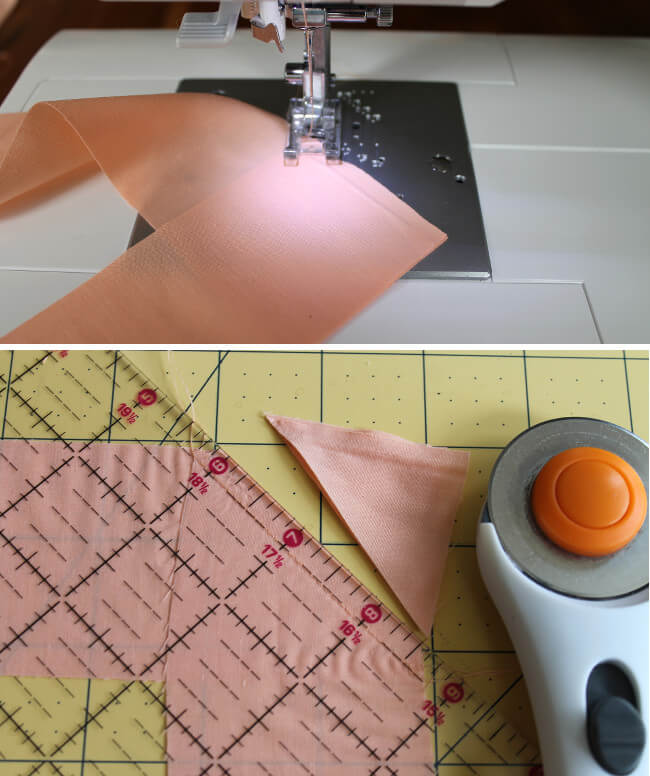
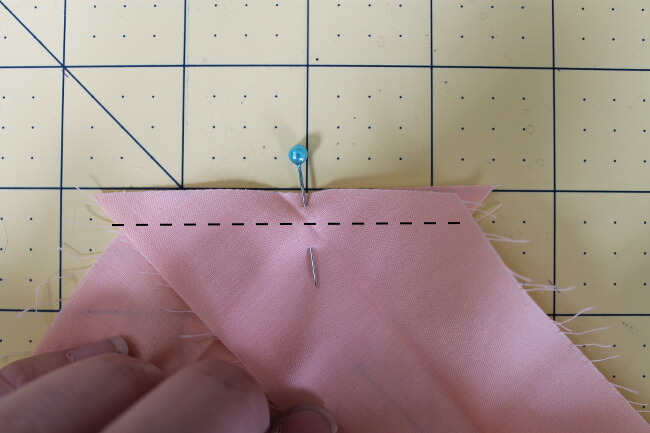
When all the strips are cut, it is time to join the strips together into one long strip. To do this, put the ends of two strips together at a right angle with right sides together and stitch from corner to corner to join the strips at an angle. Keep doing this until all your strips are joined into one long chain.

Trim the corners off where the strips are joined leaving 1/4 inch seam allowance.
Press each of the seams open to create one long strip of fabric, and then press the entire strip in half lengthwise.


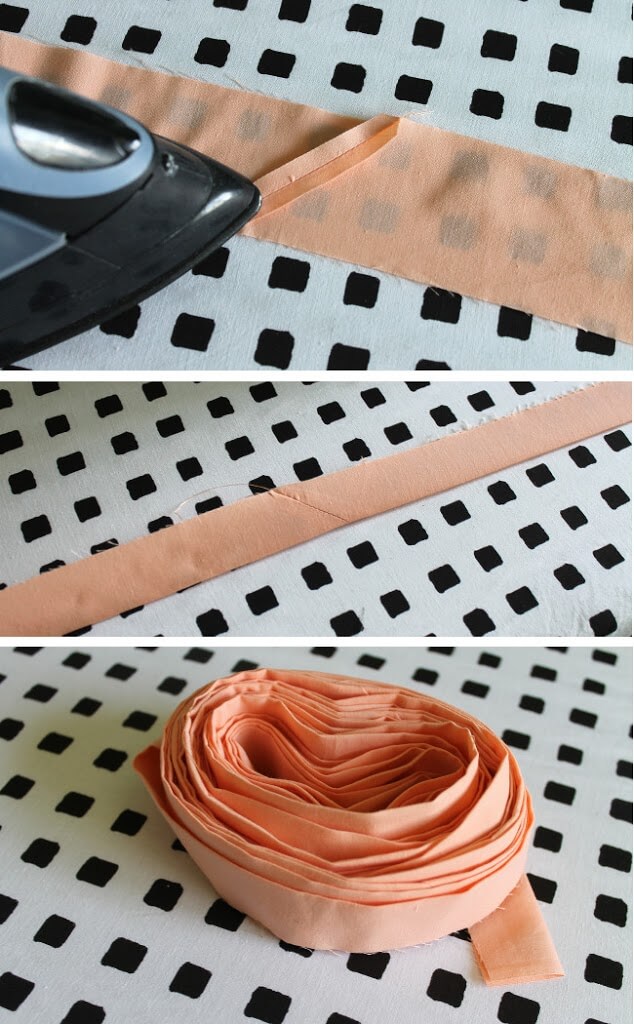
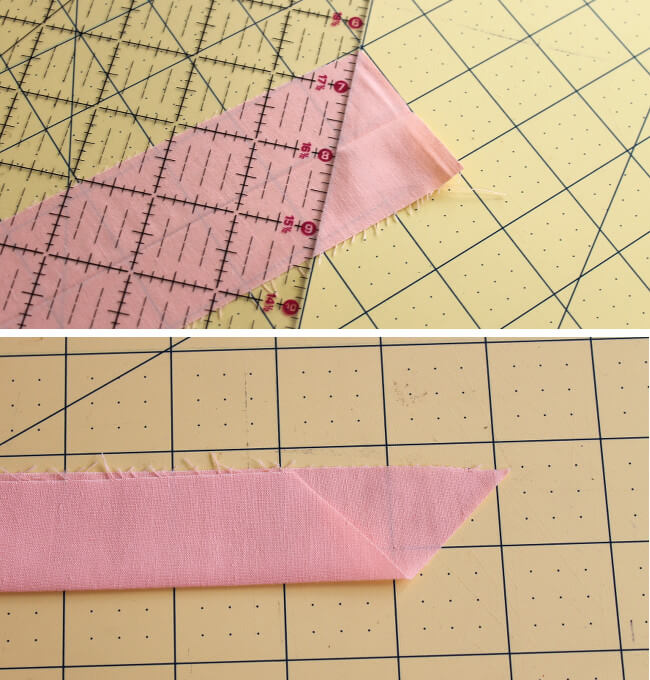
This will give you a nice long piece of binding. There is just one last step before we can attach it to the binding. Take one end of your strip, open it up so it is flat, and cut off the end at a 90 degree angle. Then fold the binding closed again along the lengthwise crease.

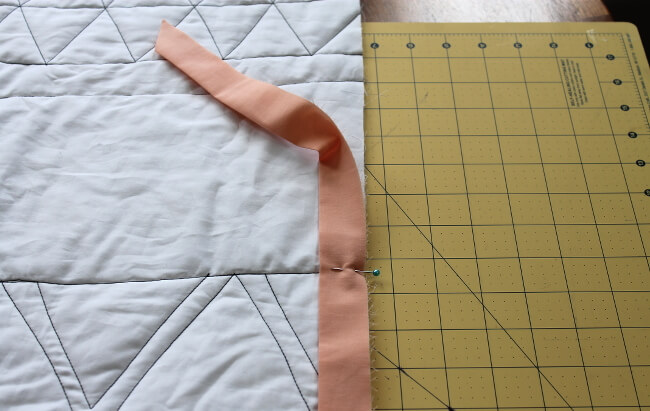
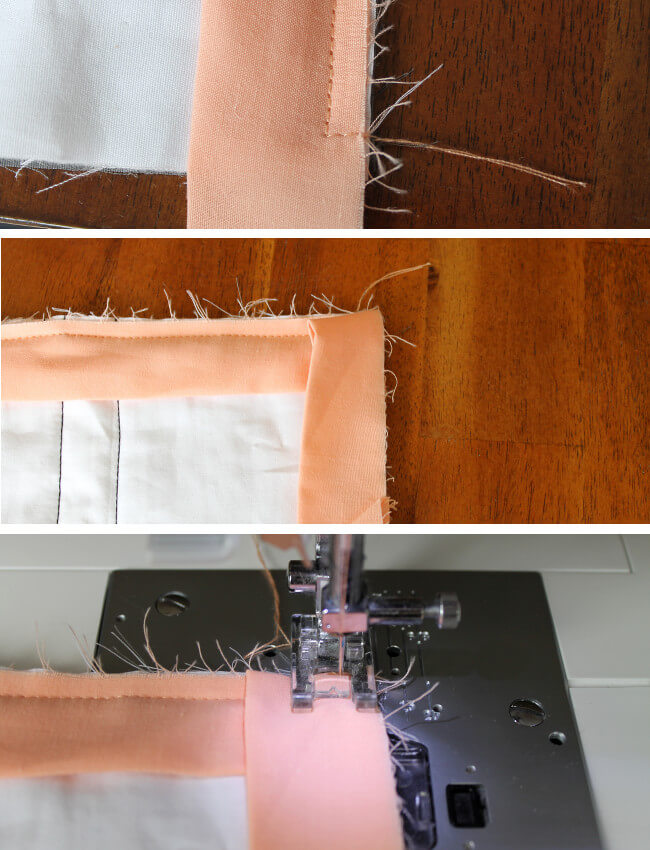
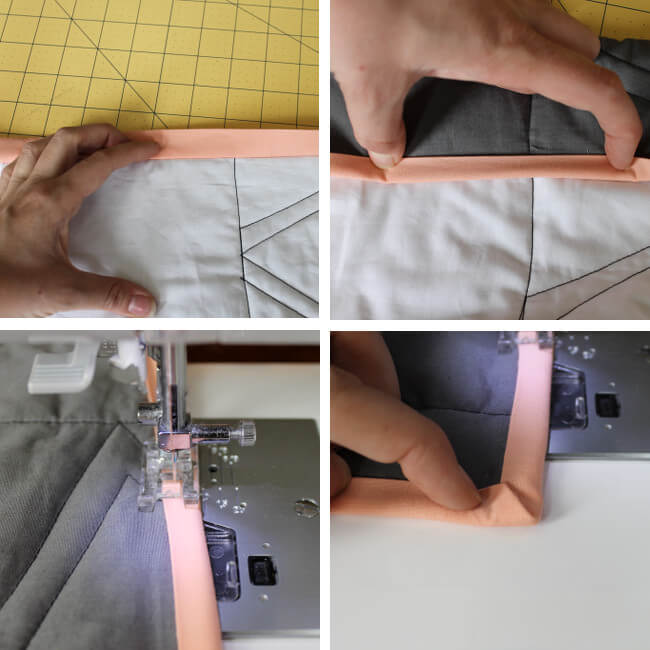
Now it is time to attach the binding to the quilt! Start in the middle of one of the sides of the quilt and leave about six inches of binding unattached (the angled end of the binding). Place the binding so the open edge lines up with the edge of the quilt and the folded edge points to the middle of the quilt.

Using matching thread, stitch the binding to the quilt at exactly 1/4 inch from the quilt edge. (It is really important that the binding be exactly 1/4 inch from the edge to make the following steps go smoothly!)
When you get to a corner, stop 1/4 inch from the edge, turn the quilt 90 degrees, and stitch off the edge.
The turn the quilt and lay the open edge of the binding along the next side of the quilt. The corner should kind of stand up in the middle. Flatten it down, and begin stitching along the next edge exactly 1/4 inch from the edge of the quilt. Keep going until you get back to where you started. Stop stitching about 10-12 inches away from where you started.
Now we will join the two ends of the binding together so you won’t be able to tell where it stopped and started! First, trim off any excess binding, leaving a few inches of overlap between the two ends. Open up the binding and lay the angled end over the top of the straight end.
Mark the edge of the angled end on the straight end. Then trim the straight end 1/2 inch from your mark. Both ends will now be cut at an angle and this should give you a perfect 1/4 inch seam allowance.
With right sides together (be careful not to twist the binding!), stitch the two ends together leaving a 1/4 inch seam allowance (see the image below).

Press open the seam allowance (a finger press should work just fine), clip off the corners, and fold the binding back along the lengthwise crease.

Going back to where you stopped stitching, and finish stitching on the binding 1/4 inch from the edge of the quilt.
Now that the binding is completely attached all around the front of the quilt, it is time to wrap the binding around the edge and attach it to the back. You could do this by hand to keep the stitches invisible, but I just used my machine to attach the binding with a top stitch in a thread that matches the binding color.
Fold the binding over the edge of the quilt. You may want to pin it in place before you quilt, but I just kind of wrapped it around as I stitched. With the back of the quilt facing up, stitch the binding down 1/4 inch from the edge of the quilt.
When you get to the corner, the binding should easily fold into a pretty mitered corner. With this binding method, both the back and the front will have nice mitered corners.
Just keep stitching all the way around the edge of the quilt, and – Voila! – all done! Yay!  A custom king-size quilt made on your home sewing machine. It’s totally doable, guys!
So, our new quilt has a new home on our bed. It is light-weight and perfect for the Vegas summers.
And that little pop of peach makes me smile.
If you like this post, be sure to check out these:
Herringbone Quilts
Diamond Baby Quilt
 Watercolor Pillow

June 28, 2014 1:00 pm Alexis Filed Under: Craft

Reader Interactions

Comments

  1. Tanya Runkle says

    June 28, 2014 at 1:42 pm

    Alexis this is gorgeous, you are so talented!! Pinning- xo<br /><br />Tanya

  2. bethany dearden says

    June 28, 2014 at 2:53 pm

    So beautiful! I love the simplicity! I have never made a quilt, it looks so intimidating! You used a regular machine right?

  3. Alicia says

    June 28, 2014 at 3:10 pm

    This is amazing. I&#39;ve admired quilting but always felt pretty intimidated about attempting it, but I really realllllly want to try this. The color combination is perfect, too.

  4. Jessica Anderson says

    June 28, 2014 at 7:39 pm

    Why have I never thought to make a no-piece quilt?! I love this!

  5. Colleen says

    June 29, 2014 at 5:20 am

    You make quilting look so easy! You might convince me to try it yet.

  6. Emily McCauley says

    June 30, 2014 at 9:25 pm

    I love that this is with solid fabric, not patterns. That is always my pet peeve with quilts, it&#39;s too busy!! Someday I will finally learn how to use my machine (when the husband lets me leave it on the dining table) and be able to do projects like this. Way to go!

  7. Amy Lee Scott says

    July 1, 2014 at 3:06 pm

    Alexis, this is BEAUTIFUL!!!!! I also bow down to your quilting prowess 🙂 I am in the process of making one of my first quilts–just straight lines and I threw in the towel after quilting three of they yesterday. I think my batting is too thick. Anyway, I hope I can someday work up to this glorious-ness!

  8. anu says

    July 1, 2014 at 9:20 pm

    The quilt turned out so well. Love the geometric stitching!

  9. Mamas Guide says

    September 22, 2014 at 6:10 am

    Just finished this quilt! I haven&#39;t made anything in almost 20 years and this is my first project on my new sewing machine. I made a smaller version because I knew I would make mistakes (and totally did) but I&#39;m proud to have started and finished and can&#39;t wait to make another one! Thank you for the great instruction and inspiration!

Primary Sidebar


Looking for Something?

FAVORITE POSTS

crochet cat slouch hablack cat hat - free crochet pattern (with video!) from persia lou
crochet feather and fan baby blanket - free crochet pattern

Footer

Content Sharing Policy

First off, thank you so much for being here! I would be so honored if you would like to share one of my projects, but please only use one or two photos and be sure to link back to the original post. Thank you!

If you see anything here that has been improperly credited, please let me know and I will fix it right away. You can email me at [email protected]

  • Home
  • About Me!
  • Disclosures and Privacy Policy

© Copyright 2016-2019 persialou.com · Theme by: PDCD