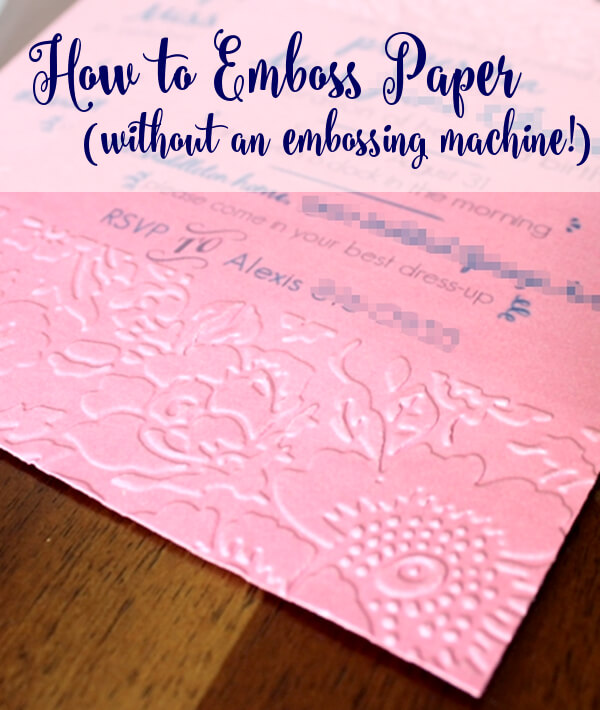
 I am in the midst of preparations for my little girl’s upcoming birthday celebration. We are going for a fancy tea party theme, and I am having a good time planning it all out. In my fantasy world, I would have beautiful letterpress invitations, but in real life, they are just a bit out of my budget. So, I came up with the idea of doing some embossing for a similar kind of look that would be inexpensive and easy to do myself.
I browsed the aisles of my local craft store looking for embossing options, but there weren’t really that many. The store pretty much only had embossing folders to use with the Cuttlebug embossing machine, which was also a little out of my budget. The folders themselves weren’t too expensive, so I started wondering if I could use one of the folders without actually using the machine. After a little googling, I found a suggestion for something I already had at home that might work:
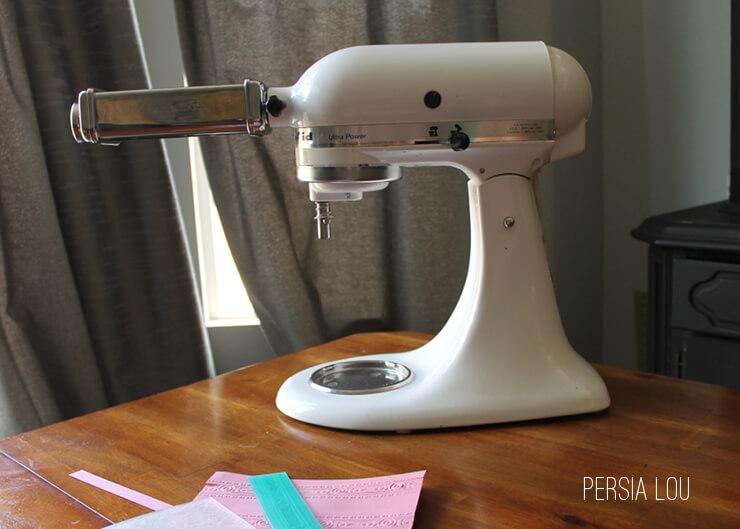 What’s that thing sticking off the front of my Kitchenaid, you ask? It’s a pasta roller!! And, guys, it embossed my invitations like a BOSS.
I imagine a hand powered pasta roller would work great too. But I can’t guarantee it will work perfectly (please don’t send me angry emails if you break your pasta roller!). I have used my pasta roller to make pasta maybe three times in the six years we have had it, so I wasn’t too concerned about it not making it through the paper embossing experiment.
I wanted the embossing on the top and the bottom of the invitation, so I put the invitation in the folder where I wanted the embossing to start.

I had my pasta roller set to the largest width and set the Kitchenaid to the lowest speed, which worked well. Hold on to the folder and the paper as it goes through the roller. Grab the folder as it comes through the bottom of the roller so it doesn’t just drop out. And that’s it!
 What do you think? I really like the way they turned out. Do you have a pasta roller that may become your new embosser?

Comments + Project Love
Jessica Anderson says
Haha. What a good idea!
Bev Carter says
I have one that I only used a few times too so I will try this. What a great idea.<br />Have a wonderful weekend,<br />Bev<br />@ <a href="http://www.eclecticredbarn.blogspot.com" rel="nofollow">Eclectic Red Barn</a><br />
Ann Martin says
Ha! That is just brilliant. 🙂
Mary Walker says
I used a hand crank type of pasta roller and it worked just fine too. I'll probably get more use out of it for embossing than pasta making.
Maria says
Awesome idea! I have a crank type roller like Mary that hasn't been used in years. Time to dig it out of the closet and put it to use. Pinning <br />I would love for you to share this at the Krafty Inspiration Thursday Link Party over at Krafty Cards etc. http://kraftycardsetc.blogspot.com/2013/08/krafty-inspiration-thursday-link-party-5.html<br />Maria
FrancineC says
What a great idea! My husband has a fancy pasta maker, but I think I'll just get myself a cheapo one to use for this! lol
Carolyn says
I just wanted to let you know that I featured your wonderful project on homework. Thanks so much for sharing it on The Inspiration Board. It makes me so happy to see beautiful creativity linked up!<br /><br />carolyn<br />homework &<br />DETAILS
Jennifer @ Delightfully Noted says
What a clever cookie you are!
Maria says
Thanks for sharing at Krafty Inspiration Thursday – I will be featuring it at tomorrow’s party!<br />Have a lovely evening!<br />Maria @ Krafty Cards etc. <br />http://kraftycardsetc.blogspot.com/<br />
kelly thompson says
very creative and cool- love it- I have the mixer but no pasta attachment- i will look for one now!
crafter1953 says
Hi,thanks for the great idea for using something I haven't used in years. I bought my pasta roller to use with polymer clay I haven't made anything with clay in a few years. I gave all my clay to my grand kids but kept the roller because they were too young to use it.
Alexis Middleton says
I hope it works for you! Put that pasta roller to work!
A Momma says
Genius!
Nomadicrose says
All I have is a rolling pin .. would that work if you taped everything first so nothing moves around?
Alexis Middleton says
I tried using a rolling pin first and didn't have a lot of success, but I think it is possible. Taping everything in place would definitely help. I think the trick is getting enough pressure, which is a bit more difficult with a rolling pin. Good luck!
ruby says
Too crafty,love it,thank you#