This post contains affiliate links. If you click through and decide to make a purchase, I may make a small commission.
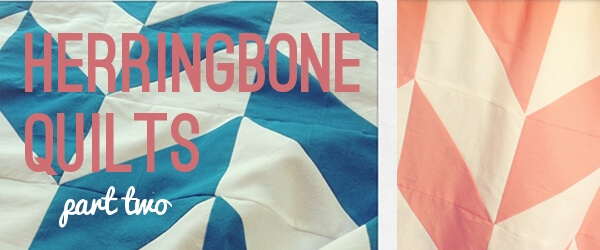
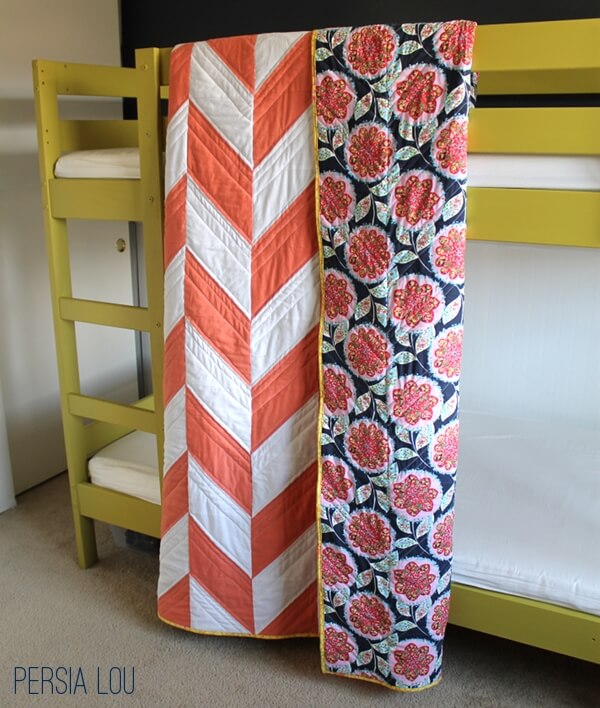
Guys. Making two twin-size quilts is a lot of work. A lot. Especially for newbie like me. But I think it was worth it. Check em:
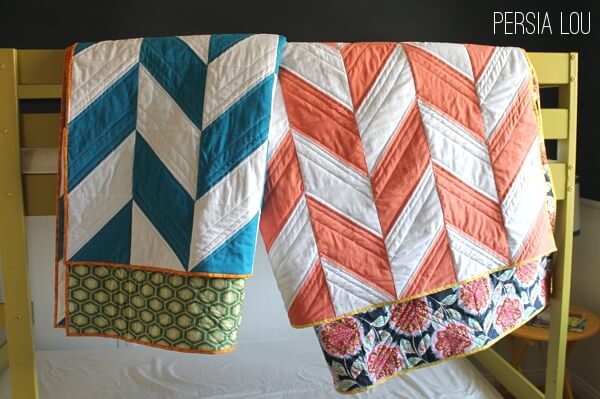
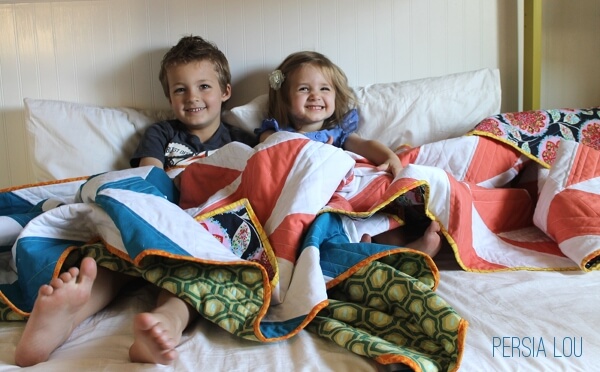
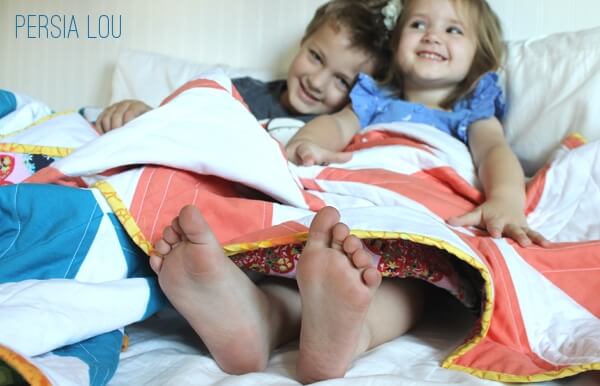
I just… Ah! I am SO happy with them. And I think their new owners are too.
Yeah. I like that.
And I like the being done part too. Because sometimes when I was wrestling those big guys around my little Singer I was thinking maybe I’d rather be doing something else. Just sometimes though.
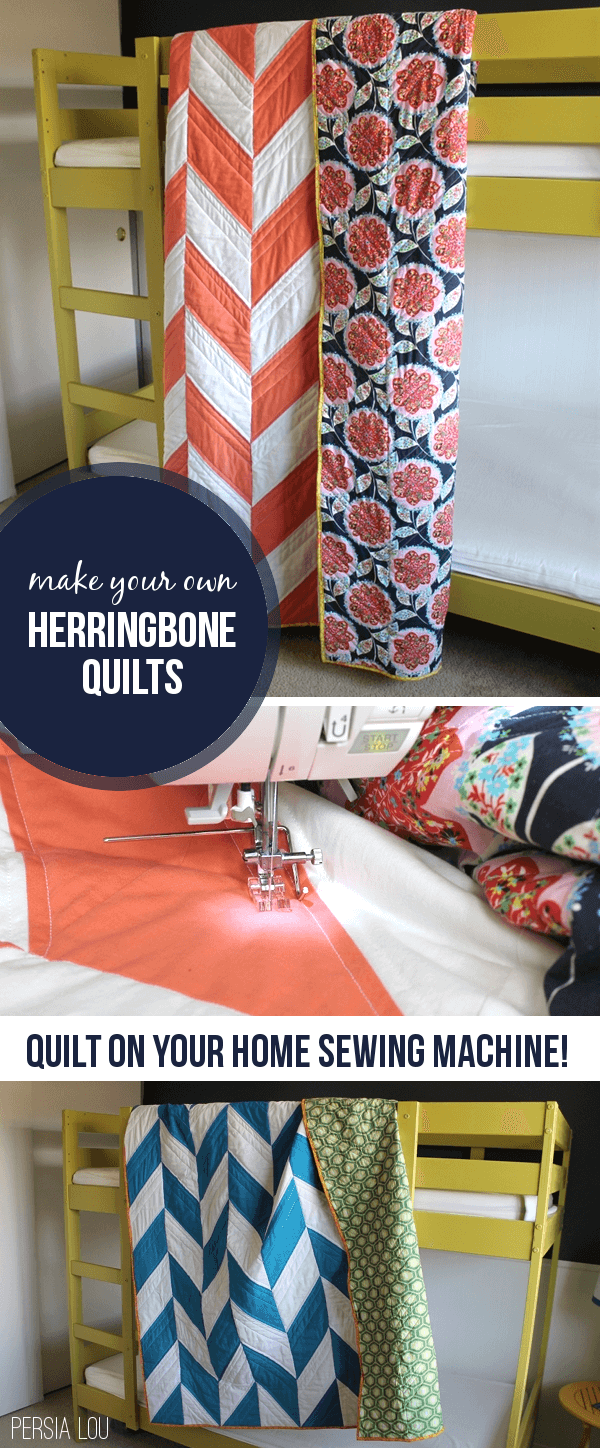
If you want to make your own, here are the yardages for one twin-size quilt:
- three yards each of the solid fabrics for your herringbone pattern (I used Kona Cotton White
 , Kona Cotton Teal Blue, and Kona Cotton Melon)
 - five yards for the backing (this needs to be pieced together lengthwise and you will have some leftover – I used Amy Butler Lark Dreamer Charisma in Midnight Blue for the backing on the coral colored quilt and Amy Butler Midwest Modern Honeycomb in a green color that doesn’t seem to be available any longer for the backing of the teal quilt.)
- 3/4 yard for the binding (I used a yellow fabric for the coral quilt and orange for the teal)
Anyway, to get from cut, pieced, and basted to cuddling, I had to do my quilting and binding, which were the two scariest parts of the whole thing for an inexperienced quilter like myself. I had done machine quilting before, but not on this scale.
When I went into the quilting, I didn’t have a real plan. I knew that I wanted to follow the lines of the pattern but that I also wanted to give the quilt some texture. Here’s what I came up with:

First, I did my stitch in the ditch (really it was more like stitch near the ditch) quilting in the vertical seams. Next, I quilted a quarter inch on either side of each zig-zag. Next, I played up the chevron pattern by stitching at different distances on one side of each zig-zag. My machine (I use the SINGER 9960 Quantum Stylist ) came with something called a quilting bar that helps you to make lines of stitches at a certain distance from a line of stitches previously quilted. All you do is set the bar to the distance you want and then line the bar up with the previous row of stitches:

And here’s what it looked like when all the quilting was finished:

Which brought me to binding. Ah, binding. Is this super scary to anyone else? I wanted to use a contrasting fabric for the binding, but I had never done a real binding on a quilt before. I had always just folded the backing over onto the front. I followed my friend Christa’s very useful machine quilting binding tutorial.
First, I cut my fabric into 2 1/4 inch crosswise strips. I needed 8 strips to go all the way around the border of my quilt, which was about 3/4 yard of fabric.

After the strips were all pieced together and pressed in half lengthwise (Christa’s tutorial explains exactly how to do this), I had a nice LONG piece of binding.

I had no trouble with the first step of attaching the binding strip to the front of the quilt, but when I folded it over to finish the binding, I had a bit of trouble. At least with my first quilt. I learned my lesson, and the second one turned out MUCH better. Here’s my tips.
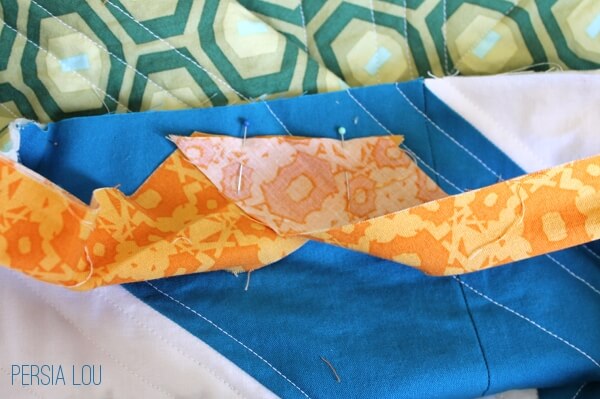
One quick (maybe obvious) tip, is to make sure you put right sides of fabric together when you are joining your binding. In Christa’s tutorial, she uses a solid fabric, so it can be a little confusing if you are using a print. Here’s how my final pieces of binding pieced together:
Most importantly, make sure you are attaching your binding with exactly a 1/4 inch seam. I don’t know about you all, but I am not normally a super precise sewer. I think most of my trouble with the first quilt was that my seam attaching the binding was actually a bit wider than 1/4 inch, so I had to really stretch the binding to make it wrap around to the back of the quilt. To avoid this problem on the second quilt, I actually busted out my tape measure, adjusted my needle, and made sure my needle was exactly 1/4 inch from the edge of my foot, so I could ensure an accurate seam allowance.

Finishing the binding on the second quilt was so much easier than the first, and it looks better too. You can see the difference:
 |
| Not so nice |
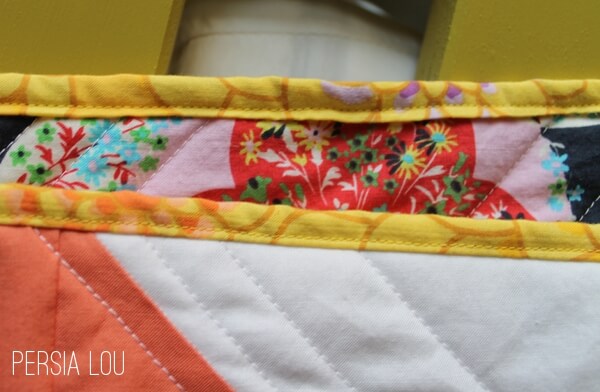 |
| Much better |
Welp… That’s about it! How about a few beauty shots for the road?


Check back soon for the full Vintage Disneyland Room Reveal! (ooh… in all caps!!)
If you like this post, you may also want to check out these:


Comments + Project Love
Amber Heidi says
Those are gorgeous!!!! Their little owners are quite adorable too 🙂 Seriously I am so impressed with those quilts. Wanna come teach me? :)<br /><br />Heidi @ handmadefrenzy.blogspot.com
Alexis @ persia lou says
Thanks, Heidi! I just stopped by your blog. You and Amber have some great projects and some cute kids!
Stacie Davis says
Lovely!
Jenny Eanes says
Your quilts are simply beautiful!! I love the patterns and mix of colors!! I'll join your quilting class too!!!<br /><br />Jenny from diywithjenandb.blogspot.com
Alexis @ persia lou says
Thanks, Jenny! I'll let you know when that class starts up. Haha…. 😉
Angie@Echoes of Laughter says
You did a fabulous job Alexis! Very pretty quilts for 2 gorgeous kids! Have a lovely week! Angie
Melissa at My Fabric Relish says
love the quilting…genius! oh, and the colors!
Cathy says
Hopping over from Whipperberry.<br /><br />I would love for you to share and link up at my TGIF Link Party. The party is open every Thursday night and closes Wednesday's at midnight.<br />http://apeekintomyparadise.blogspot.com/<br />Have a wonderful week!<br />Hugs, Cathy
Alexis @ persia lou says
Thanks, Cathy! I will come check it out!
ChristaQuilts says
I am beyond impressed!!
Alexis @ persia lou says
Thanks, Christa!
Sarah Simpson says
Oh, those are so, so pretty! Saw this on Sundae Scoop and wanted to say hi! This is an awesome tutorial, thanks for sharing!<br />Sarah @ domestically-made.com
Lynne Tilley says
Oh my, now you've inspired me to do this, too. I think I can, I think I can. You did a fantastic job and the quilts are just wonderful! I'm just learning myself, and it's good to have inspiration from other newbies 🙂 And I'm MUCH older than you. I have to do it not, or never 🙂 🙂
Alexis @ persia lou says
Haha! I'm sure you have plenty of quilting time left… 🙂 And you absolutely do it! I'd love to see your quilts when you finish!
Rachel (Lines Across) says
These are gorgeous! I love the colors and the herringbone patterns. The vintage themed Disney room sounds beautiful. Your kids remind me a lot of mine 🙂 I'll definitely be checking back to see more of their room! Thanks for sharing at Monday Funday!
Chelsea @ Making Home Base says
I hopped over from Live Laugh Rowe. I love quilts and I love herringbone so these caught my eye! I love them! Off to browse around your adorable blog 🙂
Bonnie and Trish @ Uncommon says
These are gorgeous! Love the color combos and patterns. Thank you for sharing with us at Monday Funday! 😉 Bonnie @ Uncommon Designs
THE FARMHOUSE PORCH says
These are GORGEOUS! Truly works of art!<br /><br />Linsey
Loulou says
How beautiful! I love how they turned out. Good for you. Lucky children.
Bonnie and Trish @ Uncommon says
Featured you tonight at MOnday Funday!
Anonymous says
Beautiful, where did you find the material, love it? Jennifer
Alexis @ persia lou says
I got the solid colors, the yellow binding, and the backing for the teal quilt from <a href="http://www.christaquilts.com/" rel="nofollow">Christa Quilts</a> and the orange binding and backing for the coral quilt from <a href="fabric.com" rel="nofollow">fabric.com.</a>
Melanee says
Alexis, those are amazing! I'm totally a quilting novice but I think this might give me enough courage to try triangles. That quilting bar is cool. Did you do all of that quilting with just a regular foot or were you using a walking foot?
Alexis Middleton says
Thanks, Melanee! I used a foot that came with my machine that I think was called a "quilting foot," but it is basically like a clear walking foot. I didn't drop the feed dogs like you would for free motion quilting (which I haven't worked up the courage to try yet… )
Korrie@RedHenHome says
I love and adore these! You did a great job.
Paula @ Sewy Stuff says
New follower here. Found your link at The Scoop. Wonderful quilts!!
Megan @ Megity's Handmade says
Oh my gosh! Amazing!! I'm so in love with these. Great job on them and picking out he fabrics! I'm off to explore your site some more.
Debra @ Homespun says
BRAVO!! WONDERFUL JOB!! 🙂 Making a quilt is no easy task..these are fantastic!
Kathryn Wright says
Fun and fabulous! My readers at FaveQuilts would love this.<br /><br />Kathryn
Ingrid Davis says
Maybe this is dumb question but for the backing did you find fabric wide enough for a twin or did you have to see 2 pieces together? I love the quilts by the way and the theme of the room is genius!
Alexis Middleton says
Not a dumb question at all! I had to piece the fabric together. I think I bought five yards of each fabric, cut it in half so I had two 2.5 yd pieces, and then tried to match up the patterns. I put the seam off-center so I had a large piece of leftover useable fabric, rather than two smaller pieces. I hope that makes sense. You can kind of see how the backing is pieced in one of the photos in the
Stephanie says
Ingrid, I was just about to ask the very same question about backing! <br /><br />Alexis, you've so inspired me!!!! I've been searching for a pattern or tutorial for a grey and white chevron quilt for the twin bed in my daughter's new room! Her crib and bedding are white, pink, and mustard yellow, so for the twin "guest" bed in her room, I wanted to do a grey and white
Alexis Middleton says
You're welcome, Stephanie! Hope it turns out just as you want it to. Let me know if you have any other questions, and I will do my best. 🙂
Michelle says
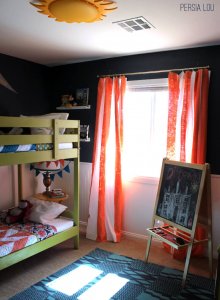
Love your bunk bed. Do you mind sharing where it is from?
Alexis says
Hi, Michelle! The bunk bed is the<a href="http://www.ikea.com/us/en/catalog/products/20102451/" rel="nofollow">MYDAL</a> bunk bed from Ikea. We painted it to match the <a href="http://persialou.blogspot.com/2013/05/ikea-tarva-hack-vintage-disneyland-room.html" rel="nofollow">dresser</a> we also made for the room. It is definitely an inexpensive option. We like it!
Claire Sonksen says
So for those of use trying to recreate this, let me just varrify quantities! 5 yards for the back, 2.5 and 3 yards of solid colors for the front, and .75 for the binding??? Thanks so much!
Alexis says
Hi, Claire! For the top of the quilt, you need the same amount of both fabrics. I would recommend getting 2.75 yards. I had five yards for both quilt tops, and I ended up being one square short. 🙁 Good thing it was just white fabric! And yes, 5 yards for the backing (you will have a long, skinny leftover piece because it will be too wide when you piece) and .75 yards for the binding. (These
Sarah says
Love the quilts! The colors, the quilting, the binding: all great!<br /><br />Love that bed too.
Ann Marie Heasley says
These are adorable! Makes me wish I knew how to quilt or sew more than a straight stitch. 😉
Danielle Goates says
Hey! I too am in love! Was wondering if you could tell me where to get the fabric on the back of the coral herringbone? Im in love with it and can't settle for anything else!
Alexis Middleton says
I love it too. It is an Amy Butler fabric I got from fabric.com. You can get it here: https://www.fabric.com/buy/eq-273/amy-butler-lark-dreamer-charisma-midnight-blue<br /><br />Thanks for stopping by! <br />
amy says
Oh my gosh. I just realized you didn't buy these quilts… I'm speechless. Stunning work, lady!
Meg says
I love your quilts! I'm decorating my baby's nursery in a coral/salmon color and I was just wondering if you had a name/brand for the color you used on the solid coral fabric? It would be perfect. If not that's OK! Thanks 🙂
MOPS says
Quilt's turned out great! I am looking to purchase a new sewing machine too, what type do you have? Looks like it quilts great.
Sarah Coggins says
Beautiful quilts! Thank you for sharing the details. I referenced your posts to create a <a href="http://2pawsdesigns.com/2014/09/floral-herringbone-quilt.html" rel="nofollow">crib sized quilt</a> (my first quilt ever) for my baby girl due next month.
Brooke Foley says
I am in love with these quilts!!! Do you remember a rough range of how much they cost to make? Also did you put any batting inside?
Alexis Middleton says
Thank you! I did use a thin cotton batting. Something like this: http://www.amazon.com/gp/product/B000YZ3RQA/ref=as_li_tl?ie=UTF8&camp=1789&creative=390957&creativeASIN=B000YZ3RQA&linkCode=as2&tag=pers02-20&linkId=E4JSFEXAY45M7C7T I don't remember exactly how much they cost, but I think about $150 total to make the two quilts. I did get some of my fabrics on sale,