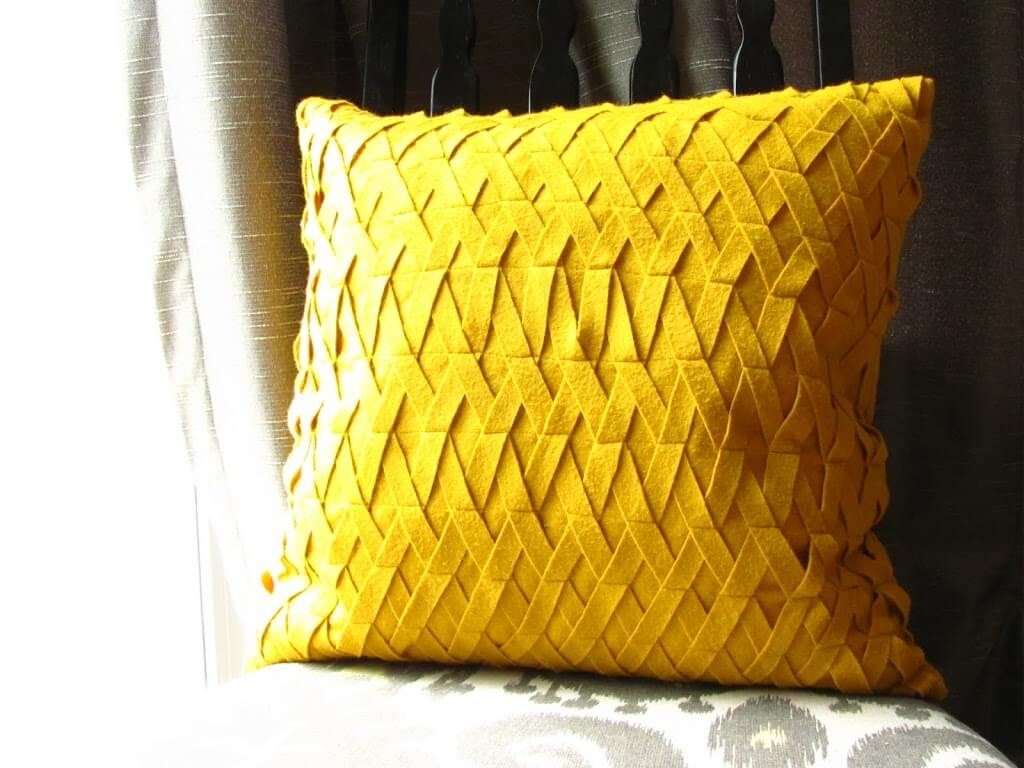
I’m back with yet another felt pillow. This one was inspired by this pillow from West Elm:


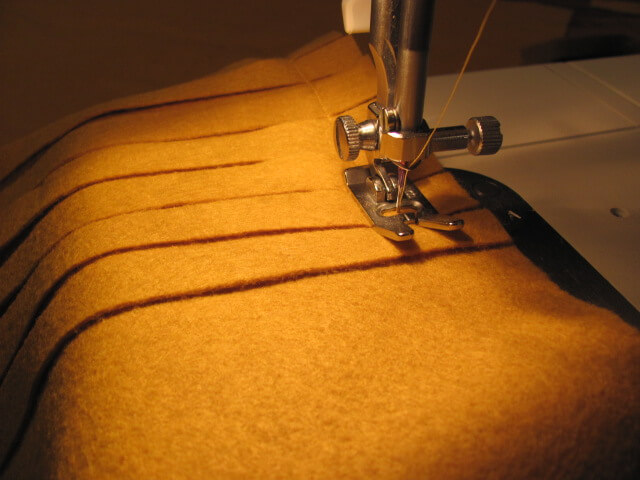
Next, I took every other strip and crossed it over the next strip. I sewed over the cross as I went along.
For the next line of stitching, I crossed same strip that went over in the previous row under the next strip.

I folded the strips at the ends of the rows back in the opposite direction like this:

And sew those suckers down:

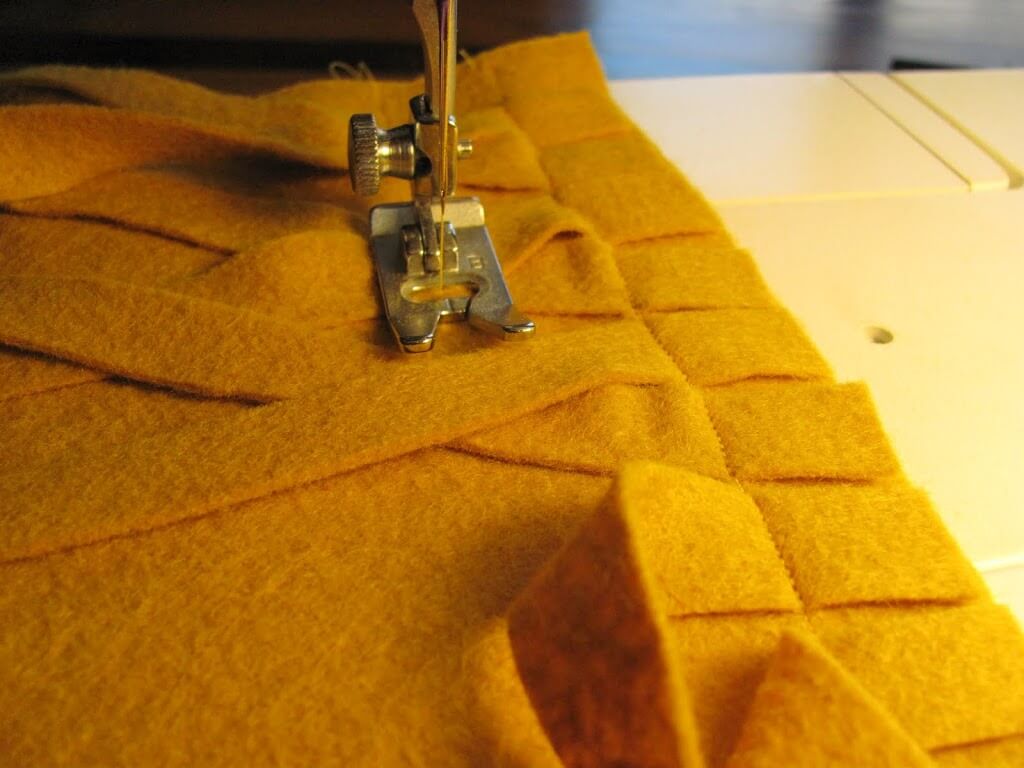
I would cross all of the strips before sewing, but I would adjust them as I sewed along to make sure they were sewn at about the right distance from the previous line of stitches. If I were to do this pillow again, I would use chalk or a washable fabric pen to mark sewing lines at an equal distance (about 1.5 – 2 inches). This would give the lattice a much more regular look.
Here’s what it looks like after a few rows of stitching:
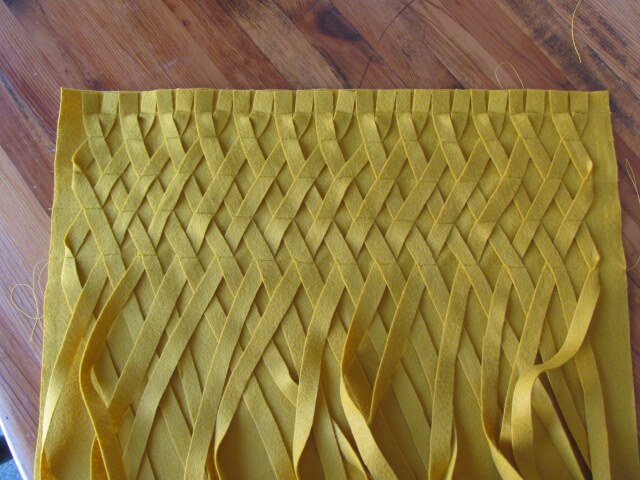
Continue weaving the felt strips until you reach the end of the square. As I played around with this I found there are many different ways you can weave the strips to create different patterns and looks. Play around with it and see what you like.
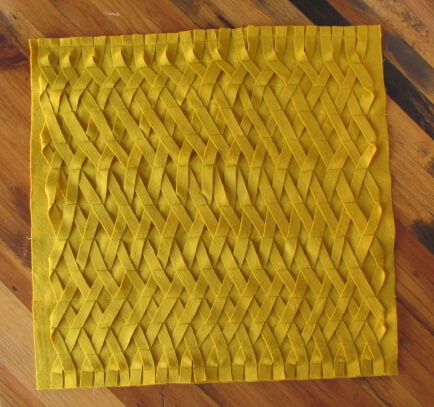
The front of my pillow all finished:


Comments + Project Love
Katie says
This is beautiful!<br /><br />Katie :)<br />www.sweetrosestudio.blogspot.com
Lauren says
Your pillow turned out amazing. I love this. I found your post via your link on WhipperBerry I am a brand new follower.<br /><br />www.elephantstrunkllb.com
{nifty thrifty things} says
Wow! This is amazing! Great job! :)<br />Thank you so much for your sweet comment on my blog! I'm so glad I found you! New follower :)<br />I would love for you to stop by my linky party @ <a href="http://niftythriftythings.blogspot.com/2011/04/nifty-thrifty-sunday-2.html" rel="nofollow">{nifty thrifty sunday}</a><br />xoxo from Germany,<br />Vanessa @ <a href="http://
persia lou says
Thanks all for the kind comments!! <br /><br />Alexis
Deb says
Really clever idea…I found you through Ruffled Up! I look forward to seeing more projects, I'll be back!
Bergs says
This looks awesome! I wish I could sew…<br /><br />http://gardenberger.blogspot.com/
Tanya says
I LOVE the way that looks!
Jen says
This is cool and I could actually do this. I first look at that sweet little Stranger than Fiction inspired afghan, but I can't crochet to save my life. 🙂 But sew felt? I can do that! :)<br /><br />Thanks for dropping by my blog, Domesticated Nomad.
Kristen says
This pillow has the most amazing texture – I'm in love! It's definitely being bookmarked! <br /><br />I'm a brand new follower and would love if you'd stop by http://www.decoratingdiy.blogspot.com and follow me!<br /><br />Kristen<br />Turning a House into a Home
{nifty thrifty things} says
I just wanted to let you know that I will feature your awesome pillow at tomorrow's linky party! :)<br /><br />Thank you so much for stopping by and linking up with <a href="http://niftythriftythings.blogspot.com/2011/04/nifty-thrifty-sunday-2.html" rel="nofollow">{nifty thrifty sunday}</a>!<br />I hope to see you again tomorrow!<br />xoxo,<br />Vanessa
Deepi's World says
Hi visiting from nifty thrifty things…this pillow is absolutely adorable.
Erin @ In Between Laundry says
Lovely! I've enjoyed looking at your recent posts. I'm your newest follower! 🙂 Erin at http://www.inbetweenlaundry.blogspot.com
blair @ a case of the mundays says
love this! a must do! 🙂
mom2amanda says
This pillow is lovely…just beautiful…
Amy at Ameroonie Designs says
This pillow is stunning! I love how much texture and depth it has. Thanks for linking up to our Pillow Point of View link party!<br />xoxo,<br />Amy
Anonymous says
Very similar.
Eline S. says
Lovely!!!<br />I want to try that!! ;)<br /><br />www.elines-producten.blogspot.com<br />www.facebook.com/elines.producten
CREATIVE MIND says
love it :)<br />i am a newest follower, would love if you will follow back 🙂
Pieced Pastimes says
I love this pillow! I have pinned this as I may have to make this one day. I have become your newest follower and look forward to seeing your next wonderful creation.
Rachel and Codee says
So cute! Thanks for the tutorial!
Debbie Stair says
For the 1st. pillow, wouldn't you go through the first step of attaching the strip to the pillow top, and then beginning looping two adjacent strips together? Look ing at the picture, I noticed that the loops links with an adjacent loop like a chain link fence does. Does that make sense? I'll try to work on it tonight &, if successful, will post pictures or send them to you if you
Alexis Middleton says
Hi Debbie! I tried to copy the West Elm pillow a couple years ago, and honestly, I don't remember exactly what I plan of attack was. 🙂 I think I started off by sewing down all the strips, and that did not work out so well for me. I'd love to see how your attempt goes though!
Carol Habets says
I think you are right
Carol Habets says
I think you are right
Camille Fredrickson says
I just found this on pinterest years later, what size of pillow form did you use?