
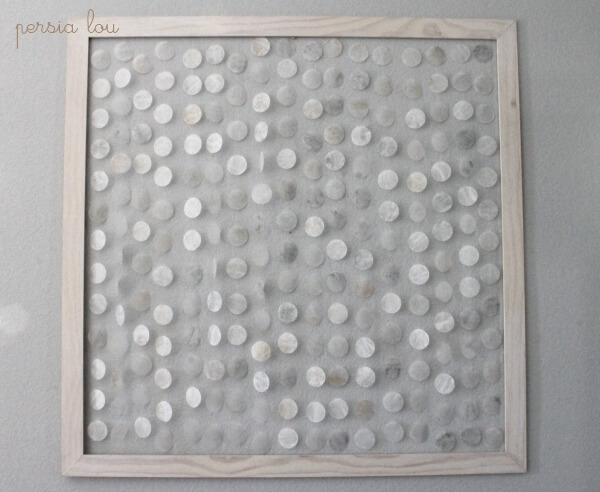
This is the project I shared over at the Country Chic Cottage’s Beach Bash last week. Ain’t she purty?
It was inspired by a beautiful piece of art I saw a several months ago in House Beautiful:
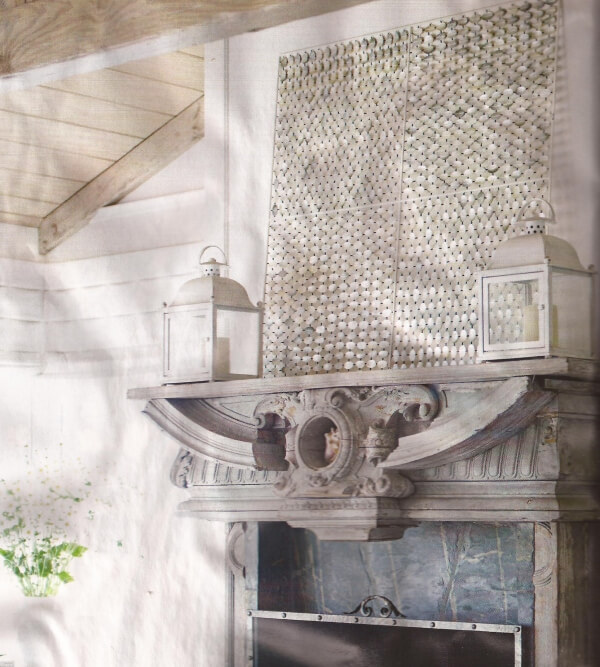 |
| Sorry the picture looks wrinkled… My magazine may have been dropped in the bath tub. Maybe… |
See that sparkly loveliness on the mantle? Here’s what the magazine has to say about it: “A framed grid of shells on fishing wire ‘sparkles and catches the light from the windows and the fireplace.'” Sounds like a dream, right? It also sounded fairly do-able to me, so I went to work. I quickly learned that pretty, sparkly shells are not so cheap. BUT – do you know what is? Wax paper. Wax paper is totally in my budget.
Maybe you saw that awesome wax paper cadiz shell chandy over at design sponge a while ago? Well, I used that tutorial to create my own shells.
Basically, you need wax paper, parchment paper, and an iron. Take three pieces of wax paper, place them between two pieces of parchment paper (to protect your ironing board and iron), and iron them together. The heat of the iron causes the wax to melt the papers together and creates a stiff, bubbly-looking paper.

I added a bit of color to my shells by using crayons. I rubbed bits of crayon onto my wax paper sheets to create a marbled look in my shells.
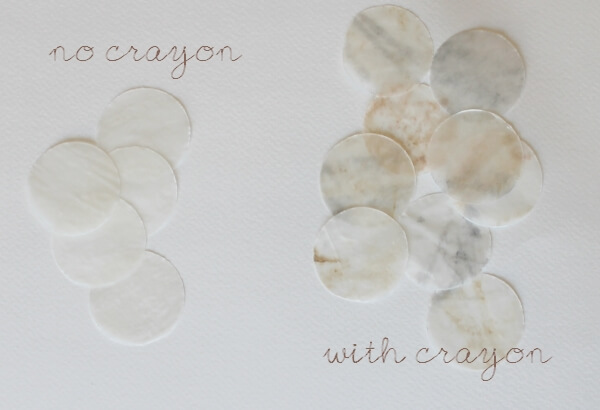
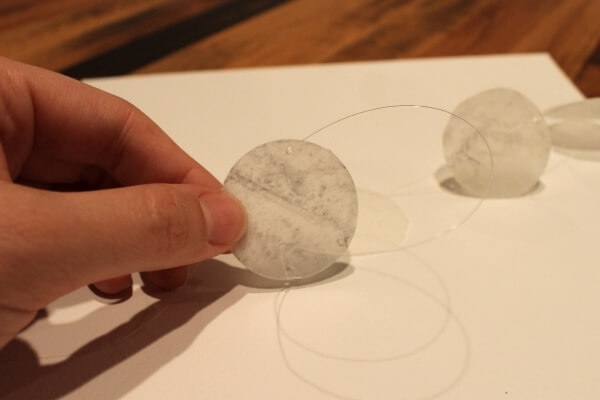
I think the crayon gives the shells character and a more natural look. I used a 1 1/2 inch circle punch to cut out my shells, although that was not the ideal tool. A circle cutter would probably work much better. I often had to go back with my Xacto knife to trim off edges that did not punch cleanly through.
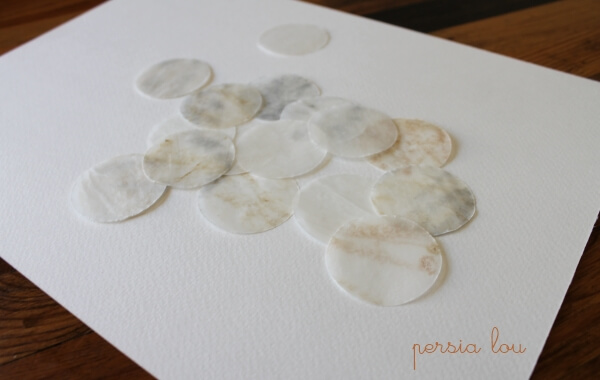
Once my shells were all punched out, I used a 1/16 inch hole punch to create two small holes in each end of every shell.

Next, I used fishing line to string up my shells. I tied the shell to the line through the hole at the top and then passed the line behind the shell and out the bottom hole.
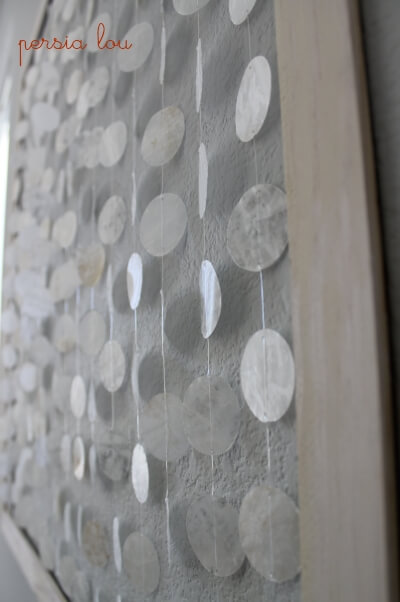
My finished piece used 17 strings of about 12-14 shells each. Once I had all my shells on strings, I needed a frame to hang them from.
Making the frame was definitely the part of this project that was most outside of my comfort zone, but it was very easy. AND I did it all myself, completely sans-husband. It took three steps:

- Cut the wood and miter the corners. I started with about 12 feet of 1 1/2 inch wood molding from the home improvement store, and ended up with a frame 34 1/2 inches square. I used a simple miter box and hand saw (which you can pick up for about fifteen bucks) to cut my wood.
- Glue the corners together. If you don’t get your corners mitered at just the right angle, this may be a bit tricky. I just used Elmer’s wood glue, and it is holding well.
- Stain the frame. I used some pickling stain that I had leftover from my paneling wall hanging project.
Finally, I attached my strings of faux shells to the frame using white glue, a paintbrush, and strips of cotton fabric. I painted glue onto the back of the frame and pressed the strips of fabric over the fishing line. When saturated with the glue, the fabric becomes a bit like tape. Using this method, I was able to get the lines securely fastened to the frame without tying it or drilling into the frame.
I am really happy with the way this project came out. It has movement, shine, and a slightly weathered look.

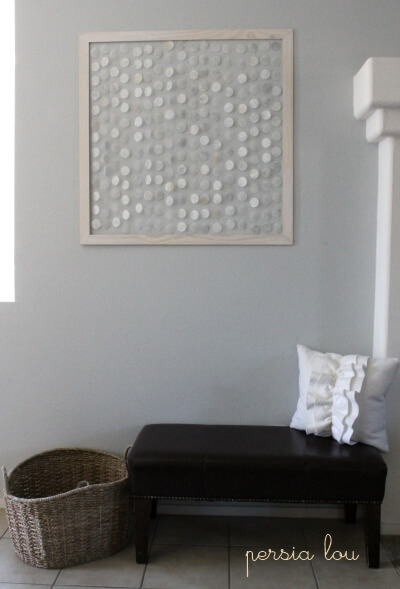
It definitely gives our entryway a pretty, seaside feel. So, whaddya think?


Comments + Project Love
Rachel D says
I am so in love with this! You are very creative!
- cristygrace - says
Found your blog from the Country Chic Cottage… love this project & I'm your newest follower 😉
Sweet Little Smoothie says
How beautiful!! What a great tip using the crayons! They do look so much more natural that way. I've wanted to try my hand at making some faux cadiz shells – thanks for the perfect inspiration piece! I'm your newest follower 🙂
Ashley says
love this!!!:) thanks for sharing:)<br />ps<br />Designer Blogs is doing a giveaway for a free button, if your interested come check it out!<br /><br />http://jaysonandashley.blogspot.com/2011/07/button-botton-who-wants-designer-blog.html
Carolyn says
I saw this on CCC and loved it. It's amazing. If you have a moment, I would love for you to share this project on my Inspiration Board. Pretty please!!!<br />http://carolynshomework.blogspot.com/2011/07/inspiration-board-link-party_19.html<br />Thanks for the inspiration.<br />carolyn | homework
{nifty thrifty things} says
Wow! Alexis – I love this!! You're so creative!<br />I just wanted to let you know that I will feature it at the next <a href="http://niftythriftythings.blogspot.com/search/label/nifty%20thrifty%20sunday" rel="nofollow">{nifty thrifty sunday}</a>. :)<br />xoxo,<br />Vanessa
Jenn Erickson says
Beautiful and ingenious!
lindsbing says
That is amazing!
Rebecca @ My Girlish Whims says
LOVE THIS PROJECT!!!!! So pretty! I totally thought they were shells!
Titti @ Shoestring Pavilion says
Looks very neat! I made a faux capiz project with milk jugs a while ago but I must say yours seems so easy and looks so pretty. I may have to try it your way 🙂
Amanda says
I love this!!!! Thanks for sharing! <br /><br />~Amanda, creatingamongstboys.blogspot.com
Nina says
I love this! And it looks like I would be able to pull it off too. Thanks for sharing! 🙂
Phoenix Peacock says
this is stunning and something I think I need to do!
Mel the Crafty Scientist says
I LOVE this! So cool – I've been loving the capiz shell art and projects and this is so fun and looks so pretty and summery without breaking the bank! Thanks for sharing! : )
heather says
This is awesome! I think you could use the same technique to make a chandelier by hanging them from wire rings. I love the melted crayon idea. Genius!
Seaweed and Raine says
Super cool! I might just have to add it to my list of things to do 🙂 The melted crayon gives it a nice balance.
Anonymous says
I, too, am a fan! Since you mentioned having to tidy up the edges with an Xacto knife, I am wondering if it was because the wax paper was too hard (solid hard, not difficult hard) for the hole punch? Or do you think the waxy texture made that happen? I want to do this project and have access to hole punches that are not mine. I just wanted to make sure it wouldn't damage the hole punch.<br /
Alexis @ persia lou says
@<a href="#c6293245313007016197" rel="nofollow">Anonymous</a><br /><br />I am glad you like it! I am not sure what the problem was with the puncher, exactly. It would often kind of crumple the paper instead of punch cleanly through it. I think part of the problem may be that while the paper is thick, it is not as stiff as, say, a piece of cardstock. I sometimes would punch through a regular piece
Monisha says
I love this! Thanks for such great inspiration! At what point did you use the crayon?
Anonymous says
Very nice adaption! Do you have the reference info on the original House Beautiful article (month and/or year)? Thanks!
Anonymous says
Nevermind, got it. http://www.housebeautiful.com/decorating/white-beach-house-in-california-0910?click=main_sr
Lauren Marie says
This is gorgeous! Great job and thank you for sharing!
belle24 says
Utterly and breathtakingly beautiful. I've redone my bedroom recently, and for a couple of months there has been an empty wall behind my headboard because I couldn't decide what to hang there. Now I do!! 😀
belle24 says
Utterly and breathtakingly beautiful. I've redone my bedroom recently, and for a couple of months there has been an empty wall behind my headboard because I couldn't decide what to hang there. Now I do!! 😀
The DIY Homegirl says
Hello! I featured your tutorial in my blog series, Living in a White Box. My series features tips, inspiration, and ideas for how to decorate rental homes. Your tutorial was perfect for inspiration to create faux capiz shell curtains. I especially like the details you added to make them look realistic!<br /><br />If you like, you can grab a featured button and check out my post at <a href="http:/
Theano Exadaktylou says
This is so pretty and creative! Thank you for sharing Alexis!