
We have lived in our current home for nearly two years. When we first moved in, one of the first things I wanted to do was make a headboard for our room. I am pretty sure I even bought the plywood right around the time we moved in.
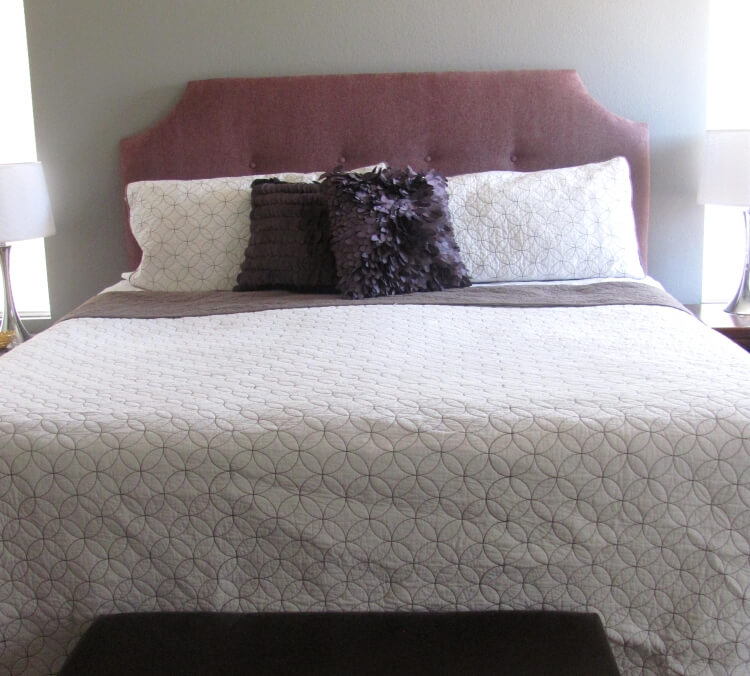
Well. Nearly two years later: The headboard is done!
And I LOVE it. It makes our room feel so much more grown up and complete. And every time I walk by my bed, I want to sit down and read a book or take a nap. It just looks so inviting.
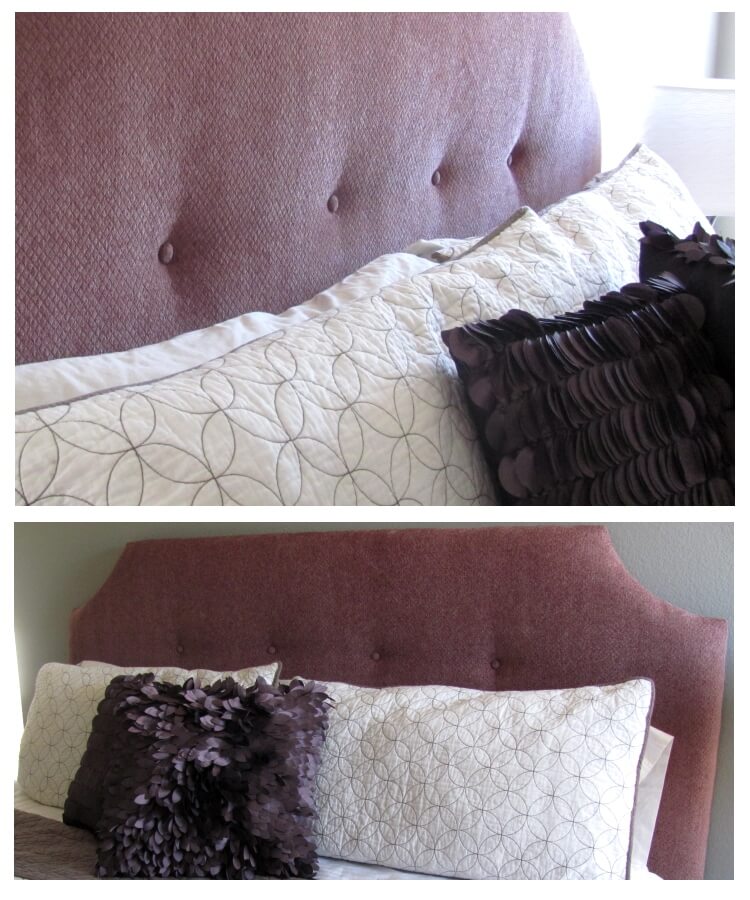
I made this headboard as part of the Week 3 challenge over at One Month to Win It, which was to use another blogger’s tutorial. Unfortunately, I didn’t make it through to the finals, but I did get a sweet new headboard! There are tons of great headboard tutorials out there, but I ended up following the incredibly detailed and helpful tutorial from Centsational Girl along with some helpful hints from the tutorial at Green Your Decor.
Materials/Tools I Used:
- piece of plywood
- large piece of 2 inch foam
- batting
- about two yards of upholstery fabric (I got it on clearance for one dollar a yard)
- staple gun
- jig saw
- electric carving knife
- drill
- cover buttons
- embroidery floss
- upholstery needle
- pliers
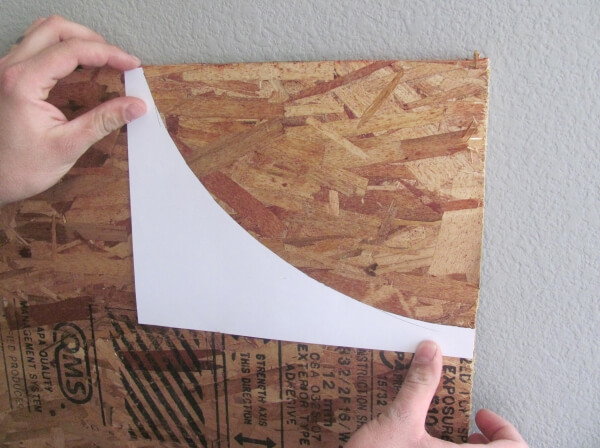
After tracing the template on both sides, the hubs cut out the corners using a jig saw. I wish I was cool enough to say I did this myself, but I am a bit chicken when it comes to power tools. I hope to get over that soon.
This is a good time to drill holes for tufting. Just mark where you want your buttons to be and drill away. My buttons are spaced 12 inches apart.
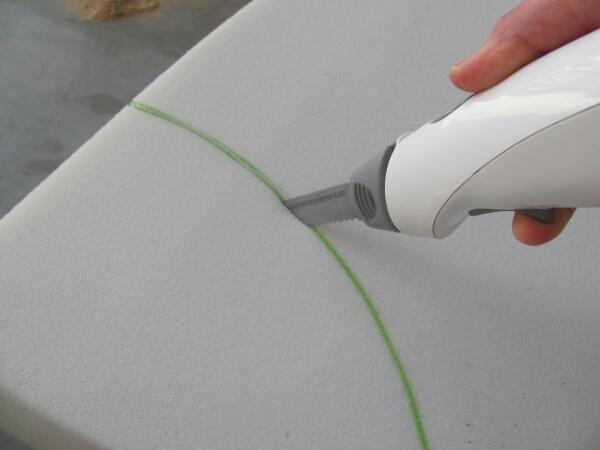
Next, I flipped the plywood onto my foam and traced the cut-outs. I used an electric carving knife to cut the foam, and it cut through it like but-tah. Brilliant.
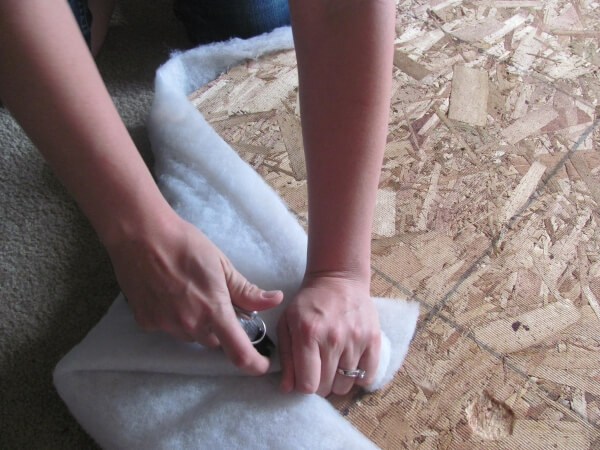
I stacked the batting, foam, and then plywood. Pull the batting over the plywood and staple it down. Then I did the same with the fabric.

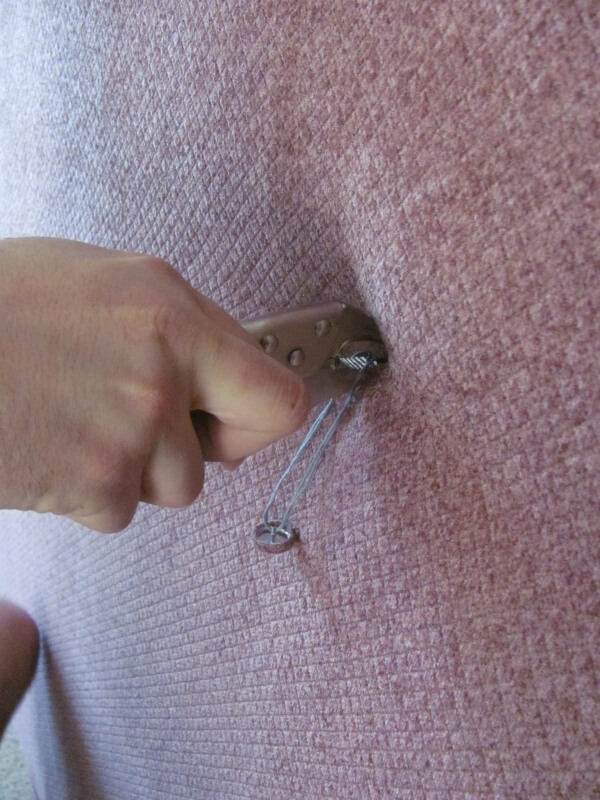
If you did not want to tuft the headboard, at this point you would be done! The tufting was probably the most difficult part of this whole project. The needle I had was really not long enough to go through the board, two inches of foam, batting, and fabric. This little difficulty lead to the discovery of my best tufting tip. If you are having a hard time pushing the needle through the headboard or finding the drilled hole in the board, try grasping the needle with a pair of pliers.


Comments + Project Love
Mel says
Great job! It's a huge undertaking but it was well worth the work.
Alexis @ persia lou says
@<a href="#c6360549189208586174" rel="nofollow">Mel</a><br /><br />I agree that the headboard is so worth the work. I like my room SO much more now.<br /><br />Thanks so much for stopping by!
Kate@TwentySixToLife says
It looks great! It's amazing how a headboard can really make a bed look "finished."
Katie says
hi alexis!<br /><br />thanks for visiting my blog and leaving a comment 🙂 i am loving this headboard and i cannot believe you made it–it looks straight out of a magazine! very elegant with the buttons, detailed shape, and color! i would have this in my home in a heartbeat 🙂 very very pretty! glad it finally got finished!! <br /><br />katie@little things bring smiles
{nifty thrifty things} says
Alexis, where do get your awesome ideas from?! I'm in love with your projects!!<br />Thank you so much for linking up to <a href="http://niftythriftythings.blogspot.com/search/label/nifty%20thrifty%20sunday" rel="nofollow">{nifty thrifty sunday}</a>!<br />I hope to see you again tomorrow!<br />xoxo,<br />Vanessa
Kayla Ariana Reagan says
sounds great! I tried to make a <a href="http://www.agungf.com/tufted-headboard-for-more-comfortable-bed/" rel="nofollow">tufted headboard</a> at home, but have not succeeded. maybe I should try the tips that you describe