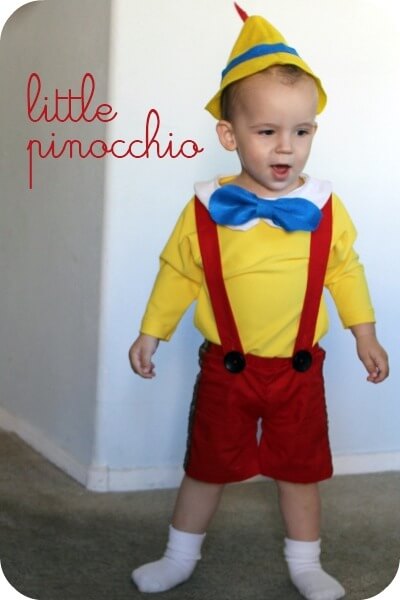
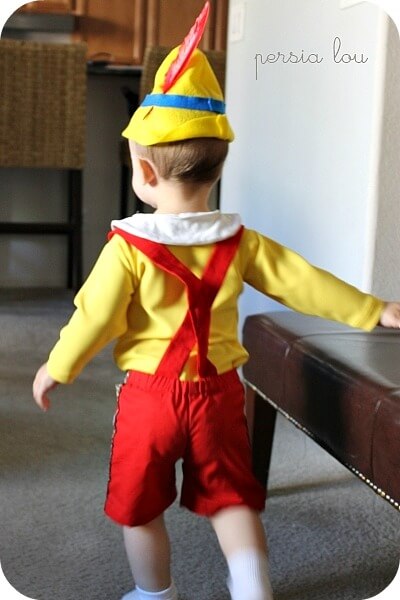
One of my dearest and oldest friends asked me to help her outfit her little boy for Halloween. She probably only has one more year of picking whatever Halloween costume she wants, so she picked Pinocchio. Perfect for a real BOY like this little guy!
 |
| via Amazon |
 |
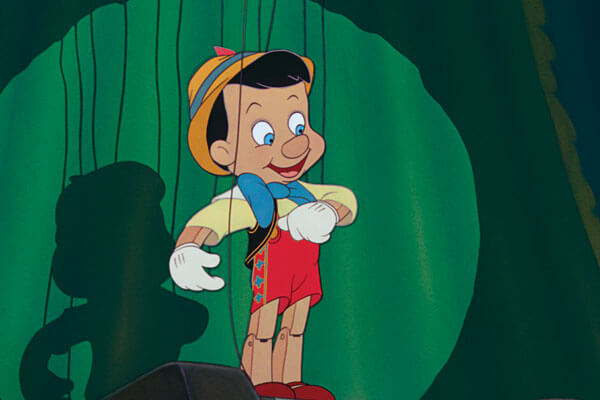
| Run, Pinocchio! Run! |
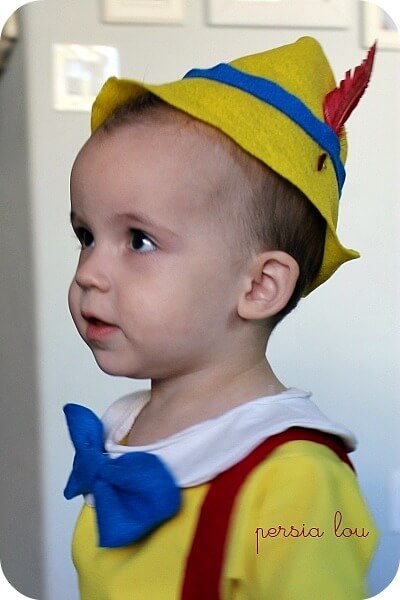
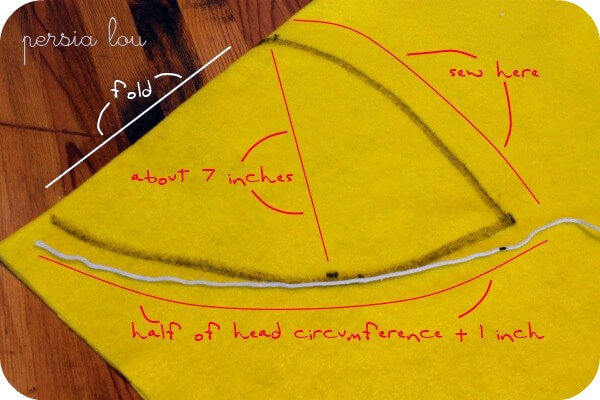
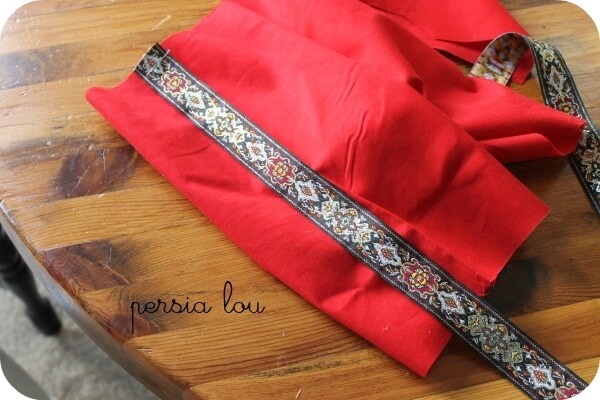
Fold a piece of felt in half, and draw this shape onto the felt using your child’s measurements. I found it easier to use a piece of yarn marked to the right length for the bottom of the hat. This helps you to get the curve to be the right length. I thought seven inches was about the right height as Pinocchio’s hat is not too pointy. If you were making this hat for an adult or older child with a larger head, you might want to add a little to the height.
Once you have cut out your hat, sew down the line marked above. Then turn the hat inside out, and press up the back of the hat about an inch and a half. If you are using inexpensive felt, be sure to use a cool iron or else you will melt your felt. Finally, glue on a strip of blue felt (or a ribbon would be cute) and a red feather! (Stinkin’ Red Feathers! – Who knows the movie? Anyone? Anyone?)
Linking up at Momnivore’s Dilemma Halloween Link Party, Somewhat Simple’s Halloween Link Party, Polish the Stars’ Halloween Party, Tatertots and Jello’s Weekend Wrapup Party, Simply Creations Link Party at Simple Home Life, Halloween Link Up Party at Eighteen25, and Once Upon a Weekend at Family Ever After. Be sure to check out my other Halloween projects and posts here!


Comments + Project Love
Rach H @ FamilyEverAfter says
i just showed this to my daughters and they loved it!!! amazing! you did such a wonderful job!<br /><br />If you're interested in linking up at more parties, I've got one that just started! I'd love to have you!<br /><br />Once Upon a Weekend @ Family Ever After, Friday nights<br /><br />http://www.familyeverafterblog.com/2011/10/once-upon-weekend-link-party-16-and.html<br /><br />ps-
Mel says
Oh my goodness, your little guy looks adorable! What a sweet costume for a sweet boy.
Christine says
You're amazing Alexis! Post pics of your kids when you're finished too! <br />Ps- You are neither old, nor lame!
Robin says
This is such a cute costume!! Good Job! :0)
Arlene says
Sooo Cute
Sommer says
Oh heavens! What a doll! That is an amazing costume you put together and totally original, I have yet to see a pinocchio! I would be delighted to have you stop by and link this up to my VIP party this weekend! http://designergarden.blogspot.com/2011/10/vip-party-34.html Have a safe and happy halloween!
aunt ho says
TROOP BEVERLY HILLS, a landmark masterpiece of modern cinema. Love your work Alexis!
Alexis @ persia lou says
@<a href="#c5455752567697323497" rel="nofollow">aunt ho</a><br /><br />You win! You win!! A film near and dear to my heart.
Anonymous says
Thanks! Just made one for my 13 yo daughter to wear for a dance recital. I used needle-felting to attach the blue "ribbon" (also felt) with the feather in place. She's tickled with the way it came out!