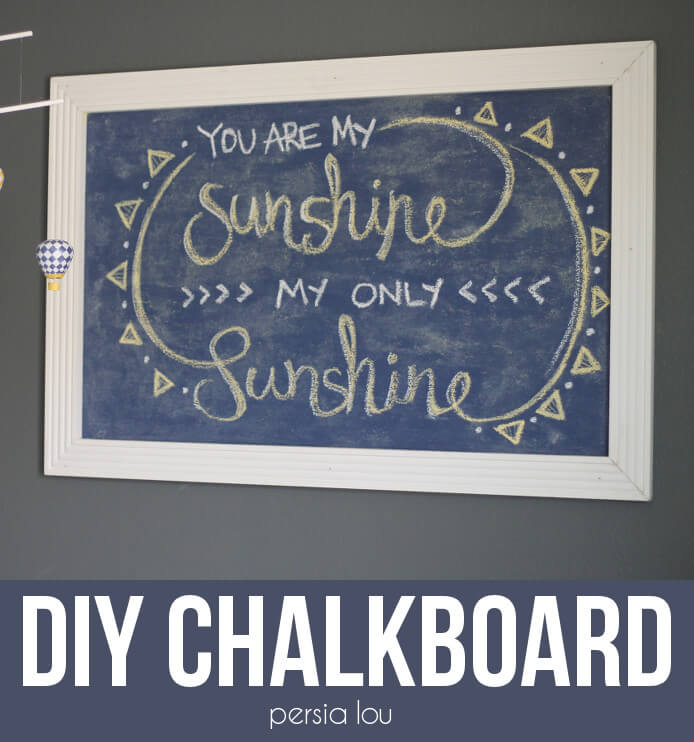
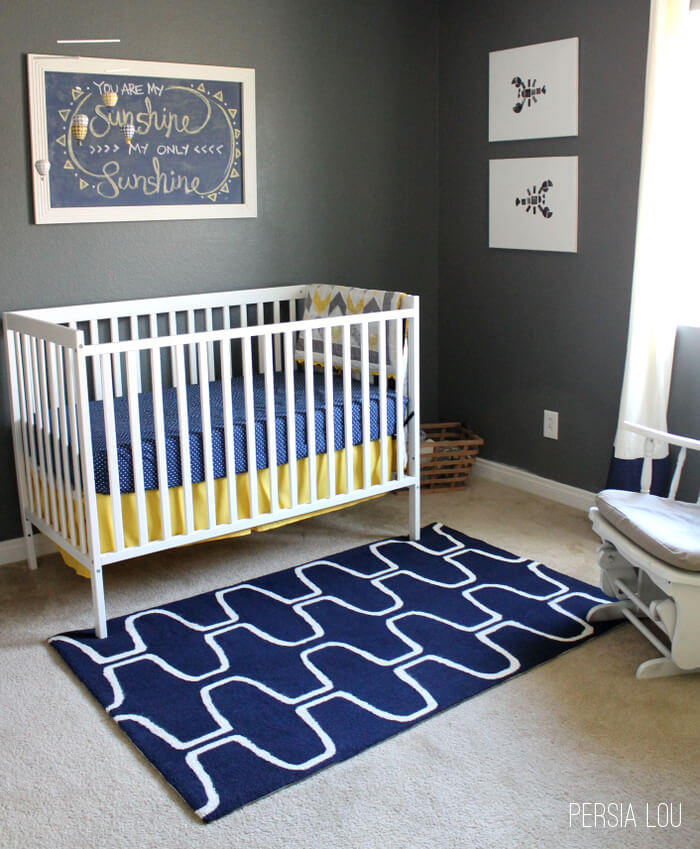
I made this DIY Chalkboard to go on the wall over my son’s crib in his nursery. I like the way it looks in the room, but I’m still calling it a semi-fail. More details on that to come.
Anyway – The really great thing about this chalkboard is how cheap it was and how easy it was to make! I used a leftover piece of drawer liner material (leftover from the ramp we built for my son’s Lego birthday party) as the back of the chalkboard, so that was free! For the chalkboard’s frame I bought about ten dollar worth of molding. And I made my own chalkboard paint using a paint sample (about three bucks) and some leftover grout from when we tiled our bathroom floors (free!) All in all, this custom chalkboard cost me thirteen dollars. Not too shabby.
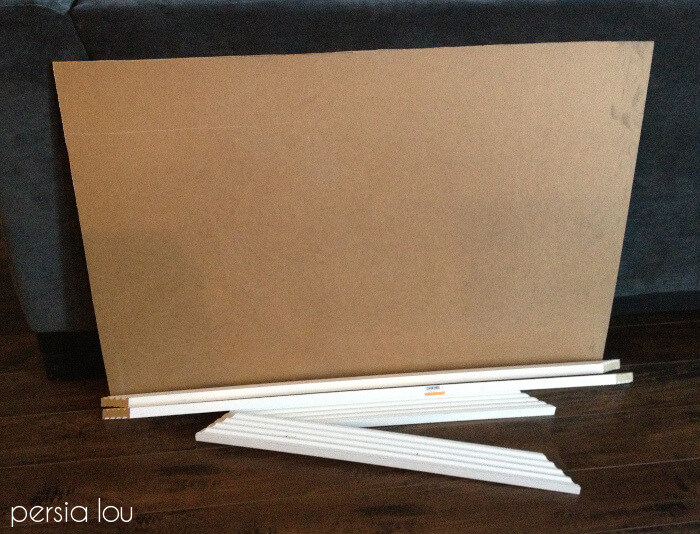
We started off by cutting the drawer liner into a 2’x3′ rectangle and cutting the molding to frame it out.
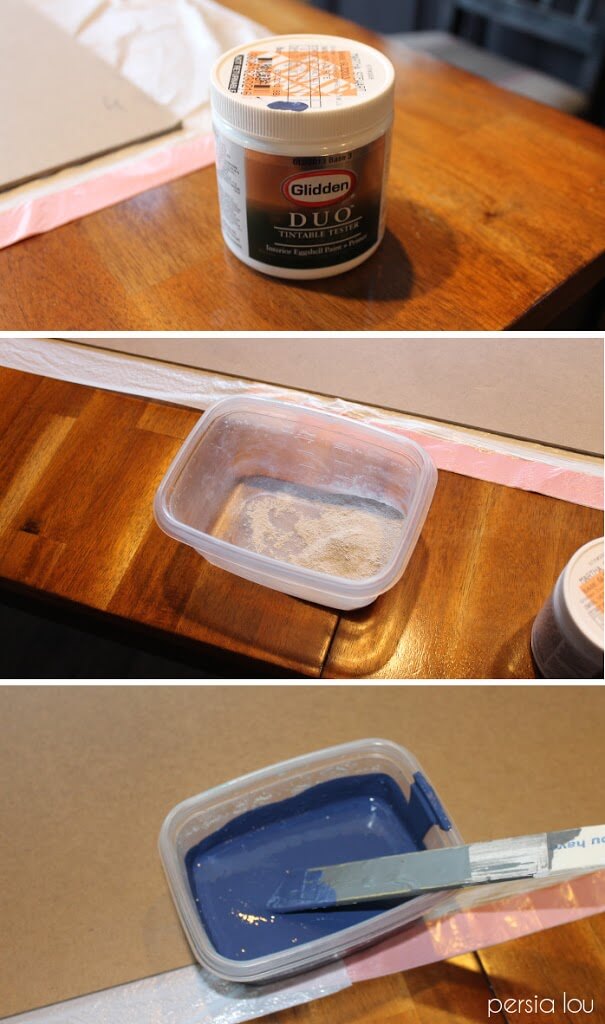
Then it was time to mix up the custom colored chalkboard paint. This is where the fail came in, friends. So, the recipe for DIY chalkboard paint it 1 cup of paint + 2 Tbsps unsanded grout. That’s it. Easy peasy, right? How could you mess that up, right?
Here’s how: you could use sanded grout. Yeah, that would do it. I knew that I needed unsanded grout, but for some reason I just assumed that was what we already had. The chalkboard paint still technically worked, but the chalkboard surface is not smooth or consistent at all. It’s really kind of a bummer.
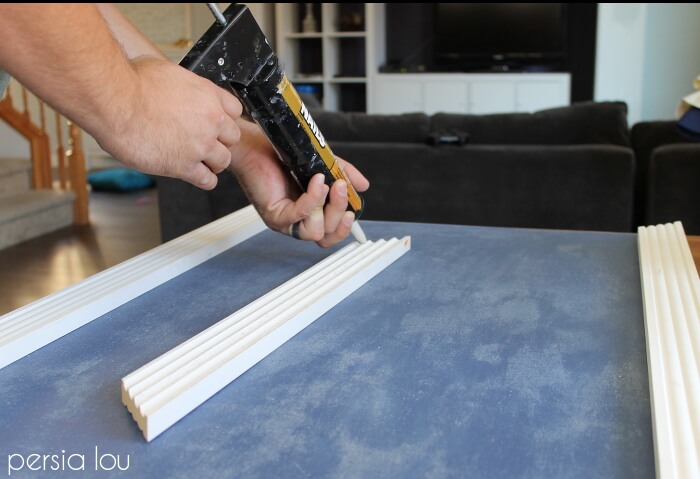
Once I had painted the backing and allowed it to dry, we attached the molding to the backing using liquid nails and then let that dry up for a while
(You can see the splotchiness of the board pretty well in that picture…) Finally, when the frame had completely dried, it was time to hang my semi-fail chalkboard up in the room.
Since the chalkboard was pretty heavy and it was going above my baby’s crib, we decided to just nail it straight through the frame into the studs. It’s not going anywhere.
So, who’s mixed up some DIY chalkboard paint? Anyone make the same rookie mistake? Anyone? … No?


Comments + Project Love
Nicole Anderson says
i tried several different recipes via pinterest and none of them worked…my paint was thick and chunky and just plain gross. I gave up after spending about fifty bucks and just bought ready to use chalkboard paint. Disney paint makes black and also a tintable version (so you can make it any color you want). works pretty great imho. overall, though, i think the chalkboard paint revolution is more
Amy W says
Well, you would certainly never look at the chalkboard pictures and think it was a fail! Looks so cute in his room, even if a little bumpy.
Cindy DIYbeautify says
I think it's precious and may actually copy it for the huge chalkboard in my living room 🙂 <br />You wanna hear about a really bad chalk paint fail? I had a quart of Annie Sloan that I wanted to make last…so I would mix it with my DIY cp. Well, one day I just wasn't thinking, and instead of adding it to the already made DIY cp, I added it before and then proceeded to add my POP. I
Crystelle Boutique says
Your son's room looks simply stunning… You are quite the frugal girl, it looks like. I must tell you that my first chalkpaint experience was similar to yours: I also used sanded grout. The armoire turned out gorgeous, but I know it's gritty and I also consider it a semi-fail…. Just like you!! The good news is: nobody else even notices….. 🙂 <br />hugs x, Crystelle<br /><a
ananda says
very cute! the sanded grout surface will just make it look more vintage! =)
Megan @ Homemade Ginger says
I think it turned out cute! I kind of like the splotchiness, I thought it was intentional!
Amy Lee Scott says
Oh, but it still turned out so great! I love the idea of framing the chalkboard to give it a little something special. I can't wait to make my own chalkboard paint!!
Amy @ Homey Oh My! says
I never would have thought there was anything wrong with this chalkboard, and even after you pointed out the splotchiness, I don't think it's anything at all! Especially since you were able to draw something beautiful on it still. Too adorable, and fits the room perfectly <3
kristi dominguez says
Fail or not…I think it looks fabulous, Alexis!
Krista thehappyhousie says
I have made my own but had to buy new grout anyhow so I used unsanded… It does really work well… And at least it isn't a chalkboard you plan to re-write on all the time! It still looks adorable!
Colleen says
Pretty good lookin' for a fail! Don't you just hate when you're on a roll and so confident that you forget to double check what you're doing? I just made some chalkboards but used premade chalkboard paint. I didn't have black paint anyways so the price difference wasn't much.