Looking for a fun and easy watercolor project with gorgeous results? In this post, I will show you, step-by-step how to paint watercolor agate slices! These beautiful little paintings are so much fun to make that I know you are going to love this project. Plus, as a little bonus, scroll all the way to the end to get free printable downloads of my paintings! I originally shared this project at Delineate your Dwelling, and this post contains affiliate links, which help to support this site at no extra cost to you.

I am really excited to share today’s post with you all! I love it, and I think you all will too. Let me tell you a little story:
Once upon a time, I was sitting at our dining room table playing around with watercolors, as I often do. I was trying to capture the look of malachite, and, honestly, kind of bombing. But, anyway, as I was messing around – painting wet on wet, wet on dry, sprinkling some salt – Aha! – it hit me. I needed to forget the malachite (for now anyway) and do an agate slice because it was obvious to me that watercolor = the BEST medium for painting agate slices.
The best, you say?
Yes, dangit, that’s what I said! The best! It is abso-tutely the very best for capturing the agate slice’s blending colors; their sparkly, crystalline texture; and slight translucence. You guys – it’s got to be watercolors. All the way.
So I went to work. After a bit of experimentation, I present to you, my e-besties, a simple method for creating your own pretty agate slice paintings. These are really pretty easy to make and a whole lot of fun. Let’s do it!
How to Paint Watercolor Agate Slices
The first step is to gather up your supplies! Here’s everything you will need to get painting.

DIY Watercolor Agate Slice Supplies:
- Watercolor paper (I prefer 140 lb)
- Painters or Masking tape
- Watercolors (tube or pan colors work)
- Paper towels
- Coarse salt
- Water
- Brushes – at least a large and small round (I used a size 8 and a size 0), a large mop brush is optional
Step One – Get Inspiration & Set Up
Start off by getting some inspiration via google image search OR look at some real agate slices if you have some laying around (lucky you!). Look at the slice’s areas of lights and darks and notice the texture. Where do the colors blend together and where are there more defined lines?
If you are using tube paints, mix up some color washes. Add more or less water to your pigment to create darker and lighter washes. Test your washes on a scrap piece of watercolor paper to see if you like them.
Step Two – Lay Down a Light Wash
Start your painting by using the large mop brush (or large round brush) to paint the slice’s shape on your paper with a light wash (add more water to create a lighter color).

Step Three – Paint Darker Shapes and Outlines
The trick to creating the pretty blended effect is to paint on a wet surface. You lay down the first wash and then paint on top of it quickly (while it is still wet). This allows the colors to blend naturally. To achieve this effect, load your large round brush with a dark wash and paint around the outside of the shape you have created.

It’s so fun to watch the color spread and blend. Load your brush with more of the darker wash and mark out an oval shape in the center.

Try adding a few dots of a complimentary shade. Look at your agate slice images for inspiration on where to place color.
Step Four – Add Texture with Salt
Sprinkle coarse salt on to the painting around the center oval shape (or anywhere you want to add that crystalline texture – reference your image or agate slice for inspiration).

Be sure to sprinkle the salt while the painting is still wet. The salt will absorb the color and leave little circles of lighter color creating the textured look we are going for.

Step Five – Final Details
Allow the painting to dry completely, and then wipe off the salt. Once the painting is completely dry, you can go back and add details using the small round brush and a very dark wash (only add a small amount of water to make a really dark wash).

Painting on the dry paper will give you a different effect than you got before when painting on the wet wash. Your strokes will not blend as they did before, so you can get more defined lines now. Trace the edge of the slice and consider adding details to the center.

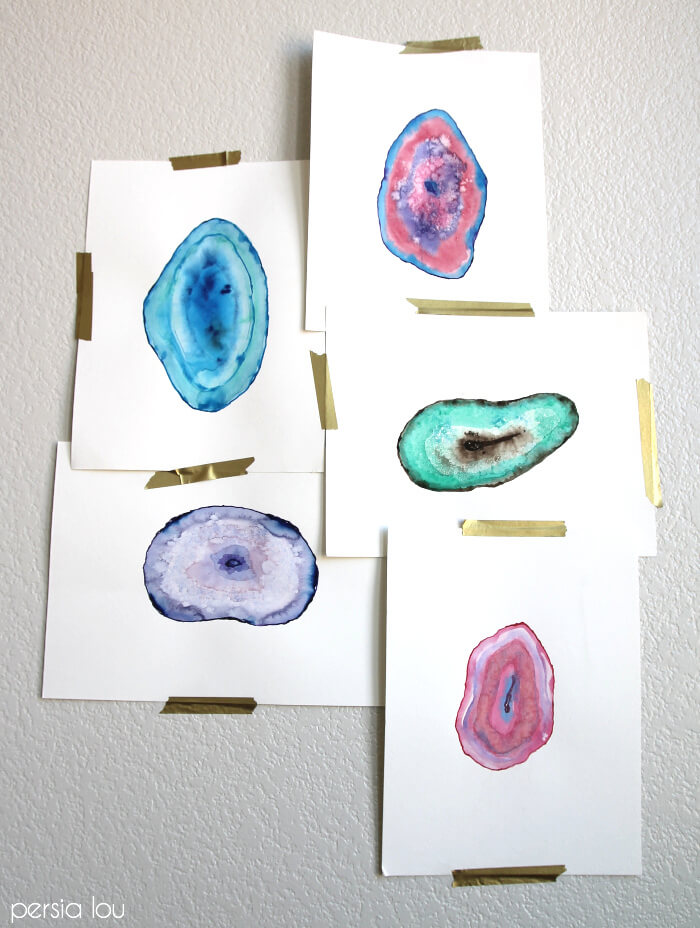
These were so much fun to make, I made a whole bunch! Try playing around with different color combinations, placing the salt in different places, or adding layers of washes after the first wash has dried.
I think the hardest part of watercolor is learning to let go of your need to control everything. The water will kind of flow and blend how it wants to. Try to relax and go with it.

The textures are just dreamy! I framed up a favorite and added it to my entry way, and I think it looks great there. I think these would also make a really pretty addition to a gallery wall.

And if you aren’t in the painting mood but still want some pretty agate slice art, good news! I’ve scanned my watercolors, and you can download them as free printables!

Yay! Just click on the link below to download the pdfs, print your favorite out on nice cardstock and frame it up. Instant wall art!
These printables may not be distributed or sold and are for personal use only. When you click the link below, you will download a zipped file containing all 6 PDF printables. You will have to unzip the folder in order to print the images.
That’s it for today, friends! If you paint your own watercolor agate slices, I want to see them! You can share to my facebook page or tag me on instagram. 🙂
Until next time, Happy Painting!

Looking for more creative inspiration? Check out these projects:


